Cloud Modernization Best Practices

Montag, 8 August, 2022

Cloud services have revolutionized the technical industry, and services and tools of all kinds have been created to help organizations migrate to the cloud and become more scalable in the process. This migration is often referred to as cloud modernization.

To successfully implement cloud modernization, you must adapt your existing processes for future feature releases. This could mean adjusting your continuous integration, continuous delivery (CI/CD) pipeline and its technical implementations, updating or redesigning your release approval process (eg from manual approvals to automated approvals), or making other changes to your software development lifecycle.

In this article, you’ll learn some best practices and tips for successfully modernizing your cloud deployments.

Best practices for cloud modernization

The following are a few best practices that you should consider when modernizing your cloud deployments.

Split your app into microservices where possible

Most existing applications deployed on-premises were developed and deployed with a monolithic architecture in mind. In this context, monolithic architecture means that the application is single-tiered and has no modularity. This makes it hard to bring new versions into a production environment because any change in the code can influence every part of the application. Often, this leads to a lot of additional and, at times, manual testing.

Monolithic applications often do not scale horizontally and can cause various problems, including complex development, tight coupling, slow application starts due to application size, and reduced reliability.

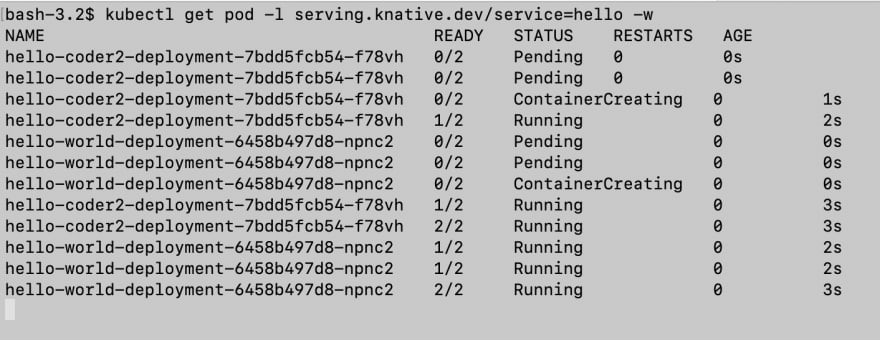
To address the challenges that a monolithic architecture presents, you should consider splitting your monolith into microservices. This means that your application is split into different, loosely coupled services that each serve a single purpose.

All of these services are independent solutions, but they are meant to work together to contribute to a larger system at scale. This increases reliability as one failing service does not take down the whole application with it. Also, you now get the freedom to scale each component of your application without affecting other components. On the development side, since each component is independent, you can split the development of your app among your team and work on multiple components parallelly to ensure faster delivery.

For example, the Lyft engineering team managed to quickly grow from a handful of different services to hundreds of services while keeping their developer productivity up. As part of this process, they included automated acceptance testing as part of their pipeline to production.

Isolate apps away from the underlying infrastructure

Engineers built scripts or pieces of code agnostic to the infrastructure they were deployed on in many older applications and workloads. This means they wrote scripts that referenced specific folders or required predefined libraries to be available in the environment in which the scripts were executed. Often, this was due to required configurations on the hardware infrastructure or the operating system or due to dependency on certain packages that were required by the application.

Most cloud providers refer to this as a shared responsibility model. In this model, the cloud provider or service provider takes responsibility for the parts of the services being used, and the service user takes responsibility for protecting and securing the data for any services or infrastructure they use. The interaction between the services or applications deployed on the infrastructure is well-defined through APIs or integration points. This means that the more you move away from managing and relying on the underlying infrastructure, the easier it becomes for you to replace it later. For instance, if required, you only need to adjust the APIs or integration points that connect your application to the underlying infrastructure.

To isolate your apps, you can containerize them, which bakes your application into a repeatable and reproducible container. To further separate your apps from the underlying infrastructure, you can move toward serverless-first development, which includes a serverless architecture. You will be required to re-architect your existing applications to be able to execute on AWS Lambda or Azure Functions or adopt other serverless technologies or services.

While going serverless is recommended in some cases, such as simple CRUD operations or applications with high scaling demands, it’s not a requirement for successful cloud modernization.

Pay attention to your app security

As you begin to incorporate cloud modernization, you’ll need to ensure that any deliverables you ship to your clients are secure and follow a shift-left process. This process lets you quickly provide feedback to your developers by incorporating security checks and guardrails early in your development lifecycle (eg running static code analysis directly after a commit to a feature branch). And to keep things secure at all times during the development cycle, it’s best to set up continuous runtime checks for your workloads. This will ensure that you actively catch future issues in your infrastructure and workloads.

Quickly delivering features, functionality, or bug fixes to customers gives you and your organization more responsibility in ensuring automated verifications in each stage of the software development lifecycle (SDLC). This means that in each stage of the delivery chain, you will need to ensure that the delivered application and customer experience are secure; otherwise, you could expose your organization to data breaches that can cause reputational risk.

Making your deliverables secure includes ensuring that any personally identifiable information is encrypted in transit and at rest. However, it also requires that you ensure your application does not have open security risks. This can be achieved by running static code analysis tools like SonarQube or Checkmarks.

In this blog post, you can read more about the importance of application security in your cloud modernization journey.

Use infrastructure as code and configuration as code

Infrastructure as code (IaC) is an important part of your cloud modernization journey. For instance, if you want to be able to provision infrastructure (ie required hardware, network and databases) in a repeatable way, using IaC will empower you to apply existing software development practices (such as pull requests and code reviews) to change the infrastructure. Using IaC also helps you to have immutable infrastructure that prevents accidentally introducing risk while making changes to existing infrastructure.

Configuration drift is a prominent issue with making ad hoc changes to an infrastructure. If you make any manual changes to your infrastructure and forget to update the configuration, you might end up with an infrastructure that doesn’t match its own configuration. Using IaC enforces that you make changes to the infrastructure only by updating the configuration code, which helps maintain consistency and a reliable record of changes.

All the major cloud providers have their own definition language for IaC, such as AWS CloudFormationGoogle Cloud Platform (GCP) and Microsoft Azure.

Ensuring that you can deploy and redeploy your application or workload in a repeatable manner will empower your teams further because you can deploy the infrastructure in additional regions or target markets without changing your application. If you don’t want to use any of the major cloud providers’ offerings to avoid vendor lock-in, other IaC alternatives include Terraform and Pulumi. These tools offer capabilities to deploy infrastructure into different cloud providers from a single codebase.

Another way of writing IaC is the AWS Cloud Development Kit (CDK), which has unique capabilities that make it a good choice for writing IaC while driving cultural change within your organization. For instance, AWS CDK lets you write automated unit tests for your IaC. From a cultural perspective, this allows developers to write IaC in their preferred programming language. This means that developers can be part of a DevOps team without needing to learn a new language. AWS CDK can also be used to quickly deploy and develop infrastructure on AWS, cdk8s for Kubernetes, and Cloud Development Kit for Terraform (CDKTF).

After adapting to IaC, it’s also recommended to deploy all your configurations as code (CAC). When you use CoC, you can put the same guardrails (ie pull requests) around configuration changes required for any code change in a production environment.

Pay attention to resource usage

It’s common for new entrants to the cloud to miss out on tracking their resource consumption while they’re in the process of migrating to the cloud. Some organizations start with too much (~20 percent) of additional resources, while some forget to set up restricted access to avoid overuse. This is why tracking the resource usage of your new cloud infrastructure from day one is very important.

There are a couple of things you can do about this. The first and a very high-level solution is to set budget alerts so that you’re notified when your resources start to cost more than they are supposed to in a fixed time period. The next step is to go a level down and set up cost consolidation of each resource being used in the cloud. This will help you understand which resource is responsible for the overuse of your budget.

The final and very effective solution is to track and audit the usage of all resources in your cloud. This will give you a direct answer as to why a certain resource overshot its expected budget and might even point you towards the root cause and probable solutions for the issue.

Culture and process recommendations for cloud modernization

How cloud modernization impacts your organization’s culture and processes often goes unnoticed. If you really want to implement cloud modernization, you need to change every engineer in your organization’s mindset drastically.

Modernize SDLC processes

Oftentimes, organizations with a more traditional, non-cloud delivery model follow a checklist-based approach for their SDLC. During your cloud modernization journey, existing SDLC processes will need to be enhanced to be able to cope with the faster delivery of new application versions to the production environment. Verifications that are manual today will need to be automated to ensure faster response times. In addition, client feedback needs to flow faster through the organization to be quickly incorporated into software deliverables. Different tools, such as SecureStack and SUSE Manager, can help automate and improve efficiency in your SDLC, as they take away the burden of manually managing rules and policies.

Drive cultural change toward blameless conversations

As your cloud journey continues to evolve and you need to deliver new features faster or quickly fix bugs as they arise, this higher change frequency and higher usage of applications will lead to more incidents and cause disruptions. To avoid attrition and arguments within the DevOps team, it’s important to create a culture of blameless communication. Blameless conversations are the foundation of a healthy DevOps culture.

One way you can do this is by running blameless post-mortems. A blameless post-mortem is usually set up after a negative experience within an organization. In the post-mortem, which is usually run as a meeting, everyone explains his or her view on what happened in a non-accusing, objective way. If you facilitate a blameless post-mortem, you need to emphasize that there is no intention of blaming or attacking anyone during the discussion.

Track key performance metrics

Google’s annual State of DevOps report uses four key metrics to measure DevOps performance: deploy frequency, lead time for changes, time to restore service, and change fail rate. While this article doesn’t focus specifically on DevOps, tracking these four metrics is also beneficial for your cloud modernization journey because it allows you to compare yourself with other industry leaders. Any improvement of key performance indicators (KPIs) will motivate your teams and ensure you reach your goals.

One of the key things you can measure is the duration of your modernization project. The project’s duration will directly impact the project’s cost, which is another important metric to pay attention to in your cloud modernization journey.

Ultimately, different companies will prioritize different KPIs depending on their goals. The most important thing is to pick metrics that are meaningful to you. For instance, a software-as-a-service (SaaS) business hosting a rapidly growing consumer website will need to track the time it takes to deliver a new feature (from commit to production). However, this metric isn’t meant for a traditional bank that only updates its software once a year.

You should review your chosen metrics regularly. Are they still in line with your current goals? If not, it’s time to adapt.

Conclusion

Migrating your company to the cloud requires changing the entirety of your applications or workloads. But it doesn’t stop there. In order to effectively implement cloud modernization, you need to adjust your existing operations, software delivery process, and organizational culture.

In this roundup, you learned about some best practices that can help you in your cloud modernization journey. By isolating your applications from the underlying infrastructure, you gain flexibility and the ability to shift your workloads easily between different cloud providers. You also learned how implementing a modern SDLC process can help your organization protect your customer’s data and avoid reputational loss by security breaches.

SUSE supports enterprises of all sizes on their cloud modernization journey through their Premium Technical Advisory Services. If you’re looking to restructure your existing solutions and accelerate your business, SUSE’s cloud native transformation approach can help you avoid common pitfalls and accelerate your business transformation.

Learn more in the SUSE & Rancher Community. We offer free classes on Kubernetes, Rancher, and more to support you on your cloud native learning path.

Persistent, Distributed Kubernetes Storage with Longhorn

Montag, 1 August, 2022

Kubernetes is an open source container orchestration system that enables applications to run on a cluster of hosts. It’s a critical part of cloud native architecture because it can work on public or private clouds and on-premises environments. With an orchestration layer on top of traditional infrastructure, Kubernetes allows the automated deployment, scaling, and management of containerized applications.

Applications deployed on Kubernetes run on containers and pods. A container represents a packaged runtime environment for an application, with all dependencies included. A pod encapsulates one or more containers with all the services required by the applications running in those containers. A service provides container networking, load balancing, scaling, scheduling, and security.

Kubernetes ensures the application’s availability by bringing up new instances of pods in various cluster nodes when existing pods and containers go down or crash. This scheduling is also used for load balancing. While this provides seamless scaling and high availability, the pods must be stateless to achieve this. However, it’s unrealistic for all applications to run statelessly, so you need a persistent storage mechanism.

You could implement persistent storage using external services, such as Amazon Simple Storage Service (Amazon S3). However, this means you need an account with a third-party provider, such as Amazon Web Services (AWS). Third-party storage solutions lack the flexibility that an open storage model built on Kubernetes can provide. They also come with issues related to vendor lock-in and additional costs.

A more flexible solution would be to use Longhorn, a reliable cloud native storage system installed on Kubernetes that can run anywhere. In this article, you’ll learn about Longhorn and see how you can use it for Kubernetes persistent storage.

Understanding Longhorn

Longhorn is a cloud native distributed block storage for Kubernetes. Developed and open sourced by Rancher, and now part of SUSE, Longhorn is currently an incubating project from the Cloud Native Computing Foundation (CNCF). It integrates with the Kubernetes persistent volume API and provides a way to use persistent storage without relying on a storage provider.

Longhorn’s architecture is microservices-based, comprising two layers — the Longhorn Manager and the Longhorn Engine. The Longhorn Manager is responsible for creating Longhorn Engines by integrating with the Kubernetes APIs. The Longhorn Engine acts as a storage controller and is required to manage only one volume. The cluster holds the storage controller and replica within itself.

To understand how Longhorn integrates with Kubernetes, you need to understand how Kubernetes handles storage. Although pods can directly reference storage, it’s not advised because local disk files in a container are short-lived and deleted when the container goes down. Instead, Kubernetes handles storage requirements through volumes that can be temporary or persistent.

Kubernetes facilitates persistent volumes through its StorageClass objects. It supports cloud storage services, such as Amazon Elastic Block Store (Amazon EBS) or Azure Disk Storage, and open source alternatives, such as GlusterFS. Kubernetes also exposes the Container Storage Interface (CSI) to allow third-party providers to implement storage plug-ins.

Kubernetes abstracts storage requests from users through PersistentVolumeClaims (PVC). Under the hood, it manages Longhorn as a CSI plug-in, which integrates with the PersistentVolume (PV) and PVC. Longhorn lets you specify the volume size and the number of replicas to maintain. Resources running on Kubernetes can use PVC claims to use existing PVs or dynamically create PVs.

Perfect persistent storage for Kubernetes

Longhorn is a perfect solution to Kubernetes persistent storage when you want the following:

  • A distributed storage system that runs well with your cloud native application (without relying on external providers).
  • A storage solution that is tightly coupled with Kubernetes.
  • Storage that is highly available and durable.
  • A storage system without specialized hardware and not external to the cluster.
  • A storage system that is easy to install and manage.

Consider the following features that Longhorn offers:

High availability

Longhorn’s lightweight, microservice-based architecture makes it highly available. As a result, Longhorn’s storage engine needs to manage only one volume. This architecture simplifies the storage controller design so that only the volume served by that engine is affected in a crash. Longhorn Engine is also lightweight enough to support thousands of volumes.

It keeps multiple replicas of each volume in the same Kubernetes cluster in different nodes. It automatically rebuilds replicas if the number drops below a predefined limit.

Since each volume and replica have a controller, upgrading a volume’s controller won’t affect its availability. It can execute long-running jobs to upgrade all the live controllers without disrupting the system.

Durability

Longhorn comes with incremental snapshot and backup features. Engineers can schedule automatic snapshots and backup jobs through the UI or ‘kubectl’ commands. It’s possible to execute these jobs even when a volume is detached. It’s also possible to configure the system to prevent existing data from being overwritten by new data by using the concept of snapshots.

Ease of use

Longhorn comes with an intuitive dashboard. It provides information about the volumes’ status, available storage space, and node status. The UI also enables engineers to configure nodes, create backup jobs, or change other operational settings. This is not to say that these configurations are only possible through the UI. The standard way of doing it through ‘kubectl’ commands is also possible.

Ease of deployment

Deploying Longhorn is easy. If you use the Rancher marketplace, you can do it with a single click. Even from the command line, it’s just a matter of running a few commands. This simplicity is possible because Longhorn is a CSI plug-in.

Built-in disaster recovery

A storage service’s usefulness largely depends on its self-healing and disaster recovery (DR) capabilities. Engineers can create a DR volume in another Kubernetes cluster for each Longhorn volume and failover when problems arise. When setting up these DR volumes, it’s also possible to explicitly define recovery time and point objectives.

Security

Longhorn can encrypt data at rest and in transit. It uses the Linux kernel’s dm-crypt subsystem methods to encrypt volumes. Kubernetes Secrets stores the saved encryption keys. Once a volume is encrypted, all volume backups are also encrypted by default.

Other benefits

Unlike cloud service storage or external storage arrays, Longhorn is portable between clusters. Also, since it is open sourced, the cost of the product is minimal and the only cost incurred has to do with infrastructure.

Getting started with Longhorn

Before installing Longhorn, ensure you meet the following prerequisites:

  • The cluster must be running Kubernetes v1.18 or above.
  • All cluster nodes must have open-iscsi installed and configured (open-iscsi enables mass storage over IP networks and is required to create PVs).
  • All cluster nodes must have an NFS v4 client installed.
  • The host filesystem must be ext4.
  • The system must have the necessary Linux libraries available (curlfindmntgrepawkblkid and lsblk).
  • The mount propagation should be enabled in Kubernetes (this is a Kubernetes setting that allows containers to share volumes).

Install Longhorn

The easiest way to set up Longhorn is through the Rancher Apps & Marketplace via the command line with the kubectl utility or by using Helm.

Rancher is a container management platform for Kubernetes. It helps you deliver Kubernetes as a service by managing multiple Kubernetes clusters from a single point. It also allows you to monitor the health of Kubernetes clusters from its UI. Rancher applies a unified role-based access control (RBAC) model across all the clusters and helps deploy applications through its marketplace.

If you don’t already have Rancher installed for your Kubernetes cluster, you can follow these instructions to install and configure it.

To install Longhorn using Rancher, find the cluster where you plan to install Longhorn:

Rancher Dashboard

Navigate to the Apps & Marketplace page and find Longhorn by searching for it:

Rancher Marketplace

Click Install and move to the next screen:

Longhorn installation

Now, select the project you want to install Longhorn to. If you don’t intend to install it on a specific project, you can leave the drop-down list empty and click Next:

Longhorn installation step 1

Access the UI

If all prerequisites are met, your installation should be complete. The next step is to look at the Longhorn UI and familiarize it. For this, you can click on the Longhorn app icon:

Longhorn app icon

You can now view the UI and play around with the options:

Longhorn dashboard

Create volumes

Longhorn UI provides a quick way to create volumes. Click on the Volume tab to list the existing volumes and create a new one:

Longhorn volume listing

Click the Create Volume button in the upper right-hand corner to create a volume. Provide a name and set the number of replicas. You can leave the rest of the options to their default values:

Creating a Longhorn volume

Select OK to go back to the volume list. You should now see the volume you created. Next, you need to attach it to a host. Click on the drop-down arrow that appears on the right side of the listed volume:

Attaching a Longhorn volume

If a valid Kubernetes host exists, it will be listed in the drop-down:

Manually attaching a Longhorn volume

Once attached, the volume should be listed as Healthy:

Longhorn volume in **Healthy** status

You can change any volume parameters from the drop-down list. You can also update the replica count, upgrade the engine, detach the volume and even delete it.

Conclusion

This article taught you about Longhorn, a distributed Cloud Native Storage for Kubernetes clusters and Rancher Prime. Longhorn can help stateful applications save data in a continuous, highly available, and scalable storage. It also comes with an easy-to-use UI. You also learned how to easily install Longhorn with the Rancher app and marketplace.

In combination with Rancher, SUSE provides open source solutions for managing Kubernetes clusters, including Longhorn. Rancher allows you to manage multiple clusters and deploy applications, like Longhorn, with a single click and monitor them.

To learn more about Longhorn, you can check out the official docs.

Managing Your Hyperconverged Network with Harvester

Freitag, 22 Juli, 2022

Hyperconverged infrastructure (HCI) is a data center architecture that uses software to provide a scalable, efficient, cost-effective way to deploy and manage resources. HCI virtualizes and combines storage, computing, and networking into a single system that can be easily scaled up or down as required.

A hyperconverged network, a networking architecture component of the HCI stack, helps simplify network management for your IT infrastructure and reduce costs by virtualizing your network. Network virtualization is the most complicated among the storage, compute and network components because you need to virtualize the physical controllers and switches while dividing the network isolation and bandwidth required by the storage and compute. HCI allows organizations to simplify their IT infrastructure via a single control pane while reducing costs and setup time.

This article will dive deeper into HCI with a new tool from SUSE called Harvester. By using Kubernetes‘ Container Network Interface (CNI) mechanisms, Harvester enables you to better manage the network in an HCI. You’ll learn the key features of Harvester and how to use it with your infrastructure.

Why you should use Harvester

The data center market offers plenty of proprietary virtualization platforms, but generally, they aren’t open source and enterprise-grade. Harvester fills that gap. The HCI solution built on Kubernetes has garnered about 2,200 GitHub stars as of this article.

In addition to traditional virtual machines (VMs), Harvester supports containerized environments, bridging the gap between legacy and cloud native IT. Harvester allows enterprises to replicate HCI instances across remote locations while managing these resources through a single pane.

Following are several reasons why Harvester could be ideal for your organization.

Open source solution

Most HCI solutions are proprietary, requiring complicated licenses, high fees and support plans to implement across your data centers. Harvester is a free, open source solution with no license fees or vendor lock-in, and it supports environments ranging from core to edge infrastructure. You can also submit a feature request or issue on the GitHub repository. Engineers check the recommendations, unlike other proprietary software that updates too slowly for market demands and only offers support for existing versions.

There is an active community that helps you adopt Harvester and offers to troubleshoot. If needed, you can buy a support plan to receive round-the-clock assistance from support engineers at SUSE.

Rancher integration

Rancher is an open source platform from SUSE that allows organizations to run containers in clusters while simplifying operations and providing security features. Harvester and Rancher, developed by the same engineering team, work together to manage VMs and Kubernetes clusters across environments in a single pane.

Importing an existing Harvester installation is as easy as clicking a few buttons on the Rancher virtualization management page. The tight integration enables you to use authentication and role-based access control for multitenancy support across Rancher and Harvester.

This integration also allows for multicluster management and load balancing of persistent storage resources in both VM and container environments. You can deploy workloads to existing VMs and containers on edge environments to take advantage of edge processing and data analytics.

Lightweight architecture

Harvester was built with the ethos and design principles of the Cloud Native Computing Foundation (CNCF), so it’s lightweight with a small footprint. Despite that, it’s powerful enough to orchestrate VMs and support edge and core use cases.

The three main components of Harvester are:

  • Kubernetes: Used as the Harvester base to produce an enterprise-grade HCI.
  • Longhorn: Provides distributed block storage for your HCI needs.
  • KubeVirt: Provides a VM management kit on top of Kubernetes for your virtualization needs.

The best part is that you don’t need experience in these technologies to use Harvester.

What Harvester offers

As an HCI solution, Harvester is powerful and easy to use, with a web-based dashboard for managing your infrastructure. It offers a comprehensive set of features, including the following:

VM lifecycle management

If you’re creating Windows or Linux VMs on the host, Harvester supports cloud-init, which allows you to assign a startup script to a VM instance that runs when the VM boots up.

The custom cloud-init startup scripts can contain custom user data or network configuration and are inserted into a VM instance using a temporary disc. Using the QEMU guest agent means you can dynamically inject SSH keys through the dashboard to your VM via cloud-init.

Destroying and creating a VM is a click away with a clearly defined UI.

VM live migration support

VMs inside Harvester are created on hosts or bare-metal infrastructure. One of the essential tasks in any infrastructure is reducing downtime and increasing availability. Harvester offers a high-availability solution with VM live migration.

If you want to move your VM to Host 1 while maintaining Host 2, you only need to click migrate. After the migration, your memory pages and disc block are transferred to the new host.

Supported VM backup and restore

Backing up a VM allows you to restore it to a previous state if something goes wrong. This backup is crucial if you’re running a business or other critical application on the machine; otherwise, you could lose data or necessary workflow time if the machine goes down.

Harvester allows you to easily back up your machines in Amazon Simple Storage Service (Amazon S3) or network-attached storage (NAS) devices. After configuring your backup target, click Take Backup on the virtual machine page. You can use the backup to replace or restore a failed VM or create a new machine on a different cluster.

Network interface controllers

Harvester offers a CNI plug-in to connect network providers and configuration management networks. There are two network interface controllers available, and you can choose either or both, depending on your needs.

Management network

This is the default networking method for a VM, using the eth0 interface. The network configures using Canal CNI plug-ins. A VM using this network changes IP after a reboot while only allowing access within the cluster nodes because there’s no DHCP server.

Secondary network

The secondary network controller uses the Multus and bridge CNI plug-ins to implement its customized Layer 2 bridge VLAN. VMs are connected to the host network via a Linux bridge and are assigned IPv4 addresses.

IPv4 addresses‘ VMs are accessed from internal and external networks using the physical switch.

When to use Harvester

There are multiple use cases for Harvester. The following are some examples:

Host management

Harvester dashboards support viewing infrastructure nodes from the host page. Kubernetes has HCI built-in, which makes live migrations, like Features, possible. And Kubernetes provides fault tolerance to keep your workloads in other nodes running if one node goes down.

VM management

Harvester offers flexible VM management, with the ability to create Windows or Linux VMs easily and quickly. You can mount volumes to your VM if needed and switch between the administration and a secondary network, according to your strategy.

As noted above, live migration, backups, and cloud-init help manage VM infrastructure.

Monitoring

Harvester has built-in monitoring integration with Prometheus and Grafana, which installs automatically during setup. You can observe CPU, memory, storage metrics, and more detailed metrics, such as CPU utilization, load average, network I/O, and traffic. The metrics included are host level and specific VM level.

These stats help ensure your cluster is healthy and provide valuable details when troubleshooting your hosts or machines. You can also pop out the Grafana dashboard for more detailed metrics.

Conclusion

Harvester is the HCI solution you need to manage and improve your hyperconverged infrastructure. The open source tool provides storage, network and computes in a single pane that’s scalable, reliable, and easy to use.

Harvester is the latest innovation brought to you by SUSE. This open source leader provides enterprise Linux solutions, such as Rancher and K3s, designed to help organizations more easily achieve digital transformation.

Get started

For more on Harvester or to get started, check the official documentation.

Gorilla Guide: So managen Sie Kubernetes in Multi-Cloud-Umgebungen

Dienstag, 12 Juli, 2022

Ein Multi-Cloud-Betrieb von Kubernetes eröffnet Unternehmen ganz neue Möglichkeiten: Im Idealfall lassen sich damit digitale Services flexibler, wirtschaftlicher und effizienter bereitstellen. Wie Unternehmen dieses Potential nutzen können – und typische Herausforderungen beim Management von verteilten Clustern in den Griff bekommen, zeigt der neue Gorilla Guide „Multi-Cloud Kubernetes with Rancher“.

Das Container-Orchestrierungssystem Kubernetes hat die Art und Weise, wie Services heute bereitgestellt werden, grundlegend verändert. Um maximalen Nutzen aus der Kubernetes-Technologie zu ziehen, setzen mittlerweile immer mehr Organisationen auf eine Multi-Cloud-Strategie.

Mit der Bereitstellung von Kubernetes in der Public Cloud profitieren Unternehmen zum einen von einer flexiblen Infrastruktur, die schnell nach oben und unten skaliert werden kann. So vermeiden sie Investitionen in eigene Infrastruktur und zahlen nur für die tatsächlich benötigten IT-Ressourcen.

Zum anderen bieten viele Cloud-Anbieter zusätzliche Managed Services rund um Kubernetes an, die den Aufwand für die Verwaltung der Umgebung zusätzlich reduzieren. Integrierte Lösungen für die Identitäts- und Zugriffsverwaltung lassen sich beispielsweise nutzen, um den Prozess der Authentifizierung und Autorisierung zu vereinfachen. Auch Services für Lifecycle Management, Protokollierung und Sicherheitsscans innerhalb einer CI/CD-Pipeline entlasten Betriebsteams beim Einsatz von Kubernetes.

Die plattformunabhängige Containerarchitektur erleichtert dabei den Wechsel zwischen unterschiedlichen Umgebungen. Grundsätzlich können Unternehmen ihre Workloads immer dort ausführen, wo es für sie am günstigsten und effizientesten ist. Allerdings hat diese Art von Flexibilität auch mögliche Nachteile:

  • Wachsende Komplexität: Wenn Workloads auf unterschiedlichen Clustern in der Cloud, on-premises und im Edge-Bereich ausgeführt werden, kann die Verwaltung sehr aufwändig werden.
  • Sinkende Effizienz: In Multi-Cloud-Umgebungen besteht zudem die Gefahr, dass Unternehmen den Überblick über die verschiedenen Plattformen verlieren und die verfügbaren Ressourcen nicht optimal ausgelastet werden.
  • Steigende Kosten: Höherer operativer Aufwand und die Verschwendung von Ressourcen treiben letztlich die Kosten in die Höhe und verschlechtern dadurch die Wirtschaftlichkeit der Strategie.

Der neue Gorilla Guide „Multi-Cloud Kubernetes with Rancher“ beleuchtet ausführlich, wie Unternehmen die Herausforderungen beim Betrieb von Kubernetes in unterschiedlichen Cloud-Umgebungen in den Griff bekommen können. Das E-Book gibt zunächst einen einfach verständlichen Überblick über die Grundlagen von Kubernetes, Containern und Cloud Computing und geht dann auf die Vorteile von Hybrid- und Multi-Cloud-Ansätzen ein. Die Möglichkeiten der drei größten Managed Kubernetes-Dienste in der Public Cloud – AWS Elastic Kubernetes Service (EKS), Azure Kubernetes Service (AKS), Google Kubernetes Engine (GKE) – werden kompakt beschrieben.

Anschließend gibt der Gorilla Guide Tipps zum Aufbau einer Multi-Cloud-Kubernetes-Strategie und zeigt, welche Faktoren dabei zu berücksichtigen sind. Schließlich wird aufgezeigt,wie sich die Anforderungen mit der Container-Management-Plattform  erfüllen lassen.

Den kompletten Gorilla Guide „Multi-Cloud Kubernetes with Rancher“ können Sie hier herunterladen.

What is GitOps?

Montag, 30 Mai, 2022

If you are new to the term ‘GitOps,’ it can be quite challenging to imagine how the two models, Git and Ops, come together to function as a single framework. Git is a source code management tool introduced in 2005 that has become the go-to standard for many software development teams. On the other hand, Ops is a term typically used to describe the functions and practices that fall under the purview of IT operations teams and the more modern DevOps philosophies and methods. GitOps is a paradigm that Alexis Richardson from the Weaveworks team coined to describe the deployment of immutable infrastructure with Git as the single source of truth.

In this article, I will cover GitOps as a deployment pattern and its components, benefits and challenges.

What is GitOps?

GitOps requires you to describe and observe systems with declarative configurations that will form the basis of continuous integration, delivery and deployment of your infrastructure. The desired state of the infrastructure or application is stored as code, then associated platforms like Kubernetes (K8s) reconcile the differences and update the infrastructure or application state. Kubernetes is the choice ecosystem for GitOps providers and practitioners because of this declarative requirement. FleetFluxCDArgoCD and Jenkins X are examples of GitOps tools or operators.

Infrastructure as Code

GitOps builds on DevOps practices surrounding version control, code review collaboration and CI/CD. These practices extend to the automation of infrastructure and application deployments, defined using Infrastructure as Code (IaC) techniques. The main idea behind IaC is to enable writing and executing code to define, deploy, update and destroy infrastructure. IaC presents a different way of thinking and treating all aspects of operations as software, even those that represent hardware.

There are five broad categories of tools used to configure and orchestrate infrastructure and application stacks:

  • Ad hoc scripts: The most straightforward approach to automating anything is to write an ad hoc script. Take any manual task and break it down into discrete steps. Use scripting languages like Bash, Ruby and Python to define each step in code and execute that script on your server.
  • Configuration management tools: Chef, Puppet, Ansible, and SaltStack are all configuration management tools designed to install and configure software on existing servers that perpetually exist.
  • Server templating tools: An alternative to configuration management that’s growing in popularity is server templating tools such as DockerPacker and Vagrant. Instead of launching and then configuring servers, the idea behind server templating is to create an image of a server that captures a fully self-contained “snapshot” of the operating system (OS), the software, the files and all other relevant dependencies.
  • Orchestration toolsKubernetes is an example of an orchestration tool. Kubernetes allows you to define how to manage containers as code. You first deploy the Kubernetes cluster, a group of servers that Kubernetes will manage and use to run your Docker containers. Most major cloud providers have native support for deploying managed Kubernetes clusters, such as Amazon Elastic Container Service for Kubernetes (Amazon EKS), Google Kubernetes Engine (GKE), and Azure Kubernetes Service (AKS).
  • IaC Provisioning tools: Whereas configuration management, server templating, and orchestration tools define the code that runs on each server or container, IaC provisioning tools such as TerraformAWS CloudFormation and OpenStack Heat define infrastructure configuration across public clouds and data centers. You use such tools to create servers, databases, caches, load balancers, queues, monitoring, subnet configurations, firewall settings, routing rules and Secure Sockets Layer (SSL) certificates.

Of the IaC tools listed above, Kubernetes is most associated with GitOps due to its declarative piece of infrastructure.

Immutable Infrastructure

The term immutable infrastructure, also commonly known as immutable architecture, is a bit misleading. The concept does not mean that infrastructure never changes, but rather, once something is instantiated, it should never change. Instead, it should be replaced by another instance to ensure predictable behavior. Following this approach enables discrete versioning in an architecture. With discrete versioning, there is less risk and complexity because the infrastructure states are tested and have a greater degree of predictability. This is one of the main goals an immutable architecture tries to accomplish.

The GitOps model supports immutable architectures because all the infrastructure is declared as source code in a versioning system. In the context of Kubernetes, this approach allows software teams to produce more reliable cluster configurations that can be tested and versioned from a single source of truth in a Git repository.

Immutable vs. Mutable Architecture

The Declarative Deployment Model

Regarding automating deployments, there are two main DevOps approaches to consider: declarative and imperative. In an imperative (or procedural approach), a team is responsible for defining the main goal in a step-by-step process. These steps include instructions such as software installation, configuration, creation, etc. These steps will then be executed in an automated way. The state of the environment will result from the operations defined by the responsible DevOps team. This paradigm may work well with small workloads but doesn’t scale well and may introduce several failures with large software environments.

In contrast, a declarative approach eliminates the need to define steps for the desired outcome. Instead, the final desired state is what is declared or defined. The relevant team will specify the number of Pods deployed for an application, how the Pods will be deployed, how they will scale, etc. The steps to achieve these goals don’t have to be defined. With the declarative approach, a lot of time is saved, and the complex steps are abstracted away. The focus shifts from the ‚how‘ to the ‚what.‘

Most cloud infrastructures that existed before Kubernetes was released provided a procedural approach for automating deployment activities. Examples of these include scripting languages such as Ansible, Chef, and Puppet. Kubernetes, on the other hand, uses a declarative approach to describe what the desired state of the system should be. GitOps and K8s fit naturally. Common Git operations control the deployment of declarative Kubernetes manifest files.

GitOps CI/CD Sequence Example

Below is a high-level sequence demonstrating what a GitOps CI/CD workflow would look like when deploying a containerized application to a Kubernetes environment. The diagrams below are a representation of this:

Pull Request & Code Review

A CI/CD pipeline typically begins with a software developer creating a pull request, which will then be peer-reviewed to ensure it meets the agreed-upon standards. This collaborative effort is used to maintain good coding practices by the team and act as a first quality gate for the desired infrastructure deployment.

Build, Test and Push Docker Container Images

The Continuous Integration (CI) stage will automatically be triggered if the pipeline is configured to initiate based on the source changes. This usually requires setting the pipeline to poll for any source changes in the relevant branch of the repository. Once the source has been pulled, the sequence will proceed as follows:

  • Build Image for Application Tests: In this step, the relevant commands will be run to build and tag the Docker image. The image built in this step will be based on a Dockerfile with an execution command to run unit tests.

  • Build Production Image: Assuming the application unit tests passed, the final Docker image can be built and tagged with the new version using the production-grade Dockerfile with an execution command to start the application.

  • Push Production Container Image to Registry: Lastly, the Docker image will be pushed to the relevant Docker registry (i.e., Docker Hub) for Kubernetes to orchestrate the eventual deployment of the application.

Clone Config Repository, Update Manifests and Push To Config Repository

Once the image has been successfully built and pushed to the appropriate registry, the application manifest files must be updated with the new Docker image tag.

  • Clone Config Repository: In this step, the repository with the K8s resource definitions will be cloned. This will usually be a repository with Helm charts for the application resources and configurations.

  • Update Manifests: Once the repository has been cloned, a configuration management tool like Kustomize can update the manifests with the new Docker image tag.

  • Push to Config Repository: Lastly, these changes can be committed and pushed to the remote config repository with the new updates.

GitOps Continuous Delivery Process

The Continuous Delivery (CD) process follows when the CI completes the config repository updates. As stated earlier, the GitOps framework and its stages are triggered by changes to the manifests in the Git repository. This is where the aforementioned GitOps tools come in. In this case, I will use Fleet as an example.

Fleet is essentially a set of K8s custom resource definitions (CRDs) and custom controllers that manage GitOps for a single or multiple Kubernetes clusters. Fleet consists of the following core components in its architecture:

  • Fleet Manager: This is the central component that governs the deployments of K8s resources from the Git repository. When deploying resources to multiple clusters, this component will reside on a dedicated K8s cluster. In a single cluster setup, the Fleet manager will run on the same cluster being managed by GitOps.
  • Fleet Controller: The Fleet controllers run on the Fleet manager that performs the GitOps actions.
  • Fleet Agent: Each downstream cluster being managed by Fleet runs an agent that communicates with the Fleet manager.
  • GitRepo: Git repositories being watched by Fleet are represented by the type GitRepo.
  • Bundle: When the relevant Git repository is pulled, the sourced configuration files produce a unit referred to as a Bundle. Bundles are the deployment units used in Fleet.
  • Bundle Deployment: A BundleDeployment represents the state of the deployed Bundle on a cluster with its specific customizations.

  • Scan Config Repository: Based on polling configurations, Fleet detects the changes in the config repository before performing a Git pull (or scan) to fetch the latest manifests.

  • Discover Manifests: Fleet determines any differences between the manifests in the Kubernetes cluster versus the latest manifests in the repository. The discovered manifests or Helm charts will be used to produce a Bundle.

  • Helm Release: When the Fleet operator detects the differences, it will convert the new manifests into Helm charts (regardless of the source) and perform a Helm release to the downstream clusters.

The Benefits of GitOps

Infrastructure as Code

Infrastructure as Code is one of the main components of GitOps. Using IaC to automate the process of creating infrastructure in cloud environments has the following advantages:

  • Reliable outcomes: When the correct process of creating infrastructure is saved in the form of code, software teams can have a reliable outcome whenever the same version of code is run.

  • Repeatable outcomes: Manually creating infrastructure is time-consuming, inefficient, and prone to human error. Using IaC enables a reliable outcome and makes the process of deploying infrastructure easily repeatable across environments.

  • Infrastructure Documentation: By defining the resources to be created using IaC, the code is a form of documentation for the environment’s infrastructure.

Code Reviews

The quality gate that code reviews bring to software teams can be translated to DevOps practices with infrastructure. For instance, changes to a Kubernetes cluster through the use of manifests or Helm charts would go through a review and approval process to meet certain criteria before deployment.

Declarative Paradigm

The declarative approach to programming in GitOps simplifies the process of creating the desired state for infrastructure. It produces a more predictable and reliable outcome in contrast to defining each step of the desired state procedurally.

Better Observability

Observability is an important element when describing the running state of a system and triggering alerts and notifications whenever unexpected behavioral changes occur. On this basis, any deployed environment should be observed by DevOps engineers. With GitOps, engineers can more easily verify if the running state matches that of the desired state in the source code repository.

The Challenges with GitOps

Collaboration Requirements

Following a GitOps pattern requires a culture shift within teams. In the case of individuals who are used to making quick manual changes on an ad hoc basis, this transition will be disruptive. In practice, teams should not be able to log in to a Kubernetes cluster to modify resource definitions to initiate a change in the cluster state. Instead, desired changes to the cluster should get pushed to the appropriate source code repository. These changes to the infrastructure go through a collaborative approval process before being merged. Once merged, the changes are deployed. This workflow sequence introduces a “change by committee” to any infrastructure changes, which is more time-consuming for teams, even if it’s better to practice.

GitOps Tooling Limitations

Today, GitOps tooling such as Fleet, FluxCD, ArgoCD and Jenkins X focuses on the Kubernetes ecosystem. This means that adopting GitOps practices with infrastructure platforms outside of Kubernetes will likely require additional work from DevOps teams. In-house tools may have to be developed to support the usage of this framework, which is less appealing for software teams because of the time it will take away from other core duties.

Declarative Infrastructure Limitations

As highlighted above, embracing GitOps requires a declarative model for deploying the infrastructure. However, there may be use cases where the declared state cannot define some infrastructure requirements. For example, in Kubernetes, you can set the number of replicas, but if a scaling event needs to occur based on CPU and memory that surpasses that replica, you end up with a deviation. Also, declarative configurations can be harder to debug and understand when the results are unexpected because the underlying steps are abstracted away.

No Universal Best Practices

Probably the most glaring issue with GitOps can be attributed to its novelty. At this point, there are no universal best practices that teams can follow when implementing this pattern. As a result, teams will have to implement a GitOps strategy based on their specific requirements and figure out what works best.

Conclusion

GitOps may be in its infancy, but the pattern extends the good old benefits of discrete and immutable versioning from software applications to infrastructure. It introduces automation, reliability, and predictability to the underlying infrastructure deployed to cloud environments.

What’s Next?

Get hands-on with GitOps. Join our free Accelerate Dev Workflows class. Week three is all about Continuous Deployment and GitOps. You can catch it on demand.

The History of Cloud Native

Mittwoch, 13 April, 2022

Cloud native is a term that’s been around for many years but really started gaining traction in 2015 and 2016. This could be attributed to the rise of Docker, which was released a few years prior. Still, many organizations started becoming more aware of the benefits of running their workloads in the cloud. Whether because of cost savings or ease of operations, companies were increasingly looking into whether they should be getting on this „cloud native“ trend.

Since then, it’s only been growing in popularity. In this article, you’ll get a brief history of what cloud native means—from running applications directly on hosts before moving to a hybrid approach to how we’re now seeing companies born in the cloud. We’ll also cover the „cloud native“ term itself, as the definition is something often discussed.

Starting with data centers

In the beginning, people were hosting their applications using their own servers in their own data centers. That might be a bit of an exaggeration in some cases, but what I mean is that specific servers were used for specific applications.

For a long time, running an application meant using an entire host. Today, we’re used to virtualization being the basis for pretty much any workload. If you’re running Windows Subsystem for Linux 2, even your Windows installation is virtualized; this hasn’t always been the case. Although the principle of virtualization has been around since the 60s, it didn’t start taking off in servers before the mid-2000s

Launching a new application meant you had to buy a new server or even an entirely new rack for it. In the early 2000s, this started changing as virtualization became more and more popular. Now it is possible to spin up applications without buying new hardware.

Applications were still running on-premises, also commonly referred to as „on-prem.“ That made it hard to scale applications, and it also meant that you couldn’t pay for resources as you were using them. You had to buy resources upfront, requiring a big cash deposit in advance.

That was one of the big benefits companies saw when cloud computing became a possibility. Now you could pay only for the resources you were using, rather than having to deposit in advance—something very attractive to many companies.

Moving to hybrid

At this point, we’re still far from cloud native being a term commonly used by close to everyone working with application infrastructure. Although the term was being thrown around from the beginning of AWS launching its first beta service (SQS) in 2004 and making it generally available in 2006, companies were still exploring this new trend.

To start with, cloud computing also mostly meant a replica of what you were running on-prem. Most of the advantages came from buying only the resources you needed and scaling your applications. Within the first year of AWS being live, they launched four important services: SQS, EC2, S3 and SimpleDB.

Elastic Compute Cloud (EC2) was, and still is, primarily a direct replica of the traditional Virtual Machine. It allows engineers to perform what’s known as a „lift-and-shift“ maneuver. As the name suggests, you lift your existing infrastructure from your data center and shift it to the cloud. This was the case with Simple Storage Service (S3) and SimpleDB, a database platform. At the time, companies could choose between running their applications on-prem or in the cloud, but the advantages weren’t as clear as they are today.

That isn’t to say that the advantages were negligible. Only paying for resources you use and not having to manage underlying infrastructure yourself are attractive qualities. This led to many shifting their workload to the cloud or launching new applications in the cloud directly, arguably the first instances of „cloud native.“

Many companies were now dipping their toes into this hybrid approach of using both hardware on their own premises and cloud resources. Over time, AWS launched more services, making a case for working in the cloud more complex. With the launch of Amazon CloudFront, a Content Delivery Network (CDN) service, AWS provided a service that was certainly possible to run yourself, but where it was much easier to run in the cloud. It wasn’t just whether the workload should be running on-prem or in the cloud; it was a matter of whether the cloud could provide previously unavailable possibilities.

In 2008, Google launched the Google Cloud Platform (GCP), and in 2010 Microsoft launched Azure. With more services launching, the market was gaining competition. Over time, all three providers started providing services specialized to the cloud rather than replicas of what was possible on-prem. Nowadays, you can get services like serverless functions, platforms as a service and much more; this is one of the main reasons companies started looking more into being cloud native.

Being cloud native

Saying that a company is cloud native is tricky because the industry does not have a universal definition. Ask five different engineers what it means to be cloud native, and you’ll get five different answers. Although, generally, you can split it into two camps.

A big part of the community believes that being cloud native just means that you are running your workloads in the cloud, with none of them being on-prem. There’s also a small subsection of this group who will say that you can be partly cloud native, meaning that you have one full application running in the cloud and another application running on-prem. However, some argue that this is still a hybrid approach.

There’s another group of people who believe that to be cloud native, you have to be utilizing the cloud to its full potential. That means that you’re not just using simple services like EC2 and S3 but taking full advantage of what your cloud provider offers, like serverless functions.

Over time, as the cloud becomes more prominent and mature, a third option appears. Some believe that to be cloud native, your company has to be born in the cloud; this is something we see more and more. Companies that have never had a single server running on-prem have launched even their first applications in the cloud.

One of the only things everyone agrees on about cloud native is cloud providers are now so prominent in the industry that anyone working with applications and application infrastructure has to think about it. Every new company has to consider whether they should build their applications using servers hosted on-prem or use services available from a cloud provider.

Even companies that have existed for quite a while are spending a lot of time considering whether it’s time to move their workloads to the cloud; this is where we see the problem of tackling cloud native at scale.

Tackling cloud native at scale

Getting your applications running in the cloud doesn’t have to be a major issue. You can follow the old lift-and-shift approach and move your applications directly to the cloud with the same infrastructure layout you used when running on-prem.

While that will work for most, it defeats some of the purposes of being in the cloud; after all, a couple of big perks of using the cloud are cost savings and resource optimization. One of the first approaches teams usually think about when they want to implement resource optimizations is converting their monolith applications to microservices; whether or not that is appropriate for your organization is an entirely different topic.

It can be tough to split an application into multiple pieces, especially if it’s something that’s been developed for a decade or more. However, the application itself is only one part of why scaling your cloud native journey can become troublesome. You also have to think about deploying and maintaining the new services you are launching.

Suddenly you have to think about scenarios where developers are deploying multiple times a day to many different services, not necessarily hosted on the same types of platforms. On your journey to being cloud native, you’ll likely start exploring paradigms like serverless functions and other specialized services by your cloud provider. Now you need to think about those as well.

My intent is not to scare anyone away from cloud native. These are just examples of what some organizations don’t think about, whether because of priorities or time, that come back to haunt them once they need to scale a certain application.

Popular ways of tackling cloud native at scale

Engineers worldwide are still trying to figure out the best way of being cloud native at scale, and it will likely be an ongoing problem for at least a few more years. However, we’re already seeing some solutions that could shape the future of cloud native.

From the beginning, virtualization has been the key to creating a good cloud environment. It’s mostly been a case of the cloud provider using virtualization and the customer using regular servers as if it were their own hardware. This is changing now that more companies integrate tools like Docker and Kubernetes into their infrastructure.

Now, it’s not only a matter of knowing that your cloud provider uses virtualization under the hood. Developers have to understand how to use virtualization efficiently. Whether it’s with Docker and Kubernetes or something else entirely, it’s a safe bet to say that virtualization is a key concept that will continue to play a major role when tackling cloud native.

Conclusion

In less than two decades, we’ve gone from people buying new servers for each new application launch to considering how applications can be split and scaled individually.

Cloud native is an exciting territory that provides value for many companies, whether they’re born in the cloud or on their way to embracing the idea. It’s an entirely different paradigm from what was common 20 years ago and allows for many new possibilities. It’s thrilling to see what companies have made possible with the cloud, and I’ll be closely watching as companies develop new ideas to scale their cloud workloads.

Let’s continue the conversation! Join the SUSE & Rancher Community where you can further your Kubernetes knowledge and share your experience.

Managing Sensitive Data in Kubernetes with Sealed Secrets and External Secrets Operator (ESO)

Donnerstag, 31 März, 2022

Having multiple environments that can be dynamically configured has become akin to modern software development. This is especially true in an enterprise context where the software release cycles typically consist of separate compute environments like dev, stage and production. These environments are usually distinguished by data that drives the specific behavior of the application.

For example, an application may have three different sets of database credentials for authentication (AuthN) purposes. Each set of credentials would be respective to an instance for a particular environment. This approach essentially allows software developers to interact with a developer-friendly database when carrying out their day-to-day coding. Similarly, QA testers can have an isolated stage database for testing purposes. As you would expect, the production database environment would be the real-world data store for end-users or clients.

To accomplish application configuration in Kubernetes, you can either use ConfigMaps or Secrets. Both serve the same purpose, except Secrets, as the name implies, are used to store very sensitive data in your Kubernetes cluster. Secrets are native Kubernetes resources saved in the cluster data store (i.e., etcd database) and can be made available to your containers at runtime.

However, using Secrets optimally isn’t so straightforward. Some inherent risks exist around Secrets. Most of which stem from the fact that, by default, Secrets are stored in a non-encrypted format (base64 encoding) in the etcd datastore. This introduces the challenge of safely storing Secret manifests in repositories privately or publicly. Some security measures that can be taken include: encrypting secrets, using centralized secrets managers, limiting administrative access to the cluster, enabling encryption of data at rest in the cluster datastore and enabling TLS/SSL between the datastore and Pods.

In this post, you’ll learn how to use Sealed Secrets for „one-way“ encryption of your Kubernetes Secrets and how to securely access and expose sensitive data as Secrets from centralized secret management systems with the External Secrets Operator (ESO).


Using Sealed Secrets for one-way encryption

One of the key advantages of Infrastructure as Code (IaC) is that it allows teams to store their configuration scripts and manifests in git repositories. However, because of the nature of Kubernetes Secrets, this is a huge risk because the original sensitive credentials and values can easily be derived from the base64 encoding format.

``` yaml

apiVersion: v1

kind: Secret

metadata:

  name: my-secret

type: Opaque

data:

  username: dXNlcg==

  password: cGFzc3dvcmQ=

```

Therefore, as a secure workaround, you can use Sealed Secrets. As stated above, Sealed Secrets allow for „one-way“ encryption of your Kubernetes Secrets and can only be decrypted by the Sealed Secrets controller running in your target cluster. This mechanism is based on public-key encryption, a form of cryptography consisting of a public key and a private key pair. One can be used for encryption, and only the other key can be used to decrypt what was encrypted. The controller will generate the key pair, publish the public key certificate to the logs and expose it over an HTTP API request.

To use Sealed Secrets, you have to deploy the controller to your target cluster and download the kubeseal CLI tool.

  • Sealed Secrets Controller – This component extends the Kubernetes API and enables lifecycle operations of Sealed Secrets in your cluster.
  • kubeseal CLI Tool – This tool uses the generated public key certificate to encrypt your Secret into a Sealed Secret.

Once generated, the Sealed Secret manifests can be stored in a git repository or shared publicly without any ramifications. When you create these Sealed Secrets in your cluster, the controller will decrypt it and retrieve the original Secret, making it available in your cluster as per norm. Below is a step-by-step guide on how to accomplish this.

To carry out this tutorial, you will need to be connected to a Kubernetes cluster. For a lightweight solution on your local machine, you can use Rancher Desktop.

To download kubeseal, you can select the binary for your respective OS (Linux, Windows, or Mac) from the GitHub releases page. Below is an example for Linux.

``` bash

wget https://github.com/bitnami-labs/sealed-secrets/releases/download/v0.17.3/kubeseal-linux-amd64 -O kubeseal

sudo install -m 755 kubeseal /usr/local/bin/kubeseal

```

Installing the Sealed Secrets Controller can either be done via Helm or kubectl. This example will use the latter. This will install Custom Resource Definitions (CRDs), RBAC resources, and the controller.

``` bash

wget https://github.com/bitnami-labs/sealed-secrets/releases/download/v0.16.0/controller.yaml

kubectl apply -f controller.yaml

```

You can ensure that the relevant Pod is running as expected by executing the following command:

``` bash

kubectl get pods -n kube-system | grep sealed-secrets-controller

```

Once it is running, you can retrieve the generated public key certificate using kubeseal and store it on your local disk.

``` bash

kubeseal --fetch-cert > public-key-cert.pem

```

You can then create a Secret and seal it with kubeseal. This example will use the manifest detailed at the start of this section, but you can change the key-value pairs under the data field as you see fit.

``` bash

kubeseal --cert=public-key-cert.pem --format=yaml < secret.yaml > sealed-secret.yaml

```

The generated output will look something like this:

``` yaml

apiVersion: bitnami.com/v1alpha1

kind: SealedSecret

metadata:

  creationTimestamp: null

  name: my-secret

  namespace: default

spec:

  encryptedData:

    password: AgBvA5WMunIZ5rF9...

    username: AgCCo8eSORsCbeJSoRs/...

  template:

    data: null

    metadata:

      creationTimestamp: null

      name: my-secret

      namespace: default

    type: Opaque

```

This manifest can be used to create the Sealed Secret in your cluster with kubectl and afterward stored in a git repository without the concern of any individual accessing the original values.

``` bash

kubectl create -f sealed-secret.yaml

```

You can then proceed to review the secret and fetch its values.

``` bash

kubectl get secret my-secret -o jsonpath="{.data.user}" | base64 --decode

kubectl get secret my-secret -o jsonpath="{.data.password}" | base64 --decode

```


Using External Secrets Operator (ESO) to access Centralized Secrets Managers

Another good practice for managing your Secrets in Kubernetes is to use centralized secrets managers. Secrets managers are hosted third-party platforms used to store sensitive data securely. These platforms typically offer encryption of your data at rest and expose an API for lifecycle management operations such as creating, reading, updating, deleting, or rotating secrets. In addition, they have audit logs for trails and visibility and fine-grained access control for operations of stored secrets. Examples of secrets managers include HashiCorp Vault, AWS Secrets Manager, IBM Secrets Manager, Azure Key Vault, Akeyless, Google Secrets Manager, etc. Such systems can put organizations in a better position when centralizing the management, auditing, and securing secrets. The next question is, „How do you get secrets from your secrets manager to Kubernetes?“ The answer to that question is the External Secrets Operator (ESO).

The External Secrets Operator is a Kubernetes operator that enables you to integrate and read values from your external secrets management system and insert them as Secrets in your cluster. The ESO extends the Kubernetes API with the following main API resources:

  • SecretStore – This is a namespaced resource that determines how your external Secret will be accessed from an authentication perspective. It contains references to Secrets that have the credentials to access the external API.
  • ClusterSecretStore – As the name implies, this is a global or cluster-wide SecretStore that can be referenced from all namespaces to provide a central gateway to your secrets manager.
  • ExternalSecret – This resource declares the data you want to fetch from the external secrets manager. It will reference the SecretStore to know how to access sensitive data.

Below is an example of how to access data from AWS Secrets Manager and make it available in your K8s cluster as a Secret. As a prerequisite, you will need to create an AWS account. A free-tier account will suffice for this demonstration.

You can create a secret in AWS Secrets Manager as the first step. If you’ve got the AWS CLI installed and configured with your AWS profile, you can use the CLI tool to create the relevant Secret.

``` bash

aws secretsmanager create-secret --name <name-of-secret> --description <secret-description> --secret-string <secret-value> --region <aws-region>

```

Alternatively, you can create the Secret using the AWS Management Console.

As you can see in the images above, my Secret is named „alias“ and has the following values:

``` json

{

  "first": "alpha",

  "second": "beta"

}

```

After you’ve created the Secret, create an IAM user with programmatic access and safely store the generated AWS credentials (access key ID and a secret access key). Make sure to limit this user’s service and resource permissions in a custom IAM Policy.

``` json

{

  "Version": "2012-10-17",

  "Statement": [

    {

      "Effect": "Allow",

      "Action": [

        "secretsmanager:GetResourcePolicy",

        "secretsmanager:GetSecretValue",

        "secretsmanager:DescribeSecret",

        "secretsmanager:ListSecretVersionIds"

      ],

      "Resource": [

        "arn:aws:secretsmanager:<aws-region>:<aws-account-id>:secret:<secret-name>",

      ]

    }

  ]

}

```

Once that is done, you can install the ESO with Helm.

``` bash

helm repo add external-secrets https://charts.external-secrets.io


helm install external-secrets \

   external-secrets/external-secrets \

    -n external-secrets \

    --create-namespace

```

Next, you can create the Secret that the SecretStore resource will reference for authentication. You can optionally seal this Secret using the approach demonstrated in the previous section that deals with encrypting Secrets with kubeseal.

``` yaml

apiVersion: v1

kind: Secret

metadata:

  name: awssm-secret

type: Opaque

data:

  accessKeyID: PUtJQTl11NKTE5...

  secretAccessKey: MklVpWFl6f2FxoTGhid3BXRU1lb1...

```

If you seal your Secret, you should get output like the code block below.

``` yaml

apiVersion: bitnami.com/v1alpha1

kind: SealedSecret

metadata:

  creationTimestamp: null

  name: awssm-secret

  namespace: default

spec:

  encryptedData:

    accessKeyID: Jcl1bC6LImu5u0khVkPcNa==...

    secretAccessKey: AgBVMUQfSOjTdyUoeNu...

  template:

    data: null

    metadata:

      creationTimestamp: null

      name: awssm-secret

      namespace: default

    type: Opaque

```

Next, you need to create the SecretStore.

``` yaml

apiVersion: external-secrets.io/v1alpha1

kind: SecretStore

metadata:

  name: awssm-secretstore

spec:

  provider:

    aws:

      service: SecretsManager

      region: eu-west-1

      auth:

        secretRef:

          accessKeyIDSecretRef:

            name: awssm-secret

            key: accessKeyID

          secretAccessKeySecretRef:

            name: awssm-secret

            key: secretAccessKey

```

The last resource to be created is the ExternalSecret.

``` yaml

apiVersion: external-secrets.io/v1alpha1

kind: ExternalSecret

metadata:

  name: awssm-external-secret

spec:

  refreshInterval: 1440m

  secretStoreRef:

    name: awssm-secretstore

    kind: SecretStore

  target:

    name: alias-secret

    creationPolicy: Owner

  data:

  - secretKey: first

    remoteRef:

      key: alias

      property: first

  - secretKey: second

    remoteRef:

      key: alias

      property: second

```

You can then chain the creation of these resources in your cluster with the following command:

``` bash

kubectl create -f sealed-secret.yaml,secret-store.yaml,external-secret.yaml

```

After this execution, you can review the results using any of the approaches below.

``` bash

kubectl get secret alias-secret -o jsonpath="{.data.first}" | base64 --decode

kubectl get secret alias-secret -o jsonpath="{.data.second}" | base64 --decode

```

You can also create a basic Job to test its access to these external secrets values as environment variables. In a real-world scenario, make sure to apply fine-grained RBAC rules to Service Accounts used by Pods. This will limit the access that Pods have to the external secrets injected into your cluster.

``` yaml

apiVersion: batch/v1

kind: Job

metadata:

  name: job-with-secret

spec:

  template:

    spec:

      containers:

        - name: busybox

          image: busybox

          command: ['sh', '-c', 'echo "First comes $ALIAS_SECRET_FIRST, then comes $ALIAS_SECRET_SECOND"']

          env:

            - name: ALIAS_SECRET_FIRST

              valueFrom:

                secretKeyRef:

                  name: alias-secret

                  key: first

            - name: ALIAS_SECRET_SECOND

              valueFrom:

                secretKeyRef:

                  name: alias-secret

                  key: second

      restartPolicy: Never

  backoffLimit: 3

```

You can then view the logs when the Job has been completed.

Conclusion

In this post, you learned that using Secrets in Kubernetes introduces risks that can be mitigated with encryption and centralized secrets managers. Furthermore, we covered how Sealed Secrets and the External Secrets Operator can be used as tools for managing your sensitive data. Alternative solutions that you can consider for encryption and management of your Secrets in Kubernetes are Mozilla SOPS and Helm Secrets. If you’re interested in a video walk-through of this post, you can watch the video below.

Let’s continue the conversation! Join the SUSE & Rancher Community, where you can further your Kubernetes knowledge and share your experience.

Kubernetes Cloud Deployments with Terraform

Montag, 28 März, 2022

Kubernetes is a rich ecosystem, and the native YAML or JSON manifest files remain a popular way to deploy applications. YAML’s support for multi-document files makes it often possible to describe complex applications with a single file. The Kubernetes CLI also allows for many individual YAML or JSON files to be applied at once by referencing their parent directory, reducing most Kubernetes deployments to a single kubectl call.  

However, anyone who frequently deploys applications to Kubernetes will discover the limitations of static files. 

The most obvious limitation is that images and their tags are hard coded as part of a pod, deployment, stateful set or daemon set resource. Updating the image tag in a Kubernetes resource file as a CI/CD pipeline that generates new images requires custom scripting, as there is no native solution. 

Helm offers a solution thanks to its ability to generate YAML from template files. But Helm doesn’t solve another common scenario where Kubernetes deployments depend on external platforms. Databases are a common example, as hosted platforms like AWS RDS or Azure SQL Database offer features that would be difficult to replicate in your own Kubernetes cluster.  

Fortunately, Terraform provides a convenient solution to all these scenarios. Terraform exposes a common declarative template syntax for all supported platforms, maintains state between deployments, and includes integrated variable support allowing frequently updated values (like image tags) to be passed at deployment time. Terraform also supports a wide range of platforms, including Kubernetes and cloud providers, so your deployments can be described and deployed with a single tool to multiple platforms. 

This post will teach you how to deploy WordPress to Kubernetes with an RDS database using Terraform. 


Prerequisites 

To follow along with this post, you’ll need to have Terraform installed. The Terraform website has instructions for installing the Terraform CLI in major operating systems. 

You’ll also deploy an RDS database in AWS. To grant Terraform access to your AWS infrastructure, you’ll need to configure the AWS CLI or define the AWS environment variables. 

Terraform will then install WordPress to an existing Kubernetes cluster. K3s is a good choice for anyone looking to test Kubernetes deployments, as it creates a cluster on your local PC with a single command. 

The code shown in this post is available from GitHub. 


Defining the Terraform providers 

To start, create a file called providers.tf. This will house the provider configuration. 

Providers are like plugins that allow Terraform to manage external resources. Both AWS and Kubernetes have providers created by Hashicorp. The providers are defined in the required_providers block, which allows Terraform to download the providers if they are not already available on your system: 

terraform { 

  required_providers { 

    aws = { 

      source  = "hashicorp/aws" 

    } 

    kubernetes = { 

      source  = "hashicorp/kubernetes" 

    } 

  } 


Configuring state 

Terraform persists the state of any resources it creates between executions in a backend. By default, the state will be saved locally, but since you are working with AWS, it is convenient to save the state in a shared S3 bucket. This way, if Terraform is executed as part of a CI/CD workflow, the build server can access the shared state files. 

The following configuration defines the bucket and region where the Terraform state will be saved. You’ll need to choose your own bucket, as S3 buckets require universally unique names, and so the name I’ve chosen here won’t be available: 

  backend "s3" { 

    bucket = "mattc-tf-bucket" 

    key    = "wordpress" 

    region = "us-west-2" 

  } 

} 


Configuring the providers 

Then the providers are configured. Here you set the default region for AWS and configure the Kubernetes provider to access the cluster defined in the local config file: 

provider "aws" { 

  region = "us-west-2" 

} 


provider "kubernetes" { 

  # Set this value to "/etc/rancher/k3s/k3s.yaml" if using K3s 

  config_path    = "~/.kube/config" 

} 


There are many different ways to access a Kubernetes cluster, and the Kubernetes provider has many different authentication options. You may want to use some of these alternative configuration options to connect to your cluster. 


Creating a VPC 

Your RDS database requires a VPC. The VPC is created with a module that abstracts away many of the finer points of AWS networking. All you need to do is give the VPC a name, define the VPC CIDR block, enable DNS support (RDS requires this), set the subnet availability zones and define the subnet CIDR blocks. 

Add the following code to a file called vpc.tf to create a VPC to host the RDS database: 

module "vpc" { 

  source = "terraform-aws-modules/vpc/aws" 


  name = "my-vpc" 

  cidr = "10.0.0.0/16" 


  enable_dns_hostnames = true 

  enable_dns_support   = true 


  azs             = ["us-west-2a", "us-west-2b"] 

  public_subnets  = ["10.0.101.0/24", "10.0.102.0/24"] 

} 


Create the database security group 

You’ll need to define a security group to grant access to the RDS database. Security groups are like firewalls that permit or deny network traffic. You’ll create a new security group with the security group module.  

For this example, you’ll grant public access to port 3306, the default MySQL port. Add the following code to the sg.tf file: 

module "mysql_sg" { 

  source = "terraform-aws-modules/security-group/aws" 


  name        = "mysql-service" 

  description = "Allows access to MySQL" 

  vpc_id      = module.vpc.vpc_id 


  ingress_with_cidr_blocks = [ 

    { 

      from_port   = 3306 

      to_port     = 3306 

      protocol    = "tcp" 

      description = "MySQL" 

      cidr_blocks = "0.0.0.0/0" 

    } 

  ] 

} 

Create the RDS instance 

With the VPC and security group configured, you can now create a MySQL RDS instance. This is done with the RDS module. 

Save the following to the file rds.tf to create a small MySQL RDS instance with public access in the VPC and with the security group created in the previous sections: 

module "db" { 

  source  = "terraform-aws-modules/rds/aws" 


  identifier = "wordpress" 


  publicly_accessible = true 


  engine            = "mysql" 

  engine_version    = "5.7.25" 

  instance_class    = "db.t3.small" 

  allocated_storage = 5 


  db_name  = "wordpress" 

  username = "user" 

  port     = "3306" 


  iam_database_authentication_enabled = true 


  vpc_security_group_ids = [module.mysql_sg.security_group_id] 


  maintenance_window = "Mon:00:00-Mon:03:00" 

  backup_window      = "03:00-06:00" 


  # DB subnet group 

  create_db_subnet_group = true 

  subnet_ids             = [module.vpc.public_subnets[0], module.vpc.public_subnets[1]] 


  # DB parameter group 

  family = "mysql5.7" 


  # DB option group 

  major_engine_version = "5.7" 

} 

Deploy WordPress to Kubernetes 

You now have all the AWS resources required to support a WordPress installation. WordPress itself will be hosted as a Kubernetes deployment and exposed by a Kubernetes service. 

The AWS resources in the previous sections were created via Terraform modules, which usually group together many related resources deployed with each other to create common infrastructure stacks. 

There is no need to use modules to deploy the Kubernetes resources, though. Kubernetes has already abstracted away much of the underlying infrastructure behind resources like pods and deployments. The Terraform provider exposes Kubernetes resources almost as you would find them in a YAML file. 

Terraform HCL files are far more flexible than the plain YAML used by Kubernetes. In the template below, you can see that the image being deployed is defined as wordpress:${var.wordpress_tag}, where wordpress_tag is a Terraform variable. You will also notice several environment variables defined with the values returned by creating the AWS RDS instance. For example, the database hostname is set as module.db.db_instance_address, which is the RDS instance address returned by the db module. 

Create the following template in a file called wordpress.tf:

resource "kubernetes_deployment" "wordpress" { 

  metadata { 

    name      = "wordpress" 

    namespace = "default" 

  } 

  spec { 

    replicas = 1 

    selector { 

      match_labels = { 

        app = "wordpress" 

      } 

    } 

    template { 

      metadata { 

        labels = { 

          app = "wordpress" 

        } 

      } 

      spec { 

        container { 

          image = "wordpress:${var.wordpress_tag}" 

          name  = "wordpress" 

          port { 

            container_port = 80 

          } 

          env { 

            name = "WORDPRESS_DB_HOST" 

            value = module.db.db_instance_address 

          } 

          env { 

            name = "WORDPRESS_DB_PASSWORD" 

            value = module.db.db_instance_password 

          } 

          env { 

            name = "WORDPRESS_DB_USER" 

            value = module.db.db_instance_username 

          } 

        } 

      } 

    } 

  } 

} 


resource "kubernetes_service" "wordpress" { 

  metadata { 

    name      = "wordpress" 

    namespace = "default" 

  } 

  spec { 

    selector = { 

      app = kubernetes_deployment.wordpress.spec.0.template.0.metadata.0.labels.app 

    } 

    type = "ClusterIP" 

    port { 

      port        = 80 

      target_port = 80 

    } 

  } 

} 


Defining variables 

The final step is to expose the variables used by the Terraform deployment. As noted in the previous section, the WordPress image tag deployed by Terraform is defined in the variable wordpress_tag. 

Save the following template to a file called vars.tf: 

variable "wordpress_tag" { 

  type = string 

  default = "4.8-apache" 

} 


Deploying the resources 

Ensure you have a valid Kubernetes configuration file saved at ~/.kube/config and have configured the AWS CLI (see the prerequisites section for more information). Then instruct Terraform to download the providers by running the command: 

terraform init 


To deploy the resources without any additional prompts, run the command: 

terraform apply --auto-approve 


At this point, Terraform will proceed to deploy the AWS and Kubernetes resources, giving you a complete infrastructure stack with two simple commands. 

To define the wordpress image tag used by the deployment, set the wordpress_tag variable with the -var argument: 

terraform apply --auto-approve -var "wordpress_tag=5.9.0-apache" 


Conclusion 

The ability to deploy multiple resources across many platforms is a powerful feature of Terraform. It allows DevOps teams to use the best solution for the job rather than limit themselves to the features of any single platform. In addition, Terraform’s support for variables allows commonly updated fields, like image tags, to be defined at deployment time. 

In this post, you learned how to use Terraform to deploy WordPress to Kubernetes backed by an AWS RDS database, taking advantage of variables to define the WordPress version at deployment time.

Let’s continue the conversation! Join the SUSE & Rancher Community where you can further your Kubernetes knowledge and share your experience.

Running Serverless Applications on Kubernetes with Knative

Freitag, 11 März, 2022

Kubernetes provides a set of primitives to run resilient, distributed applications. It takes care of scaling and automatic failover for your application and it provides deployment patterns and APIs that allow you to automate resource management and provision new workloads.

One of the main challenges that developers face is how to focus more on the details of the code rather than the infrastructure where that code runs. For that, serverless is one of the leading architectural paradigms to address this challenge. There are various platforms that allow you to run serverless applications either deployed as single functions or running inside containers, such as AWS Lambda, AWS Fargate, and Azure Functions. These managed platforms come with some drawbacks like:

-Vendor lock-in

-Constraint in the size of the application binary/artifacts

-Cold start performance

You could be in a situation where you’re only allowed to run applications within a private data center, or you may be using Kubernetes but you’d like to harness the benefits of serverless. There are different open source platforms, such as Knative and OpenFaaS, that use Kubernetes to abstract the infrastructure from the developer, allowing you to deploy and manage your applications using serverless architecture and patterns. Using any of those platforms takes away the problems mentioned in the previous paragraph.

This article will show you how to deploy and manage serverless applications using Knative and Kubernetes.

Serverless Landscape

Serverless computing is a development model that allows you to build and run applications without having to manage servers. It describes a model where a cloud provider handles the routine work of provisioning, maintaining, and scaling the server infrastructure, while the developers can simply package and upload their code for deployment. Serverless apps can automatically scale up and down as needed, without any extra configuration by the developer.

As stated in a white paper by the CNCF serverless working group, there are two primary serverless personas:

-Developer: Writes code for and benefits from the serverless platform that provides them with the point of view that there are no servers and that their code is always running.

-Provider: Deploys the serverless platform for an external or internal customer.

The provider needs to manage servers (or containers) and will have some cost for running the platform, even when idle. A self-hosted system can still be considered serverless: Typically, one team acts as the provider and another as the developer.

In the Kubernetes landscape, there are various ways to run serverless apps. It can be through managed serverless platforms like IBM Cloud Code and Google Cloud Run, or open source alternatives that you can self-host, such as OpenFaaS and Knative.

Introduction to Knative

Knative is a set of Kubernetes components that provides serverless capabilities. It provides an event-driven platform that can be used to deploy and run applications and services that can auto-scale based on demand, with out-of-the-box support for monitoring, automatic renewal of TLS certificates, and more.

Knative is used by a lot of companies. In fact, it powers the Google Cloud Run platform, IBM Cloud Code Engine, and Scaleway serverless functions.

The basic deployment unit for Knative is a container that can receive incoming traffic. You give it a container image to run and Knative handles every other component needed to run and scale the application. The deployment and management of the containerized apps are handled by one of the core components of Knative, called Knative Serving. Knative Serving is the component in Knative that manages the deployment and rollout of stateless services, plus its networking and autoscaling requirements.

The other core component of Knative is called Knative Eventing. This component provides an abstract way to consume Cloud Events from internal and external sources without writing extra code for different event sources. This article focuses on Knative Serving but you will learn about how to use and configure Knative Eventing for different use-cases in a future article.

Development Set Up

In order to install Knative and deploy your application, you’ll need a Kubernetes cluster and the following tools installed:

-Docker

-kubectl, the Kubernetes command-line tool

-kn CLI, the CLI for managing Knative application and configuration

Installing Docker

To install Docker, go to the URL docs.docker.com/get-docker and download the appropriate binary for your OS.

Installing kubectl

The Kubernetes command-line tool kubectl allows you to run commands against Kubernetes clusters. Docker Desktop installs kubectl for you, so if you followed the previous section in installing Docker Desktop, you should already have kubectl installed and you can skip this step. If you don’t have kubectl installed, follow the instructions below to install it.

If you’re on Linux or macOS, you can install kubectl using Homebrew by running the command brew install kubectl. Ensure that the version you installed is up to date by running the command kubectl version --client.

If you’re on Windows, run the command curl -LO https://dl.k8s.io/release/v1.21.0/bin/windows/amd64/kubectl.exe to install kubectl, and then add the binary to your PATH. Ensure that the version you installed is up to date by running the command kubectl version --client. You should have version 1.20.x or v1.21.x because in a future section, you’re going to create a server cluster with Kubernetes version 1.21.x.

Installing kn CLI

The kn CLI provides a quick and easy interface for creating Knative resources, such as services and event sources, without the need to create or modify YAML files directly. kn also simplifies completion of otherwise complex procedures, such as autoscaling and traffic splitting.

To install kn on macOS or Linux, run the command brew install kn.

To install kn on Windows, download and install a stable binary from https://mirror.openshift.com/pub/openshift-v4/clients/serverless/latest. Afterward, add the binary to the system PATH.

Creating a Kubernetes Cluster

You need a Kubernetes cluster to run Knative. For this article, you’re going to work with a local Kubernetes cluster running on Docker. You should have Docker Desktop installed.

Create a Cluster with Docker Desktop

Docker Desktop includes a standalone Kubernetes server and client. This is a single-node cluster that runs within a Docker container on your local system and should be used only for local testing.

To enable Kubernetes support and install a standalone instance of Kubernetes running as a Docker container, go to Preferences > Kubernetes and then click Enable Kubernetes.

Click Apply & Restart to save the settings and then click Install to confirm, as shown in the image below.

Figure 1: Enable Kubernetes on Docker Desktop

This instantiates the images required to run the Kubernetes server as containers.

The status of Kubernetes shows in the Docker menu and the context points to docker-desktop, as shown in the image below.

Figure 2 : kube context

Alternatively, Create a Cluster with Kind

You can also create a cluster using kind, a tool for running local Kubernetes clusters using Docker container nodes. If you have kind installed, you can run the following command to create your kind cluster and set the kubectl context.

curl -sL https://raw.githubusercontent.com/csantanapr/knative-kind/master/01-kind.sh | sh

Install Knative Serving

Knative Serving manages service deployments, revisions, networking, and scaling. The Knative Serving component exposes your service via an HTTP URL and has safe defaults for its configurations.

For kind users, follow these instructions to install Knative Serving:

-Run the command curl -sL https://raw.githubusercontent.com/csantanapr/knative-kind/master/02-serving.sh | sh to install Knative Serving.

-When that’s done, run the command curl -sL https://raw.githubusercontent.com/csantanapr/knative-kind/master/02-kourier.sh | sh to install and configure Kourier.

For Docker Desktop users, run the command curl -sL https://raw.githubusercontent.com/csantanapr/knative-docker-desktop/main/demo.sh | sh.

Deploying Your First Application

Next, you’ll deploy a basic Hello World application so that you can learn how to deploy and configure an application on Knative. You can deploy an application using a YAML file and the kubectl command, or using the kn command and passing the right options. For this article, I’ll be using the kn command. The sample container image you’ll use is hosted on gcr.io/knative-samples/helloworld-go.

To deploy an application, you use the kn service create command, and you need to specify the name of the application and the container image to use.

Run the following command to create a service called hello using the image https://gcr.io/knative-samples/helloworld-go.

kn service create hello \
--image gcr.io/knative-samples/helloworld-go \
--port 8080 \
--revision-name=world

The command creates and starts a new service using the specified image and port. An environment variable is set using the --env option.

The revision name is set to world using the --revision-name option. Knative uses revisions to maintain the history of each change to a service. Each time a service is updated, a new revision is created and promoted as the current version of the application. This feature allows you to roll back to previous version of the service when needed. Specifying a name for the revision allows you to easily identify them.

When the service is created and ready, you should get the following output printed in the console.

Service hello created to latest revision 'hello-world'
is available at URL: http://hello.default.127.0.0.1.nip.io

Confirm that the application is running by running the command curl http://hello.default.127.0.0.1.nip.io. You should get the output Hello World! printed in the console.

Update the Service

Suppose you want to update the service; you can use the kn service update command to make any changes to the service. Each change creates a new revision and directs all traffic to the new revision once it’s started and is healthy.

Update the TARGET environment variable by running the command:

kn service update hello \
--env TARGET=Coder \
--revision-name=coder

You should get the following output when the command has been completed.

Service 'hello' updated to latest revision
'hello-coder' is available at
URL: http://hello.default.127.0.0.1.nip.io

Run the curl command again and you should get Hello Coder! printed out.

~ curl http://hello.default.127.0.0.1.nip.io
~ Hello Coder!

Traffic Splitting and Revisions

Knative Revision is similar to a version control tag or label and it’s immutable. Every Knative Revision has a corresponding Kubernetes Deployment associated with it; it allows the application to be rolled back to any of the previous revisions. You can see the list of available revisions by running the command kn revisions list. This should print out a list of available revisions for every service, with information on how much traffic each revision gets, as shown in the image below. By default, each new revision gets routed 100% of traffic when created.

Figure 5 : Revision list

With revisions, you may wish to deploy applications using common deployment patterns such as Canary or blue-green. You need to have more than one revision of a service in order to use these patterns. The hello service you deployed in the previous section already have two revisions named hello-world and hello-coder respectively. You can split traffic 50% for each revision using the following command:

kn service update hello \
--traffic hello-world=50 \
--traffic hello-coder=50

Run the curl http://hello.default.127.0.0.1.nip.io command a few times to see that you get Hello World! sometimes, and Hello Coder! other times.

Figure 6 : Traffic Splitting

Autoscaling Services

One of the benefits of serverless is the ability to scale up and down to meet demand. When there’s no traffic coming in, it should scale down, and when it peaks, it should scale up to meet demand. Knative scales out the pods for a Knative Service based on inbound HTTP traffic. After a period of idleness (by default, 60 seconds), Knative terminates all of the pods for that service. In other words, it scales down to zero. This autoscaling capability of Knative is managed by Knative Horizontal Pod Autoscaler in conjunction with the Horizontal Pod Autoscaler built into Kubernetes.

If you’ve not accessed the hello service for more than one minute, the pods should have already been terminated. Running the command kubectl get pod -l serving.knative.dev/service=hello -w should show you an empty result. To see the autoscaling in action, open the service URL in the browser and check back to see the pods started and responding to the request. You should get an output similar to what’s shown below.

Scaling Up
Scaling Up

Scaling Down
Scaling Down

There you have the awesome autoscaling capability of serverless.

If you have an application that is badly affected by the cold-start performance, and you’d like to keep at least one instance of the application running, you can do so by running the command kn service update <SERVICE_NAME> --scale-min <VALUE>. For example, to keep at least one instance of the hello service running at all times, you can use the command kn service update hello --scale-min 1.

What’s Next?

Kubernetes has become a standard tool for managing container workloads. A lot of companies rely on it to build and scale cloud native applications, and it powers many of the products and services you use today. Although companies are adopting Kubernetes and reaping some benefits, developers aren’t interested in the low-level details of Kubernetes and therefore want to focus on their code without worrying about the infrastructure bits of running the application.

Knative provides a set of tools and CLI that developers can use to deploy their code and have Knative manage the infrastructure requirement of the application. In this article, you saw how to install the Knative Serving component and deploy services to run on it. You also learned how to deploy services and manage their configuration using the kn CLI. If you want to learn more about how to use the kn CLI, check out this free cheat sheet I made at cheatsheet.pmbanugo.me/knative-serving.

In a future article, I’ll show you how to work with Knative Eventing and how your application can respond to Cloud Events in and out of your cluster.

In the meantime, you can get my book How to build a serverless app platform on Kubernetes. It will teach you how to build a platform to deploy and manage web apps and services using Cloud Native technologies. You will learn about serverless, Knative, Tekton, GitHub Apps, Cloud Native Buildpacks, and more!

Get your copy at books.pmbanugo.me/serverless-app-platform

Let’s continue the conversation! Join the SUSE & Rancher Community where you can further your Kubernetes knowledge and share your experience.