About six months ago, I learned about a new project called Harvester, our open source hyperconverged infrastructure (HCI) software built using Kubernetes, libvirt, kubevirt, Longhorn and minIO. At first, the idea of managing VMs via Kubernetes did not seem very exciting. “Why would I not just containerize the workloads or orchestrate the VM natively via KVM, Xen or my hypervisor of choice?” and that approach makes a lot of sense except for one thing: the edge. At the edge, Harvester provides a solution for a nightmarish technical challenge. Specifically, when one host must run the dreaded Windows legacy applications and modern containerized microservers. In this blog and the following tutorials, I’ll map out an edge stack and set up and install Harvester. Later I’ll use Fleet to orchestrate the entire host with OS and Kubernetes updates. We’ll then deploy the whole thing with a bit of Terraform, completing the solution.
At the edge, we often lack the necessities such as a cloud or even spare hardware. Running Windows VMs alongside your Linux containers provides much-needed flexibility while using the Kubernetes API to manage the entire deployment brings welcome simplicity and control. With K3s and Harvester (in app mode), you can maximize your edge node’s utility by allowing it to run Linux containers and Windows VMs, down to the host OS orchestrated via Rancher’s Continuous Delivery (Fleet) GitOps deployment tool.
At the host, we start with SLES and Ubuntu. The system-update operator can be customized for other Linux operating systems.
We’ll use K3s as our Kubernetes distribution. K3s’ advantage here is indisputable: small footprint, less chatty datastore (SQLite when used in single master mode), and removal of cloud-based bloat present in most Kubernetes distributions, including our RKE.
Harvester has two modes of operation: HCI, where it can attach to another cluster as a VM hosting node or a Helm application deployed into an existing Kubernetes cluster. The application can be installed and operated via a Helm chart and CRDs, providing our node with the greatest flexibility.
Later we’ll orchestrate it via a Rancher 2.5 cluster and our Continuous Delivery functionality, powered by Fleet. Underneath, Harvester uses libvirt, kubevirt, multus and minIO, installed by default with the Helm chart. We’ll add a Windows image and deploy a VM via a CRD once we finish installing Harvester. At the end, I’ll provide scripts to get the MVP deployed in Google Cloud Platform (GCP), so you can play along at home. Note that since multi-layered VMs require special CPU functionality, we can currently only test in GCP or Digital Ocean.
In summary, Rancher Continuous Delivery (Fleet), Harvester, and K3s on top of Linux can provide a solid edge application hosting solution capable of scaling to many teams and millions of edge devices. While it’s not the only solution, and you can use each component individually with other open source components, this is one solution that you can implement today, complete with instructions and tutorials. Drop me a note if it is helpful for you, and as always, you can reach out to our consulting services for expert assistance and advice.
Tutorial Sections:
Walks you through the extra work needed to enable nested virtualization in GCP.
Deploy a cluster and get ready for Harvester.
Deploy the Harvester app itself.
Testing with an OpenSuse JeOS Leap 15 sp2
Testing with a pre-licensed windows 10 Pro vm
Orchestrating the entire rollout in Terraform.
Setting Up The Host Image on GCP
When choosing the host for Harvester, k3os requires the least amount of customization for K3s. However, GCP (and Digital Ocean) requires some extra configuration to get nested virtualization working and enable us to run Harvester. I’ll show the steps with SLES, k3OS, and Ubuntu 20.04 LTS since the former uses the latter. Both images need a special license key passed in so GCP places them on hosts that support nested virtualization. You can find more info here.
Do not forget to initialize gcloud prior to starting and after deployment be sure to open up port 22 to enable access. You can open port 22 with the following gcloud command.
gcloud compute firewall-rules create allow-tcpssh --allow tcp:22
Build a Customized SUSE Linux Enterprise Server (SLES) Image
GCP publishes public images that can be used. Sles public images are stored in the project `suse-cloud` and we’ll get a standard image and then recreate it with the needed vm license. We’ll do this by first copying a public image onto a disk in my current project.
gcloud compute disks create sles-15-sp2 --image-project suse-cloud --image-family sles-15 --zone us-central1-b
That will create a disk called sles-15-sp2 based on the sles-15 family in zone us-central1-b. Next we’ll create an image local to our project that will use that disk and include the nested vm license.
gcloud compute images create sles-15-sp2 --source-disk sles-15-sp2 --family sles-15 --source-disk-zone us-central1-b --licenses "https://www.googleapis.com/compute/v1/projects/vm-options/global/licenses/enable-vmx"
That’s it! (Until we get to K3s configuration.)
Build a Customized Ubuntu Image
The process to create the Ubuntu image is much the same.
First, we’ll create a new disk in our project and load the public ubuntu 20.04 image.
gcloud compute disks create ubuntu-2004-lts --image-project ubuntu-os-cloud --image-family ubuntu-2004-lts --zone us-central1-b
Then we’ll build a new image locally in our project by passing the special key.
gcloud compute images create ubuntu-2004-lts --source-disk ubuntu-2004-lts --family ubuntu-2004-lts --source-disk-zone us-central1-b --licenses "https://www.googleapis.com/compute/v1/projects/vm-options/global/licenses/enable-vmx"
You can then move on to K3s setup unless you are configuring k3OS.
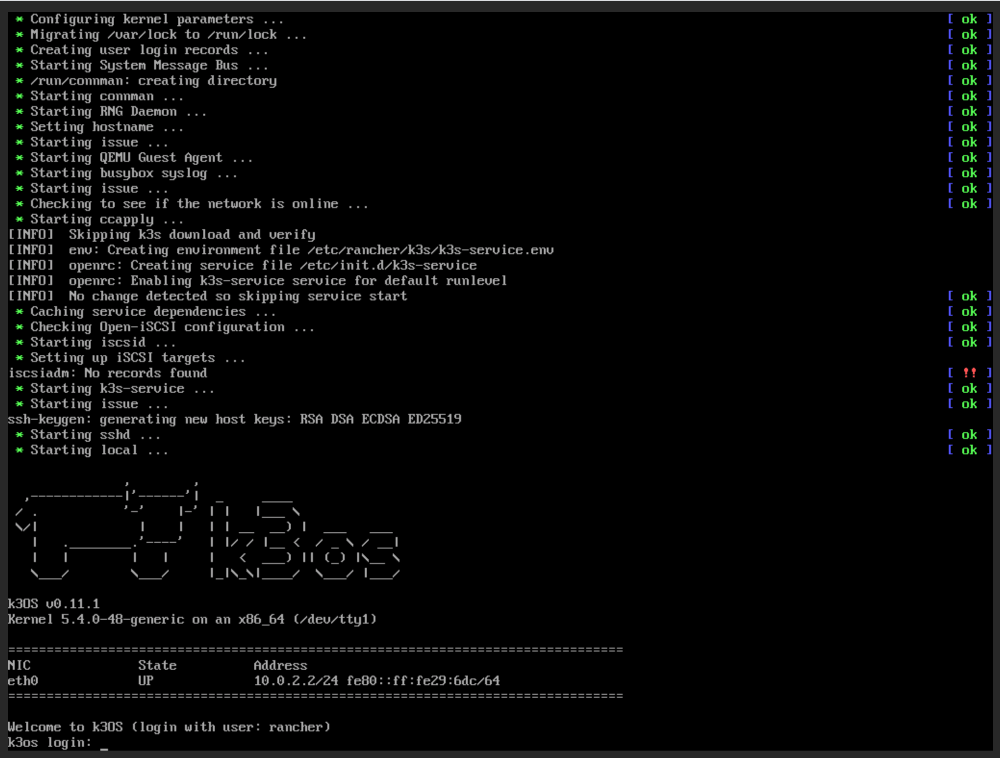
Create and Build a Custom k3OS Image
Since there is no k3OS image published currently for GCP’s nested virtualization, we’ll build our own.
Prerequisites
To do the build itself, you’ll need a clean Ubuntu 20.04 installation with internet access. I used a new multipass instance with standard specs and it worked great. You can get it here]:
multipass launch --name gcp-builder
You’ll also need a GCP account with an active project.
Set Up the Tools Inside Local Builder VM
First, we need to install the GCP CLI. For k3os, we’ll need Packer, which we’ll install later.
Add Google to your ubuntu source list.
echo "deb https://packages.cloud.google.com/apt cloud-sdk main" | sudo tee -a /etc/apt/sources.list.d/google-cloud-sdk.list
Then we’ll need to add their key:
curl https://packages.cloud.google.com/apt/doc/apt-key.gpg | sudo apt-key add -
Update sources and install the cloud SDK:
sudo apt-get update && sudo apt-get install google-cloud-sdk
Last, we’ll initialize the SDK by logging in and selecting our project. Go ahead and select your zone. I used us-central1-b for all the instructions.
gcloud init
Create k3os Image (k3os)
We’ll need another tool called Packer to build the k3os image:
sudo apt-get install packer
The k3os github repo comes with a handy gcp builder. Skip this part to use the Ubuntu image directly. Otherwise:
git clone https://github.com/rancher/k3os.git
And check out the latest no-rc build:
git checkout v0.11.1
For the rest, we’ll cd into the k3os/package/packer/gcp directory:
cd k3os/package/packer/gcp
Here I manually edited the template.json file and simplified the image name and region to match my default (us-central1-b):
vi template.json
Update builders[0].image_name to ‘rancher-k3os’ and variables.region value to ‘us-central1-b’. Then, we need to pass the GCP license needed for nested virtualization builders[0].image_licenses to [“projects/vm-options/global/licenses/enable-vmx”].
Add your project’s ID to the environment as GCP_PROJECT_ID.
export GCP_PROJECT_ID=<<YOUR GCP PROJECT ID>>
Add SSH Public Key to Image
I’m not sure why this was required, but the standard packer does not provide ssh access. I added the local google_cloud_engine key in ~/.ssh to the authorized_ssh_keys in the config.yml.
You can find more configuration options in the configuration section of the [installation docs.](https://github.com/rancher/k3os#configuration)
Google Cloud Service Account
Create a new service account with Cloud Build Service Account permissions. You can do this via the ui or cli: Google Console: https://console.cloud.google.com/iam-admin/serviceaccounts
Packer also provides [GCP service account creation instructions](https://www.packer.io/docs/builders/googlecompute) for the cli.
Either way, save the resulting configuration file as account.json in the gcp directory.
Finally, let’s run the image builder.
packer build template.json
Create a Test Cluster with K3s
To create the VM in GCP based on our new image, we need to specify the minimum CPU family that includes the nested virtualization tech and enough drive space to run everything.
SUSE Enterprise Linux 15 SP2
https://cloud.google.com/compute/docs/instances/enable-nested-virtualization-vm-instances
gcloud compute instances create harvester –zone us-central1-b –min-cpu-platform “Intel Haswell” –image sles-15-sp2 –machine-type=n1-standard-8 –boot-disk-size=200GB –tags http-server,https-server –can-ip-forward
You will then need to install libvirt, qemu-kvm, and setup app armor exception.
Ubuntu 20.04
The following command should create an ubuntu instance usable for our testing:
gcloud compute instances create harvester --zone us-central1-b --min-cpu-platform "Intel Haswell" --image ubuntu-2004-lts --machine-type=n1-standard-8 --boot-disk-size=200GB
Connecting
If you set the firewall rule from the previous step, you can connect using the ssh key that Google created ~/.ssh/google_compute_engine. When connecting to the ubuntu instance, use the ubuntu username.
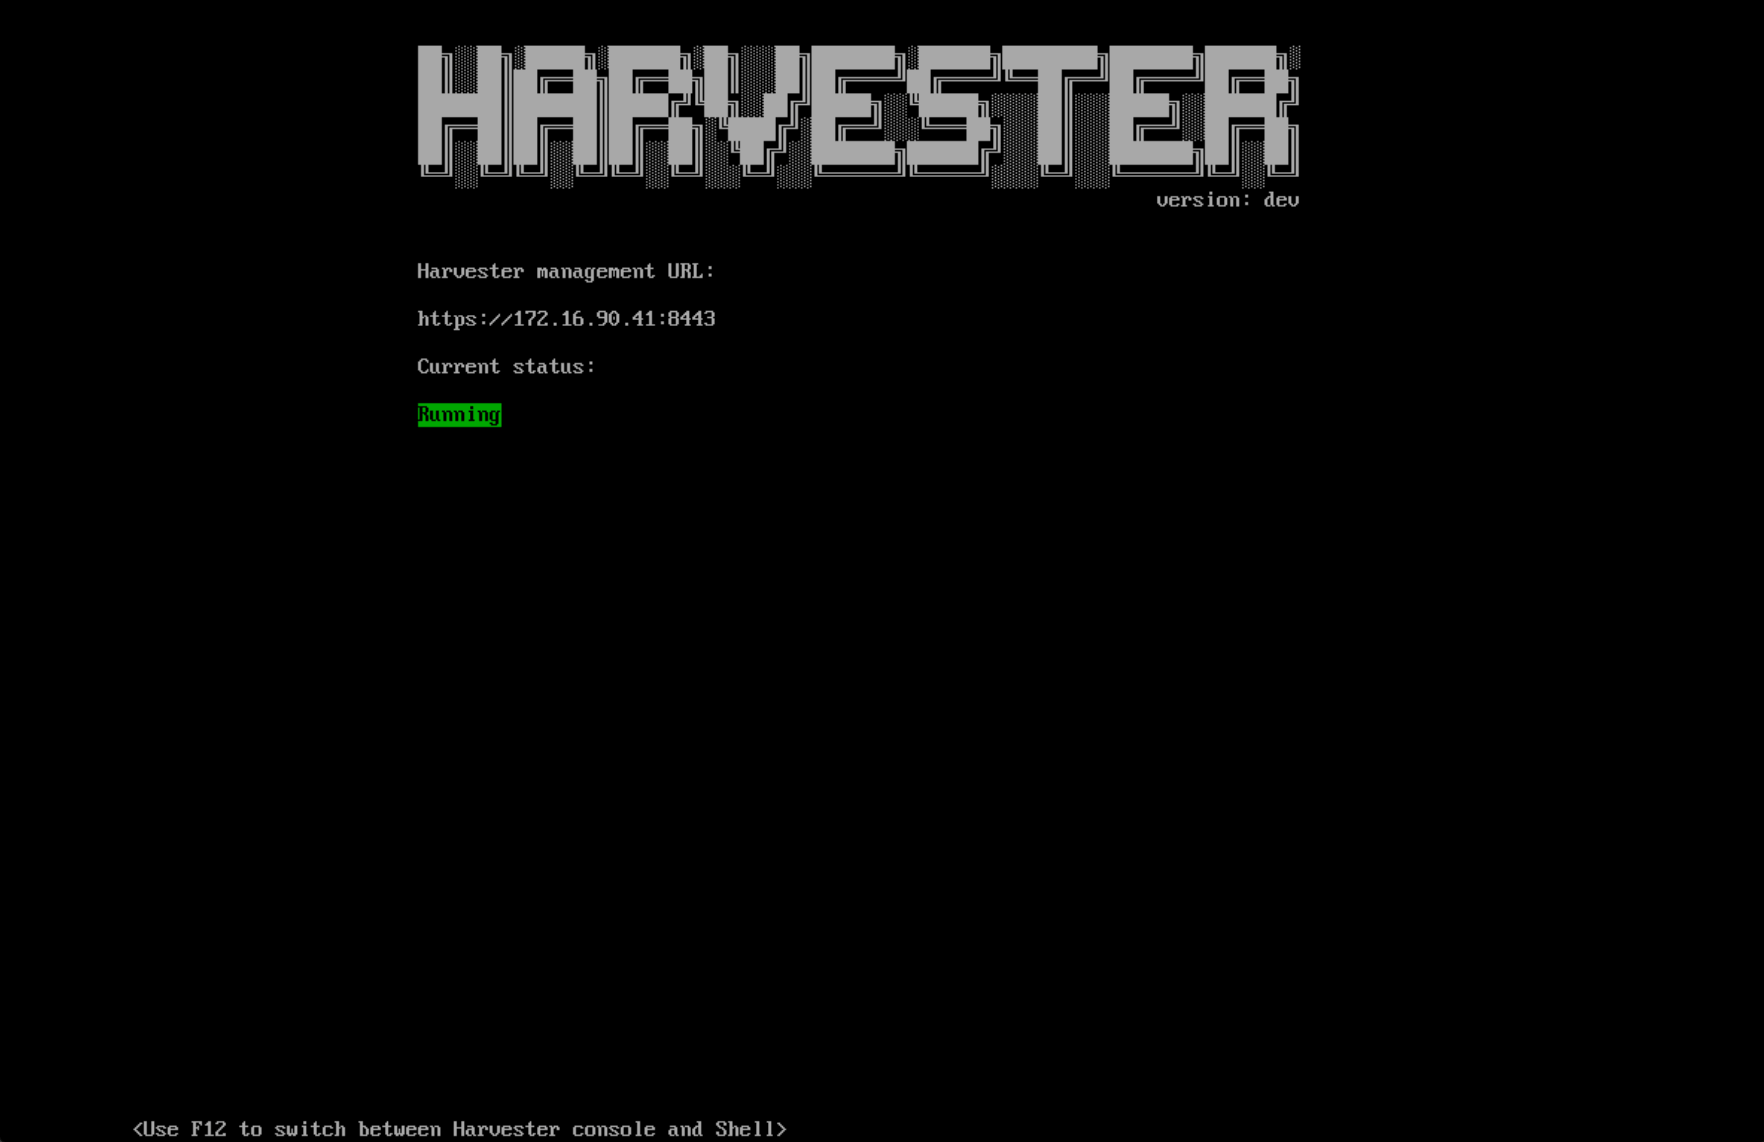
Deploying Harvester with Helm
Deploying Harvester is a three-step process and requires you to install Helm on the new cluster. Connect via ssh and install the application:
export VERIFY_CHECKSUM=false
 curl https://raw.githubusercontent.com/helm/helm/master/scripts/get-helm-3 | bash
 cp /etc/rancher/k3s/k3s.yaml ~/.kube/config
Then clone the Harvester repository.
git clone https://github.com/rancher/harvester
Then browse to harvester/deploy/charts:
cd harvester/deploy/charts
Then install the chart itself. This will take a few minutes:
helm upgrade --install harvester ./harvester --namespace harvester-system --set longhorn.enabled=true,minio.persistence.storageClass=longhorn,service.harvester.type=NodePort,multus.enabled=true --create-namespace
However, this hides the complexity of what is happening underneath. It installs Longhorn, minIO, and multus along with the kubevirt components. You can install them separately by disabling them in the Helm installation.
Note: Currently, it is not possible to use another storage type. However, the defaults would just not install anything and would create a broken system. So they must be specified despite lack of functional choice.
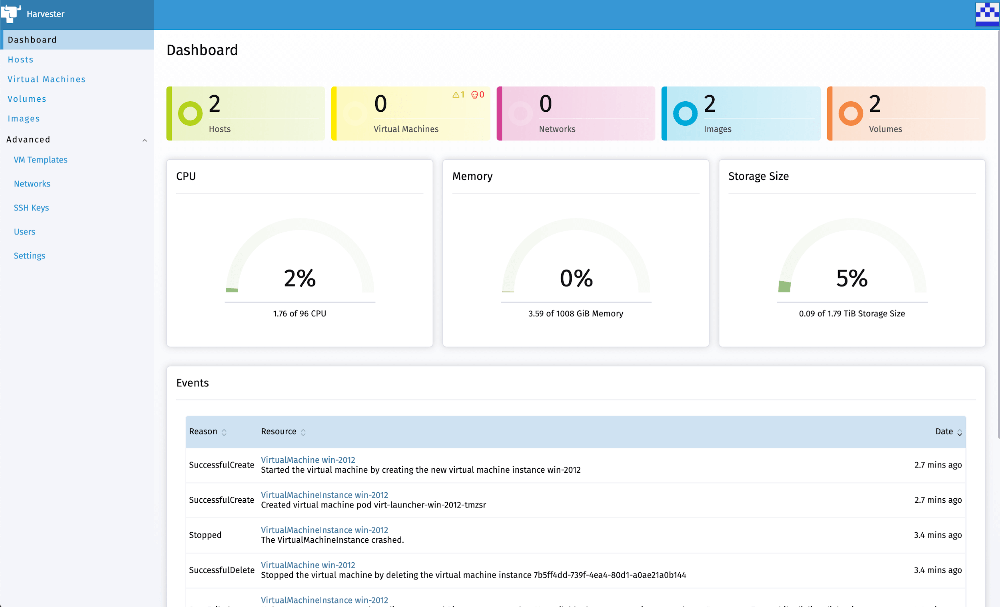
Setting Up and Starting a Linux VM
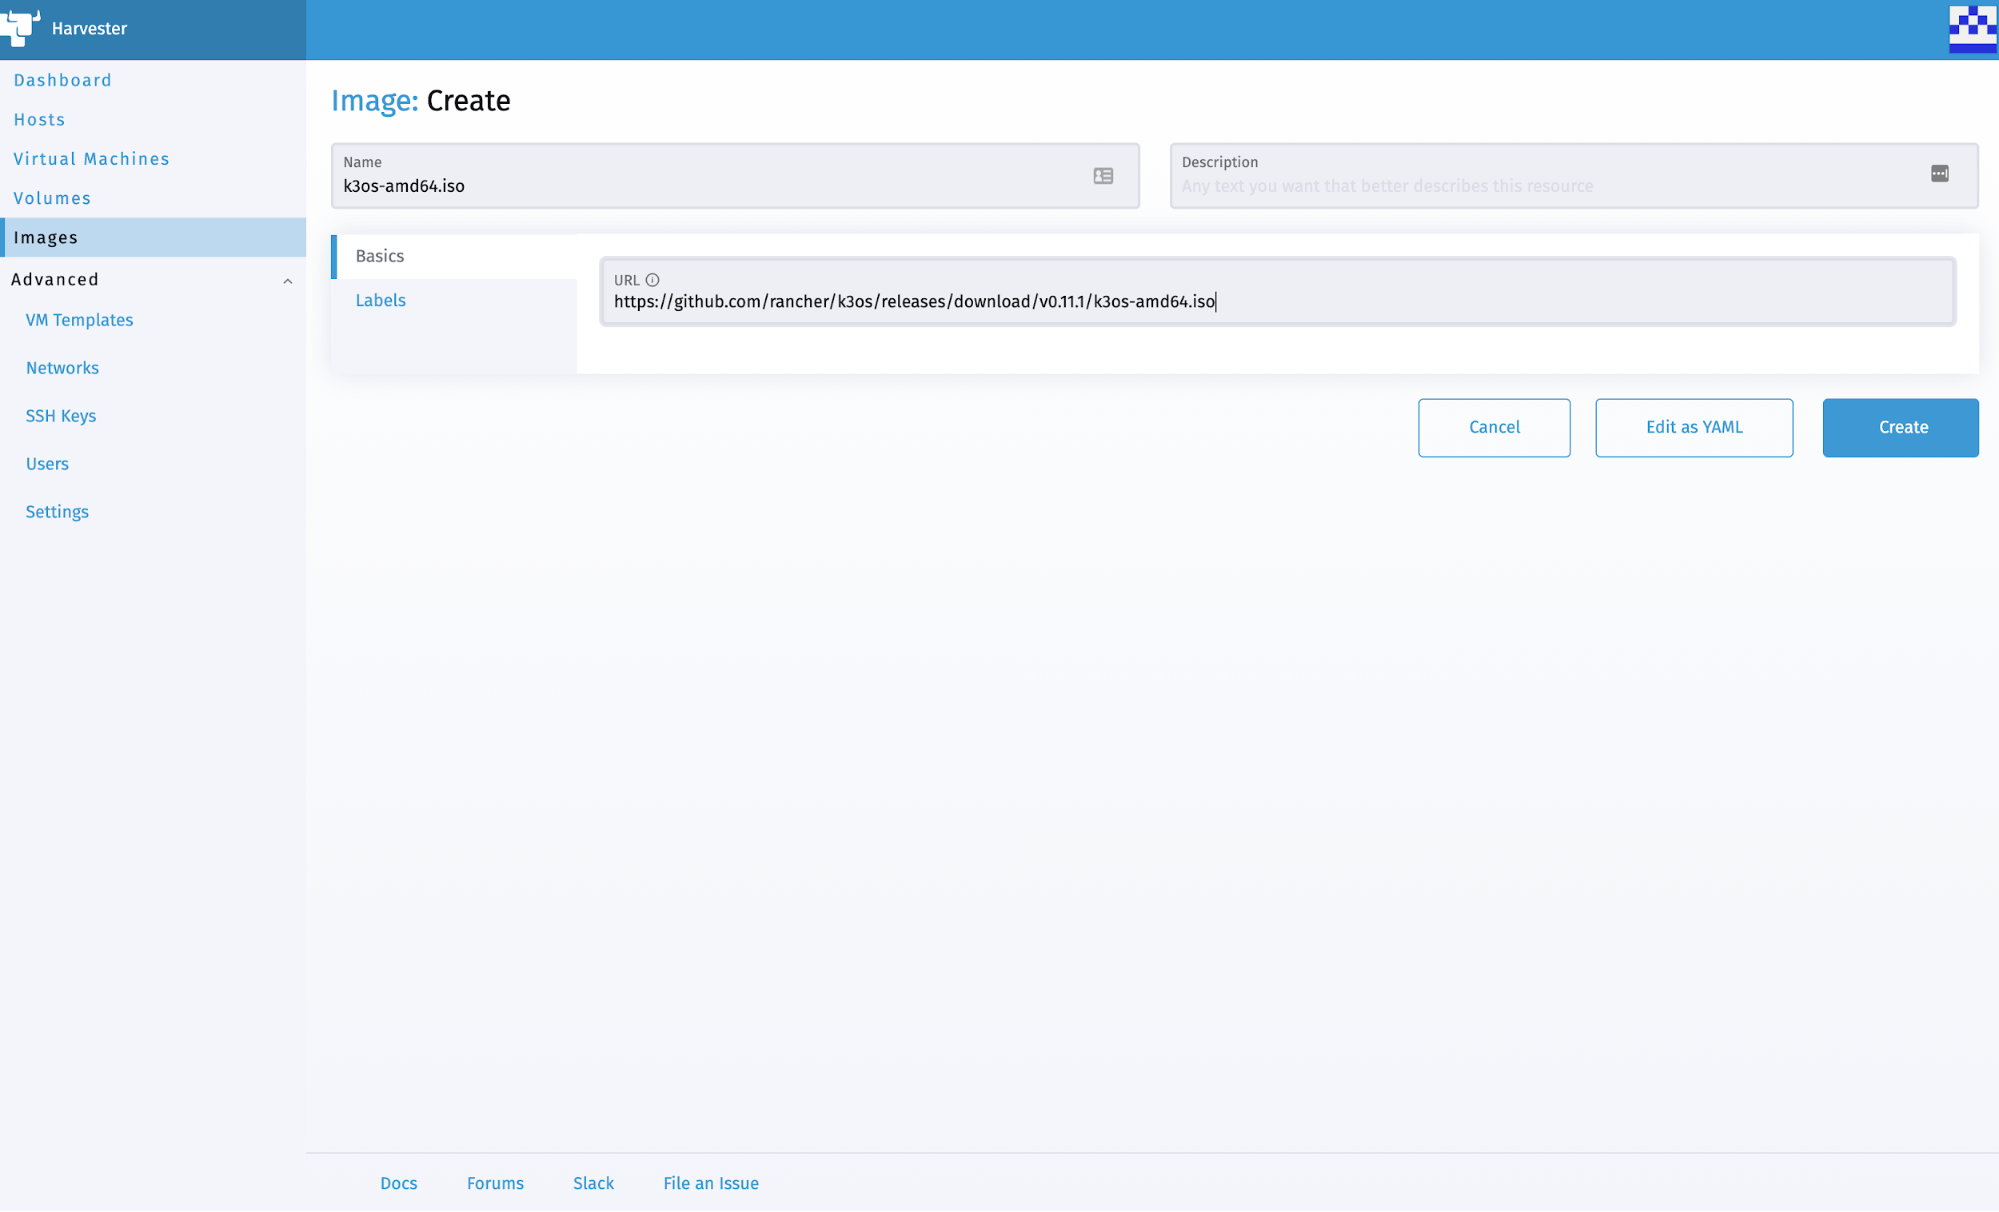
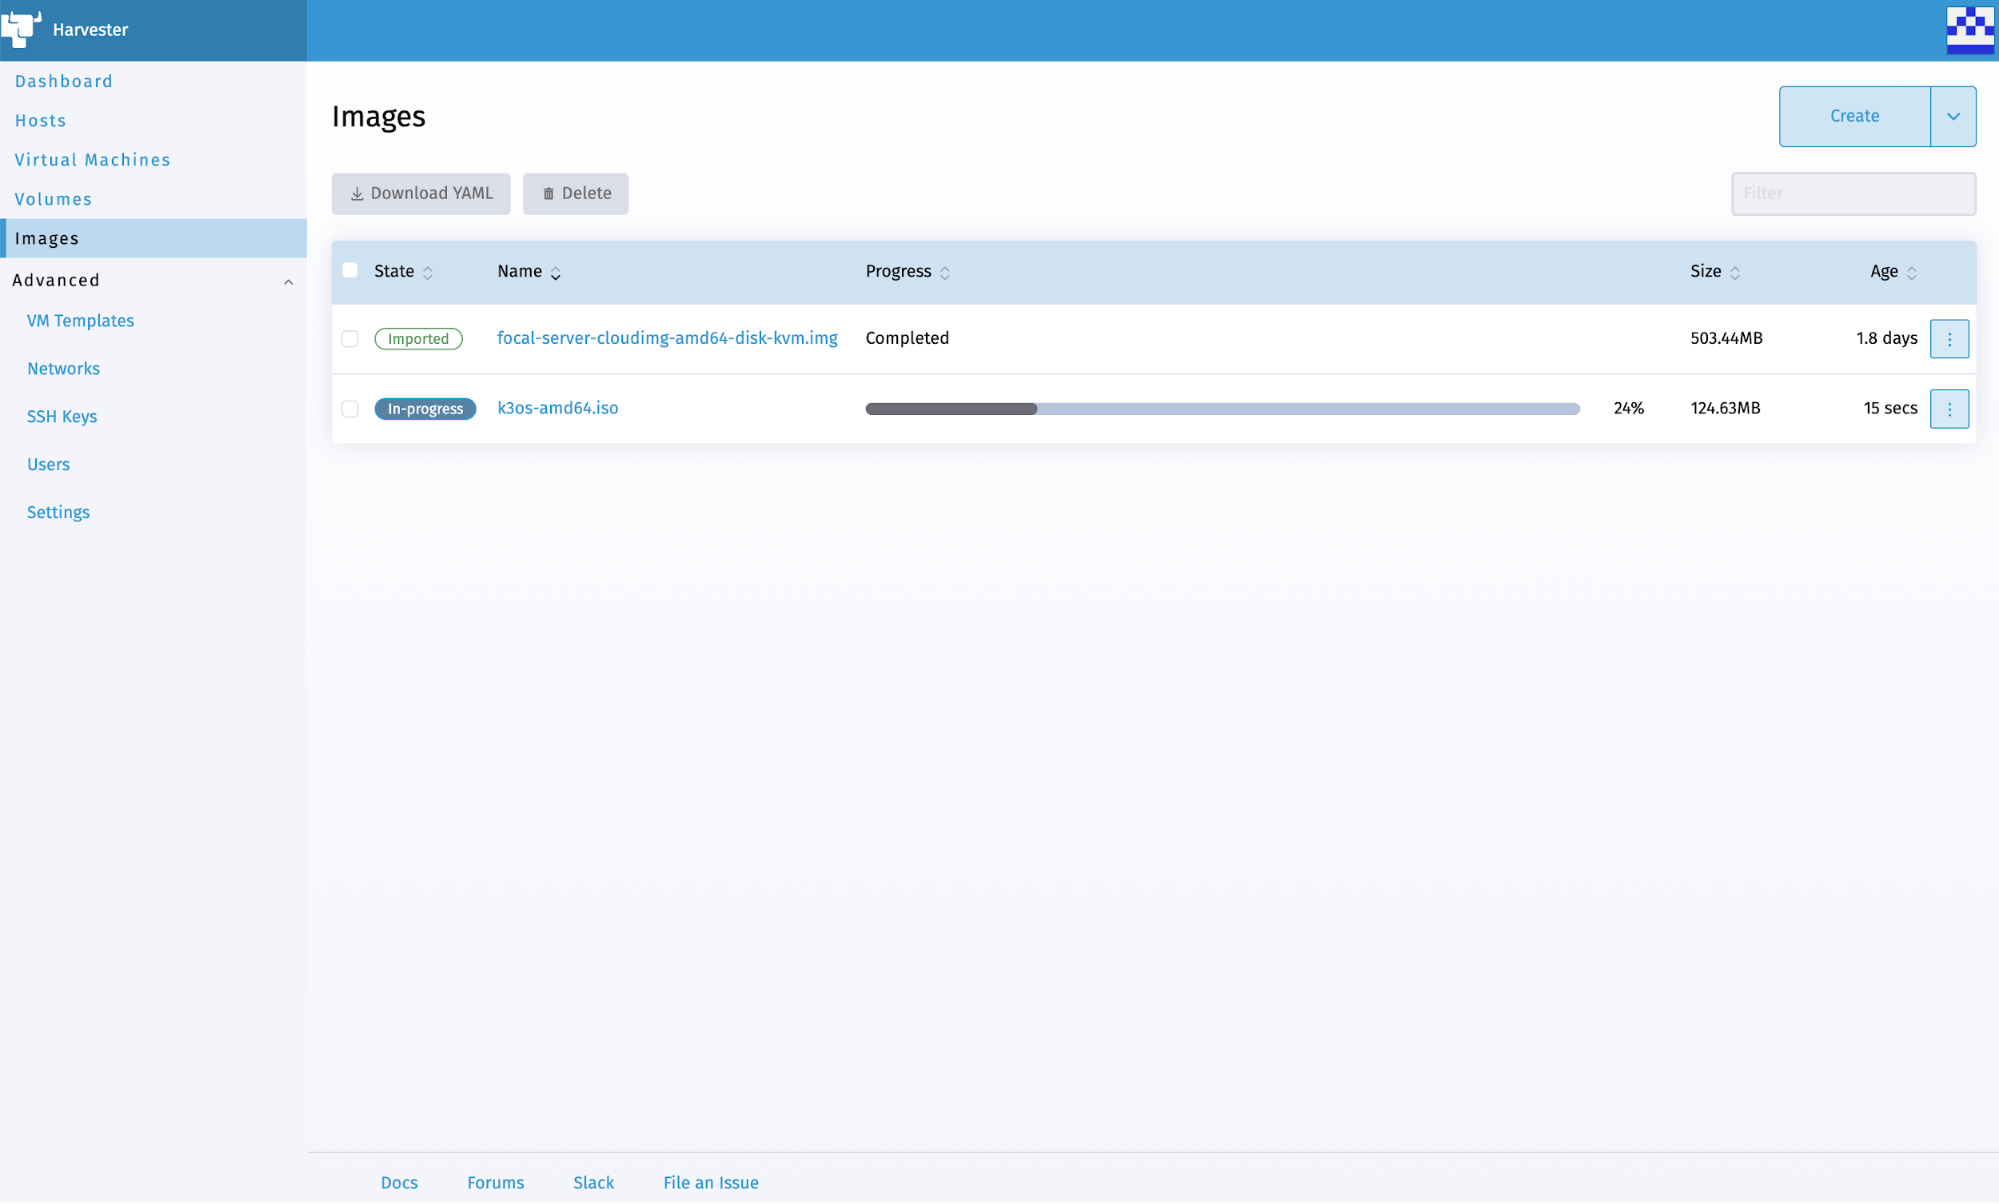
Currently, setting up a VM takes some effort. You must place the compatible image in an accessible URL so that Harvester can download it. For the Linux VM, we’ll use the UI, switching to CRDs for the Windows VM.
A Working VM
Harvester does not support all formats, but kvm and compressed kvm images will work.
Upload to a URL
I uploaded mine to s3 to make it easy, but any web-accessible storage will do.
You can use the manifest here to import an open sles joes 15.2 leap image:
apiVersion: harvester.cattle.io/v1alpha1
kind: VirtualMachineImage
metadata:
 name: image-openjeos-leap-15sp2
 annotations:
 {}
# key: string
 generateName: image-openjeos-leap-15sp2
 labels:
 {}
# key: string
 namespace: default
spec:
 displayName: opensles-leap-jeos-15-sp2
 url: >-
 https://thecrazyrussian.s3.amazonaws.com/openSUSE-Leap-15.2-JeOS.x86_64-15.2-kvm-and-xen-Build31.186.qcow2
Download Via Harvester
Browse over to the images, select “add a new”, and input the URL to upload and store it in the included minIO installation.
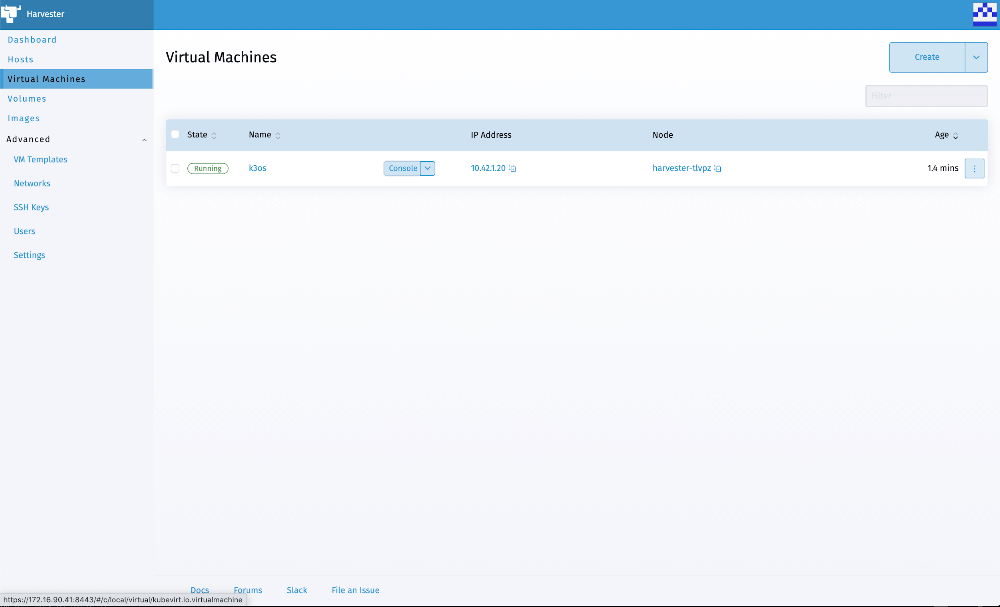
Create a VM from Image
Once the image is fully uploaded, we can create a VM based on the image.
Remote Connection: VNC
If everything is working properly, you should be able to vnc into the new image.
Setting Up and Starting a Windows VM
The process for setting up a Windows VM is a bit more painful than a Linux VM. We need to pass options into the underlying yaml, so we’ll use these sample Windows CRDs and insert them to create our VM after image download.
Upload CRD for Image. We can use this CRD to grab a Windows CD image that I have stored on a web-accessible location:
apiVersion: harvester.cattle.io/v1alpha1
kind: VirtualMachineImage
metadata:
 name: image-windows10
 annotations:
 field.cattle.io/description: windowsimage
 generateName: image-windows10
 labels:
 {}
 namespace: default
spec:
 displayName: windows
 url: 'https://thecrazyrussian.s3.amazonaws.com/Win10_2004_English_x64.iso'
Upload CRD for VM
apiVersion: kubevirt.io/v1alpha3
kind: VirtualMachine
metadata:
  annotations:
    kubevirt.io/latest-observed-api-version: v1alpha3
    kubevirt.io/storage-observed-api-version: v1alpha3
  finalizers:
    - wrangler.cattle.io/VMController.UnsetOwnerOfDataVolumes
  labels: {}
  name: 'windows10'
  namespace: default
spec:
  dataVolumeTemplates:
    - apiVersion: cdi.kubevirt.io/v1alpha1
      kind: DataVolume
      metadata:
        annotations:
          cdi.kubevirt.io/storage.import.requiresScratch: 'true'
          harvester.cattle.io/imageId: default/image-windows10
        creationTimestamp: null
        name: windows-cdrom-disk-win
      spec:
        pvc:
          accessModes:
            - ReadWriteOnce
          resources:
            requests:
              storage: 20Gi
          storageClassName: longhorn
          volumeMode: Filesystem
        source:
          http:
            certConfigMap: importer-ca-none
            url: 'http://minio.harvester-system:9000/vm-images/image-windows10'
    - apiVersion: cdi.kubevirt.io/v1alpha1
      kind: DataVolume
      metadata:
        creationTimestamp: null
        name: windows-rootdisk-win
      spec:
        pvc:
          accessModes:
            - ReadWriteOnce
          resources:
            requests:
              storage: 32Gi
          storageClassName: longhorn
          volumeMode: Filesystem
        source:
          blank: {}
  running: true
  template:
    metadata:
      annotations:
        harvester.cattle.io/diskNames: >-
          ["windows-cdrom-disk-win","windows-rootdisk-win","windows-virtio-container-disk-win"]
        harvester.cattle.io/sshNames: '[]'
      creationTimestamp: null
      labels:
        harvester.cattle.io/creator: harvester
        harvester.cattle.io/vmName: windows
    spec:
      domain:
        cpu:
          cores: 4
        devices:
          disks:
            - bootOrder: 1
n              cdrom:
                bus: sata
              name: cdrom-disk
            - disk:
                bus: virtio
              name: rootdisk
            - cdrom:
                bus: sata
              name: virtio-container-disk
            - disk:
                bus: virtio
              name: cloudinitdisk
          inputs:
            - bus: usb
              name: tablet
              type: tablet
          interfaces:
            - masquerade: {}
              model: e1000
              name: default
        machine:
          type: q35
        resources:
          requests:
            memory: 4Gi
      hostname: windows
      networks:
        - name: default
          pod: {}
      volumes:
        - dataVolume:
            name: windows-cdrom-disk-win
          name: cdrom-disk
        - dataVolume:
            name: windows-rootdisk-win
          name: rootdisk
        - containerDisk:
            image: kubevirt/virtio-container-disk
          name: virtio-container-disk
        - cloudInitNoCloud:
            userData: |
              #cloud-config
              ssh_authorized_keys: []
          name: cloudinitdisk
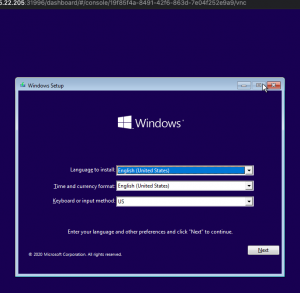
Once both CRDs finish processing, the VM should start booting and you will be able to run the normal Windows install process via the console or VNC.
When it is time to select which drive to load Windows on, you’ll need to load the special Virtio driver from the cd already included in the VM above.
Select “Install Now”
Then “I do not have a product key”
Select “Windows 10 Pro”
“Accept the license”
Install the Virtio Storage Driver
You will then have to select the disk. Instead, select “Load Driver”

Select the AMD64 driver (depending on your VM) and load it.

You should be able to select your (non-empty) hard disk and continue installing Windows.
We can automate all these components. For example, we can script the VM creation via bash or Terraform. We can use Fleet or any other GitOps tool to push out individual VM and image crds and updates to the entire edge device, from the OS to the applications. Let’s start with an integrated Terraform script responsible for deploying Rancher and Harvester on a single node K3s cluster in GCP. You must complete the previous steps for this to work.
git clone https://github.com/thecrazyrussian/terraform-harvester.git
cd terraform-harvester
Here we must edit the infra/terraform.tfvars.example file. We can copy it from the infra/terraform.tfvars.example:
cp terraform.tfvars.example terraform.tfvars
And edit it in our favorite editor:
vi terraform.tfvars
Once you set all the variables for your route53 zone, GCP account, and you’ve added credentials.json for gcp into the infra/ directory, you should be ready to `apply`. That should stand up a single node Rancher/Harvester cluster and deploy a Windows VM on to it for customization.
Browse to the nodeport where Harvester made itself available, log in with admin/password and start a console to the VM to configure it as you normally would.

If you enjoyed this demo, head over to the SUSE & Rancher Community and let us know how you plan to use Harvester.