Managing Your Hyperconverged Network with Harvester

Friday, 22 July, 2022

Hyperconverged infrastructure (HCI) is a data center architecture that uses software to provide a scalable, efficient, cost-effective way to deploy and manage resources. HCI virtualizes and combines storage, computing, and networking into a single system that can be easily scaled up or down as required.

A hyperconverged network, a networking architecture component of the HCI stack, helps simplify network management for your IT infrastructure and reduce costs by virtualizing your network. Network virtualization is the most complicated among the storage, compute and network components because you need to virtualize the physical controllers and switches while dividing the network isolation and bandwidth required by the storage and compute. HCI allows organizations to simplify their IT infrastructure via a single control pane while reducing costs and setup time.

This article will dive deeper into HCI with a new tool from SUSE called Harvester. By using Kubernetes’ Container Network Interface (CNI) mechanisms, Harvester enables you to better manage the network in an HCI. You’ll learn the key features of Harvester and how to use it with your infrastructure.

Why you should use Harvester

The data center market offers plenty of proprietary virtualization platforms, but generally, they aren’t open source and enterprise-grade. Harvester fills that gap. The HCI solution built on Kubernetes has garnered about 2,200 GitHub stars as of this article.

In addition to traditional virtual machines (VMs), Harvester supports containerized environments, bridging the gap between legacy and cloud native IT. Harvester allows enterprises to replicate HCI instances across remote locations while managing these resources through a single pane.

Following are several reasons why Harvester could be ideal for your organization.

Open source solution

Most HCI solutions are proprietary, requiring complicated licenses, high fees and support plans to implement across your data centers. Harvester is a free, open source solution with no license fees or vendor lock-in, and it supports environments ranging from core to edge infrastructure. You can also submit a feature request or issue on the GitHub repository. Engineers check the recommendations, unlike other proprietary software that updates too slowly for market demands and only offers support for existing versions.

There is an active community that helps you adopt Harvester and offers to troubleshoot. If needed, you can buy a support plan to receive round-the-clock assistance from support engineers at SUSE.

Rancher integration

Rancher is an open source platform from SUSE that allows organizations to run containers in clusters while simplifying operations and providing security features. Harvester and Rancher, developed by the same engineering team, work together to manage VMs and Kubernetes clusters across environments in a single pane.

Importing an existing Harvester installation is as easy as clicking a few buttons on the Rancher virtualization management page. The tight integration enables you to use authentication and role-based access control for multitenancy support across Rancher and Harvester.

This integration also allows for multicluster management and load balancing of persistent storage resources in both VM and container environments. You can deploy workloads to existing VMs and containers on edge environments to take advantage of edge processing and data analytics.

Lightweight architecture

Harvester was built with the ethos and design principles of the Cloud Native Computing Foundation (CNCF), so it’s lightweight with a small footprint. Despite that, it’s powerful enough to orchestrate VMs and support edge and core use cases.

The three main components of Harvester are:

  • Kubernetes: Used as the Harvester base to produce an enterprise-grade HCI.
  • Longhorn: Provides distributed block storage for your HCI needs.
  • KubeVirt: Provides a VM management kit on top of Kubernetes for your virtualization needs.

The best part is that you don’t need experience in these technologies to use Harvester.

What Harvester offers

As an HCI solution, Harvester is powerful and easy to use, with a web-based dashboard for managing your infrastructure. It offers a comprehensive set of features, including the following:

VM lifecycle management

If you’re creating Windows or Linux VMs on the host, Harvester supports cloud-init, which allows you to assign a startup script to a VM instance that runs when the VM boots up.

The custom cloud-init startup scripts can contain custom user data or network configuration and are inserted into a VM instance using a temporary disc. Using the QEMU guest agent means you can dynamically inject SSH keys through the dashboard to your VM via cloud-init.

Destroying and creating a VM is a click away with a clearly defined UI.

VM live migration support

VMs inside Harvester are created on hosts or bare-metal infrastructure. One of the essential tasks in any infrastructure is reducing downtime and increasing availability. Harvester offers a high-availability solution with VM live migration.

If you want to move your VM to Host 1 while maintaining Host 2, you only need to click migrate. After the migration, your memory pages and disc block are transferred to the new host.

Supported VM backup and restore

Backing up a VM allows you to restore it to a previous state if something goes wrong. This backup is crucial if you’re running a business or other critical application on the machine; otherwise, you could lose data or necessary workflow time if the machine goes down.

Harvester allows you to easily back up your machines in Amazon Simple Storage Service (Amazon S3) or network-attached storage (NAS) devices. After configuring your backup target, click Take Backup on the virtual machine page. You can use the backup to replace or restore a failed VM or create a new machine on a different cluster.

Network interface controllers

Harvester offers a CNI plug-in to connect network providers and configuration management networks. There are two network interface controllers available, and you can choose either or both, depending on your needs.

Management network

This is the default networking method for a VM, using the eth0 interface. The network configures using Canal CNI plug-ins. A VM using this network changes IP after a reboot while only allowing access within the cluster nodes because there’s no DHCP server.

Secondary network

The secondary network controller uses the Multus and bridge CNI plug-ins to implement its customized Layer 2 bridge VLAN. VMs are connected to the host network via a Linux bridge and are assigned IPv4 addresses.

IPv4 addresses’ VMs are accessed from internal and external networks using the physical switch.

When to use Harvester

There are multiple use cases for Harvester. The following are some examples:

Host management

Harvester dashboards support viewing infrastructure nodes from the host page. Kubernetes has HCI built-in, which makes live migrations, like Features, possible. And Kubernetes provides fault tolerance to keep your workloads in other nodes running if one node goes down.

VM management

Harvester offers flexible VM management, with the ability to create Windows or Linux VMs easily and quickly. You can mount volumes to your VM if needed and switch between the administration and a secondary network, according to your strategy.

As noted above, live migration, backups, and cloud-init help manage VM infrastructure.

Monitoring

Harvester has built-in monitoring integration with Prometheus and Grafana, which installs automatically during setup. You can observe CPU, memory, storage metrics, and more detailed metrics, such as CPU utilization, load average, network I/O, and traffic. The metrics included are host level and specific VM level.

These stats help ensure your cluster is healthy and provide valuable details when troubleshooting your hosts or machines. You can also pop out the Grafana dashboard for more detailed metrics.

Conclusion

Harvester is the HCI solution you need to manage and improve your hyperconverged infrastructure. The open source tool provides storage, network and computes in a single pane that’s scalable, reliable, and easy to use.

Harvester is the latest innovation brought to you by SUSE. This open source leader provides enterprise Linux solutions, such as Rancher and K3s, designed to help organizations more easily achieve digital transformation.

Get started

For more on Harvester or to get started, check the official documentation.

What is GitOps?

Monday, 30 May, 2022

If you are new to the term ‘GitOps,’ it can be quite challenging to imagine how the two models, Git and Ops, come together to function as a single framework. Git is a source code management tool introduced in 2005 that has become the go-to standard for many software development teams. On the other hand, Ops is a term typically used to describe the functions and practices that fall under the purview of IT operations teams and the more modern DevOps philosophies and methods. GitOps is a paradigm that Alexis Richardson from the Weaveworks team coined to describe the deployment of immutable infrastructure with Git as the single source of truth.

In this article, I will cover GitOps as a deployment pattern and its components, benefits and challenges.

What is GitOps?

GitOps requires you to describe and observe systems with declarative configurations that will form the basis of continuous integration, delivery and deployment of your infrastructure. The desired state of the infrastructure or application is stored as code, then associated platforms like Kubernetes (K8s) reconcile the differences and update the infrastructure or application state. Kubernetes is the choice ecosystem for GitOps providers and practitioners because of this declarative requirement. FleetFluxCDArgoCD and Jenkins X are examples of GitOps tools or operators.

Infrastructure as Code

GitOps builds on DevOps practices surrounding version control, code review collaboration and CI/CD. These practices extend to the automation of infrastructure and application deployments, defined using Infrastructure as Code (IaC) techniques. The main idea behind IaC is to enable writing and executing code to define, deploy, update and destroy infrastructure. IaC presents a different way of thinking and treating all aspects of operations as software, even those that represent hardware.

There are five broad categories of tools used to configure and orchestrate infrastructure and application stacks:

  • Ad hoc scripts: The most straightforward approach to automating anything is to write an ad hoc script. Take any manual task and break it down into discrete steps. Use scripting languages like Bash, Ruby and Python to define each step in code and execute that script on your server.
  • Configuration management tools: Chef, Puppet, Ansible, and SaltStack are all configuration management tools designed to install and configure software on existing servers that perpetually exist.
  • Server templating tools: An alternative to configuration management that’s growing in popularity is server templating tools such as DockerPacker and Vagrant. Instead of launching and then configuring servers, the idea behind server templating is to create an image of a server that captures a fully self-contained “snapshot” of the operating system (OS), the software, the files and all other relevant dependencies.
  • Orchestration toolsKubernetes is an example of an orchestration tool. Kubernetes allows you to define how to manage containers as code. You first deploy the Kubernetes cluster, a group of servers that Kubernetes will manage and use to run your Docker containers. Most major cloud providers have native support for deploying managed Kubernetes clusters, such as Amazon Elastic Container Service for Kubernetes (Amazon EKS), Google Kubernetes Engine (GKE), and Azure Kubernetes Service (AKS).
  • IaC Provisioning tools: Whereas configuration management, server templating, and orchestration tools define the code that runs on each server or container, IaC provisioning tools such as TerraformAWS CloudFormation and OpenStack Heat define infrastructure configuration across public clouds and data centers. You use such tools to create servers, databases, caches, load balancers, queues, monitoring, subnet configurations, firewall settings, routing rules and Secure Sockets Layer (SSL) certificates.

Of the IaC tools listed above, Kubernetes is most associated with GitOps due to its declarative piece of infrastructure.

Immutable Infrastructure

The term immutable infrastructure, also commonly known as immutable architecture, is a bit misleading. The concept does not mean that infrastructure never changes, but rather, once something is instantiated, it should never change. Instead, it should be replaced by another instance to ensure predictable behavior. Following this approach enables discrete versioning in an architecture. With discrete versioning, there is less risk and complexity because the infrastructure states are tested and have a greater degree of predictability. This is one of the main goals an immutable architecture tries to accomplish.

The GitOps model supports immutable architectures because all the infrastructure is declared as source code in a versioning system. In the context of Kubernetes, this approach allows software teams to produce more reliable cluster configurations that can be tested and versioned from a single source of truth in a Git repository.

Immutable vs. Mutable Architecture

The Declarative Deployment Model

Regarding automating deployments, there are two main DevOps approaches to consider: declarative and imperative. In an imperative (or procedural approach), a team is responsible for defining the main goal in a step-by-step process. These steps include instructions such as software installation, configuration, creation, etc. These steps will then be executed in an automated way. The state of the environment will result from the operations defined by the responsible DevOps team. This paradigm may work well with small workloads but doesn’t scale well and may introduce several failures with large software environments.

In contrast, a declarative approach eliminates the need to define steps for the desired outcome. Instead, the final desired state is what is declared or defined. The relevant team will specify the number of Pods deployed for an application, how the Pods will be deployed, how they will scale, etc. The steps to achieve these goals don’t have to be defined. With the declarative approach, a lot of time is saved, and the complex steps are abstracted away. The focus shifts from the ‘how’ to the ‘what.’

Most cloud infrastructures that existed before Kubernetes was released provided a procedural approach for automating deployment activities. Examples of these include scripting languages such as Ansible, Chef, and Puppet. Kubernetes, on the other hand, uses a declarative approach to describe what the desired state of the system should be. GitOps and K8s fit naturally. Common Git operations control the deployment of declarative Kubernetes manifest files.

GitOps CI/CD Sequence Example

Below is a high-level sequence demonstrating what a GitOps CI/CD workflow would look like when deploying a containerized application to a Kubernetes environment. The diagrams below are a representation of this:

Pull Request & Code Review

A CI/CD pipeline typically begins with a software developer creating a pull request, which will then be peer-reviewed to ensure it meets the agreed-upon standards. This collaborative effort is used to maintain good coding practices by the team and act as a first quality gate for the desired infrastructure deployment.

Build, Test and Push Docker Container Images

The Continuous Integration (CI) stage will automatically be triggered if the pipeline is configured to initiate based on the source changes. This usually requires setting the pipeline to poll for any source changes in the relevant branch of the repository. Once the source has been pulled, the sequence will proceed as follows:

  • Build Image for Application Tests: In this step, the relevant commands will be run to build and tag the Docker image. The image built in this step will be based on a Dockerfile with an execution command to run unit tests.

  • Build Production Image: Assuming the application unit tests passed, the final Docker image can be built and tagged with the new version using the production-grade Dockerfile with an execution command to start the application.

  • Push Production Container Image to Registry: Lastly, the Docker image will be pushed to the relevant Docker registry (i.e., Docker Hub) for Kubernetes to orchestrate the eventual deployment of the application.

Clone Config Repository, Update Manifests and Push To Config Repository

Once the image has been successfully built and pushed to the appropriate registry, the application manifest files must be updated with the new Docker image tag.

  • Clone Config Repository: In this step, the repository with the K8s resource definitions will be cloned. This will usually be a repository with Helm charts for the application resources and configurations.

  • Update Manifests: Once the repository has been cloned, a configuration management tool like Kustomize can update the manifests with the new Docker image tag.

  • Push to Config Repository: Lastly, these changes can be committed and pushed to the remote config repository with the new updates.

GitOps Continuous Delivery Process

The Continuous Delivery (CD) process follows when the CI completes the config repository updates. As stated earlier, the GitOps framework and its stages are triggered by changes to the manifests in the Git repository. This is where the aforementioned GitOps tools come in. In this case, I will use Fleet as an example.

Fleet is essentially a set of K8s custom resource definitions (CRDs) and custom controllers that manage GitOps for a single or multiple Kubernetes clusters. Fleet consists of the following core components in its architecture:

  • Fleet Manager: This is the central component that governs the deployments of K8s resources from the Git repository. When deploying resources to multiple clusters, this component will reside on a dedicated K8s cluster. In a single cluster setup, the Fleet manager will run on the same cluster being managed by GitOps.
  • Fleet Controller: The Fleet controllers run on the Fleet manager that performs the GitOps actions.
  • Fleet Agent: Each downstream cluster being managed by Fleet runs an agent that communicates with the Fleet manager.
  • GitRepo: Git repositories being watched by Fleet are represented by the type GitRepo.
  • Bundle: When the relevant Git repository is pulled, the sourced configuration files produce a unit referred to as a Bundle. Bundles are the deployment units used in Fleet.
  • Bundle Deployment: A BundleDeployment represents the state of the deployed Bundle on a cluster with its specific customizations.

  • Scan Config Repository: Based on polling configurations, Fleet detects the changes in the config repository before performing a Git pull (or scan) to fetch the latest manifests.

  • Discover Manifests: Fleet determines any differences between the manifests in the Kubernetes cluster versus the latest manifests in the repository. The discovered manifests or Helm charts will be used to produce a Bundle.

  • Helm Release: When the Fleet operator detects the differences, it will convert the new manifests into Helm charts (regardless of the source) and perform a Helm release to the downstream clusters.

The Benefits of GitOps

Infrastructure as Code

Infrastructure as Code is one of the main components of GitOps. Using IaC to automate the process of creating infrastructure in cloud environments has the following advantages:

  • Reliable outcomes: When the correct process of creating infrastructure is saved in the form of code, software teams can have a reliable outcome whenever the same version of code is run.

  • Repeatable outcomes: Manually creating infrastructure is time-consuming, inefficient, and prone to human error. Using IaC enables a reliable outcome and makes the process of deploying infrastructure easily repeatable across environments.

  • Infrastructure Documentation: By defining the resources to be created using IaC, the code is a form of documentation for the environment’s infrastructure.

Code Reviews

The quality gate that code reviews bring to software teams can be translated to DevOps practices with infrastructure. For instance, changes to a Kubernetes cluster through the use of manifests or Helm charts would go through a review and approval process to meet certain criteria before deployment.

Declarative Paradigm

The declarative approach to programming in GitOps simplifies the process of creating the desired state for infrastructure. It produces a more predictable and reliable outcome in contrast to defining each step of the desired state procedurally.

Better Observability

Observability is an important element when describing the running state of a system and triggering alerts and notifications whenever unexpected behavioral changes occur. On this basis, any deployed environment should be observed by DevOps engineers. With GitOps, engineers can more easily verify if the running state matches that of the desired state in the source code repository.

The Challenges with GitOps

Collaboration Requirements

Following a GitOps pattern requires a culture shift within teams. In the case of individuals who are used to making quick manual changes on an ad hoc basis, this transition will be disruptive. In practice, teams should not be able to log in to a Kubernetes cluster to modify resource definitions to initiate a change in the cluster state. Instead, desired changes to the cluster should get pushed to the appropriate source code repository. These changes to the infrastructure go through a collaborative approval process before being merged. Once merged, the changes are deployed. This workflow sequence introduces a “change by committee” to any infrastructure changes, which is more time-consuming for teams, even if it’s better to practice.

GitOps Tooling Limitations

Today, GitOps tooling such as Fleet, FluxCD, ArgoCD and Jenkins X focuses on the Kubernetes ecosystem. This means that adopting GitOps practices with infrastructure platforms outside of Kubernetes will likely require additional work from DevOps teams. In-house tools may have to be developed to support the usage of this framework, which is less appealing for software teams because of the time it will take away from other core duties.

Declarative Infrastructure Limitations

As highlighted above, embracing GitOps requires a declarative model for deploying the infrastructure. However, there may be use cases where the declared state cannot define some infrastructure requirements. For example, in Kubernetes, you can set the number of replicas, but if a scaling event needs to occur based on CPU and memory that surpasses that replica, you end up with a deviation. Also, declarative configurations can be harder to debug and understand when the results are unexpected because the underlying steps are abstracted away.

No Universal Best Practices

Probably the most glaring issue with GitOps can be attributed to its novelty. At this point, there are no universal best practices that teams can follow when implementing this pattern. As a result, teams will have to implement a GitOps strategy based on their specific requirements and figure out what works best.

Conclusion

GitOps may be in its infancy, but the pattern extends the good old benefits of discrete and immutable versioning from software applications to infrastructure. It introduces automation, reliability, and predictability to the underlying infrastructure deployed to cloud environments.

What’s Next?

Get hands-on with GitOps. Join our free Accelerate Dev Workflows class. Week three is all about Continuous Deployment and GitOps. You can catch it on demand.

The History of Cloud Native

Wednesday, 13 April, 2022

Cloud native is a term that’s been around for many years but really started gaining traction in 2015 and 2016. This could be attributed to the rise of Docker, which was released a few years prior. Still, many organizations started becoming more aware of the benefits of running their workloads in the cloud. Whether because of cost savings or ease of operations, companies were increasingly looking into whether they should be getting on this “cloud native” trend.

Since then, it’s only been growing in popularity. In this article, you’ll get a brief history of what cloud native means—from running applications directly on hosts before moving to a hybrid approach to how we’re now seeing companies born in the cloud. We’ll also cover the “cloud native” term itself, as the definition is something often discussed.

Starting with data centers

In the beginning, people were hosting their applications using their own servers in their own data centers. That might be a bit of an exaggeration in some cases, but what I mean is that specific servers were used for specific applications.

For a long time, running an application meant using an entire host. Today, we’re used to virtualization being the basis for pretty much any workload. If you’re running Windows Subsystem for Linux 2, even your Windows installation is virtualized; this hasn’t always been the case. Although the principle of virtualization has been around since the 60s, it didn’t start taking off in servers before the mid-2000s

Launching a new application meant you had to buy a new server or even an entirely new rack for it. In the early 2000s, this started changing as virtualization became more and more popular. Now it is possible to spin up applications without buying new hardware.

Applications were still running on-premises, also commonly referred to as “on-prem.” That made it hard to scale applications, and it also meant that you couldn’t pay for resources as you were using them. You had to buy resources upfront, requiring a big cash deposit in advance.

That was one of the big benefits companies saw when cloud computing became a possibility. Now you could pay only for the resources you were using, rather than having to deposit in advance—something very attractive to many companies.

Moving to hybrid

At this point, we’re still far from cloud native being a term commonly used by close to everyone working with application infrastructure. Although the term was being thrown around from the beginning of AWS launching its first beta service (SQS) in 2004 and making it generally available in 2006, companies were still exploring this new trend.

To start with, cloud computing also mostly meant a replica of what you were running on-prem. Most of the advantages came from buying only the resources you needed and scaling your applications. Within the first year of AWS being live, they launched four important services: SQS, EC2, S3 and SimpleDB.

Elastic Compute Cloud (EC2) was, and still is, primarily a direct replica of the traditional Virtual Machine. It allows engineers to perform what’s known as a “lift-and-shift” maneuver. As the name suggests, you lift your existing infrastructure from your data center and shift it to the cloud. This was the case with Simple Storage Service (S3) and SimpleDB, a database platform. At the time, companies could choose between running their applications on-prem or in the cloud, but the advantages weren’t as clear as they are today.

That isn’t to say that the advantages were negligible. Only paying for resources you use and not having to manage underlying infrastructure yourself are attractive qualities. This led to many shifting their workload to the cloud or launching new applications in the cloud directly, arguably the first instances of “cloud native.”

Many companies were now dipping their toes into this hybrid approach of using both hardware on their own premises and cloud resources. Over time, AWS launched more services, making a case for working in the cloud more complex. With the launch of Amazon CloudFront, a Content Delivery Network (CDN) service, AWS provided a service that was certainly possible to run yourself, but where it was much easier to run in the cloud. It wasn’t just whether the workload should be running on-prem or in the cloud; it was a matter of whether the cloud could provide previously unavailable possibilities.

In 2008, Google launched the Google Cloud Platform (GCP), and in 2010 Microsoft launched Azure. With more services launching, the market was gaining competition. Over time, all three providers started providing services specialized to the cloud rather than replicas of what was possible on-prem. Nowadays, you can get services like serverless functions, platforms as a service and much more; this is one of the main reasons companies started looking more into being cloud native.

Being cloud native

Saying that a company is cloud native is tricky because the industry does not have a universal definition. Ask five different engineers what it means to be cloud native, and you’ll get five different answers. Although, generally, you can split it into two camps.

A big part of the community believes that being cloud native just means that you are running your workloads in the cloud, with none of them being on-prem. There’s also a small subsection of this group who will say that you can be partly cloud native, meaning that you have one full application running in the cloud and another application running on-prem. However, some argue that this is still a hybrid approach.

There’s another group of people who believe that to be cloud native, you have to be utilizing the cloud to its full potential. That means that you’re not just using simple services like EC2 and S3 but taking full advantage of what your cloud provider offers, like serverless functions.

Over time, as the cloud becomes more prominent and mature, a third option appears. Some believe that to be cloud native, your company has to be born in the cloud; this is something we see more and more. Companies that have never had a single server running on-prem have launched even their first applications in the cloud.

One of the only things everyone agrees on about cloud native is cloud providers are now so prominent in the industry that anyone working with applications and application infrastructure has to think about it. Every new company has to consider whether they should build their applications using servers hosted on-prem or use services available from a cloud provider.

Even companies that have existed for quite a while are spending a lot of time considering whether it’s time to move their workloads to the cloud; this is where we see the problem of tackling cloud native at scale.

Tackling cloud native at scale

Getting your applications running in the cloud doesn’t have to be a major issue. You can follow the old lift-and-shift approach and move your applications directly to the cloud with the same infrastructure layout you used when running on-prem.

While that will work for most, it defeats some of the purposes of being in the cloud; after all, a couple of big perks of using the cloud are cost savings and resource optimization. One of the first approaches teams usually think about when they want to implement resource optimizations is converting their monolith applications to microservices; whether or not that is appropriate for your organization is an entirely different topic.

It can be tough to split an application into multiple pieces, especially if it’s something that’s been developed for a decade or more. However, the application itself is only one part of why scaling your cloud native journey can become troublesome. You also have to think about deploying and maintaining the new services you are launching.

Suddenly you have to think about scenarios where developers are deploying multiple times a day to many different services, not necessarily hosted on the same types of platforms. On your journey to being cloud native, you’ll likely start exploring paradigms like serverless functions and other specialized services by your cloud provider. Now you need to think about those as well.

My intent is not to scare anyone away from cloud native. These are just examples of what some organizations don’t think about, whether because of priorities or time, that come back to haunt them once they need to scale a certain application.

Popular ways of tackling cloud native at scale

Engineers worldwide are still trying to figure out the best way of being cloud native at scale, and it will likely be an ongoing problem for at least a few more years. However, we’re already seeing some solutions that could shape the future of cloud native.

From the beginning, virtualization has been the key to creating a good cloud environment. It’s mostly been a case of the cloud provider using virtualization and the customer using regular servers as if it were their own hardware. This is changing now that more companies integrate tools like Docker and Kubernetes into their infrastructure.

Now, it’s not only a matter of knowing that your cloud provider uses virtualization under the hood. Developers have to understand how to use virtualization efficiently. Whether it’s with Docker and Kubernetes or something else entirely, it’s a safe bet to say that virtualization is a key concept that will continue to play a major role when tackling cloud native.

Conclusion

In less than two decades, we’ve gone from people buying new servers for each new application launch to considering how applications can be split and scaled individually.

Cloud native is an exciting territory that provides value for many companies, whether they’re born in the cloud or on their way to embracing the idea. It’s an entirely different paradigm from what was common 20 years ago and allows for many new possibilities. It’s thrilling to see what companies have made possible with the cloud, and I’ll be closely watching as companies develop new ideas to scale their cloud workloads.

Let’s continue the conversation! Join the SUSE & Rancher Community where you can further your Kubernetes knowledge and share your experience.

Managing Sensitive Data in Kubernetes with Sealed Secrets and External Secrets Operator (ESO)

Thursday, 31 March, 2022

Having multiple environments that can be dynamically configured has become akin to modern software development. This is especially true in an enterprise context where the software release cycles typically consist of separate compute environments like dev, stage and production. These environments are usually distinguished by data that drives the specific behavior of the application.

For example, an application may have three different sets of database credentials for authentication (AuthN) purposes. Each set of credentials would be respective to an instance for a particular environment. This approach essentially allows software developers to interact with a developer-friendly database when carrying out their day-to-day coding. Similarly, QA testers can have an isolated stage database for testing purposes. As you would expect, the production database environment would be the real-world data store for end-users or clients.

To accomplish application configuration in Kubernetes, you can either use ConfigMaps or Secrets. Both serve the same purpose, except Secrets, as the name implies, are used to store very sensitive data in your Kubernetes cluster. Secrets are native Kubernetes resources saved in the cluster data store (i.e., etcd database) and can be made available to your containers at runtime.

However, using Secrets optimally isn’t so straightforward. Some inherent risks exist around Secrets. Most of which stem from the fact that, by default, Secrets are stored in a non-encrypted format (base64 encoding) in the etcd datastore. This introduces the challenge of safely storing Secret manifests in repositories privately or publicly. Some security measures that can be taken include: encrypting secrets, using centralized secrets managers, limiting administrative access to the cluster, enabling encryption of data at rest in the cluster datastore and enabling TLS/SSL between the datastore and Pods.

In this post, you’ll learn how to use Sealed Secrets for “one-way” encryption of your Kubernetes Secrets and how to securely access and expose sensitive data as Secrets from centralized secret management systems with the External Secrets Operator (ESO).


Using Sealed Secrets for one-way encryption

One of the key advantages of Infrastructure as Code (IaC) is that it allows teams to store their configuration scripts and manifests in git repositories. However, because of the nature of Kubernetes Secrets, this is a huge risk because the original sensitive credentials and values can easily be derived from the base64 encoding format.

``` yaml

apiVersion: v1

kind: Secret

metadata:

  name: my-secret

type: Opaque

data:

  username: dXNlcg==

  password: cGFzc3dvcmQ=

```

Therefore, as a secure workaround, you can use Sealed Secrets. As stated above, Sealed Secrets allow for “one-way” encryption of your Kubernetes Secrets and can only be decrypted by the Sealed Secrets controller running in your target cluster. This mechanism is based on public-key encryption, a form of cryptography consisting of a public key and a private key pair. One can be used for encryption, and only the other key can be used to decrypt what was encrypted. The controller will generate the key pair, publish the public key certificate to the logs and expose it over an HTTP API request.

To use Sealed Secrets, you have to deploy the controller to your target cluster and download the kubeseal CLI tool.

  • Sealed Secrets Controller – This component extends the Kubernetes API and enables lifecycle operations of Sealed Secrets in your cluster.
  • kubeseal CLI Tool – This tool uses the generated public key certificate to encrypt your Secret into a Sealed Secret.

Once generated, the Sealed Secret manifests can be stored in a git repository or shared publicly without any ramifications. When you create these Sealed Secrets in your cluster, the controller will decrypt it and retrieve the original Secret, making it available in your cluster as per norm. Below is a step-by-step guide on how to accomplish this.

To carry out this tutorial, you will need to be connected to a Kubernetes cluster. For a lightweight solution on your local machine, you can use Rancher Desktop.

To download kubeseal, you can select the binary for your respective OS (Linux, Windows, or Mac) from the GitHub releases page. Below is an example for Linux.

``` bash

wget https://github.com/bitnami-labs/sealed-secrets/releases/download/v0.17.3/kubeseal-linux-amd64 -O kubeseal

sudo install -m 755 kubeseal /usr/local/bin/kubeseal

```

Installing the Sealed Secrets Controller can either be done via Helm or kubectl. This example will use the latter. This will install Custom Resource Definitions (CRDs), RBAC resources, and the controller.

``` bash

wget https://github.com/bitnami-labs/sealed-secrets/releases/download/v0.16.0/controller.yaml

kubectl apply -f controller.yaml

```

You can ensure that the relevant Pod is running as expected by executing the following command:

``` bash

kubectl get pods -n kube-system | grep sealed-secrets-controller

```

Once it is running, you can retrieve the generated public key certificate using kubeseal and store it on your local disk.

``` bash

kubeseal --fetch-cert > public-key-cert.pem

```

You can then create a Secret and seal it with kubeseal. This example will use the manifest detailed at the start of this section, but you can change the key-value pairs under the data field as you see fit.

``` bash

kubeseal --cert=public-key-cert.pem --format=yaml < secret.yaml > sealed-secret.yaml

```

The generated output will look something like this:

``` yaml

apiVersion: bitnami.com/v1alpha1

kind: SealedSecret

metadata:

  creationTimestamp: null

  name: my-secret

  namespace: default

spec:

  encryptedData:

    password: AgBvA5WMunIZ5rF9...

    username: AgCCo8eSORsCbeJSoRs/...

  template:

    data: null

    metadata:

      creationTimestamp: null

      name: my-secret

      namespace: default

    type: Opaque

```

This manifest can be used to create the Sealed Secret in your cluster with kubectl and afterward stored in a git repository without the concern of any individual accessing the original values.

``` bash

kubectl create -f sealed-secret.yaml

```

You can then proceed to review the secret and fetch its values.

``` bash

kubectl get secret my-secret -o jsonpath="{.data.user}" | base64 --decode

kubectl get secret my-secret -o jsonpath="{.data.password}" | base64 --decode

```


Using External Secrets Operator (ESO) to access Centralized Secrets Managers

Another good practice for managing your Secrets in Kubernetes is to use centralized secrets managers. Secrets managers are hosted third-party platforms used to store sensitive data securely. These platforms typically offer encryption of your data at rest and expose an API for lifecycle management operations such as creating, reading, updating, deleting, or rotating secrets. In addition, they have audit logs for trails and visibility and fine-grained access control for operations of stored secrets. Examples of secrets managers include HashiCorp Vault, AWS Secrets Manager, IBM Secrets Manager, Azure Key Vault, Akeyless, Google Secrets Manager, etc. Such systems can put organizations in a better position when centralizing the management, auditing, and securing secrets. The next question is, “How do you get secrets from your secrets manager to Kubernetes?” The answer to that question is the External Secrets Operator (ESO).

The External Secrets Operator is a Kubernetes operator that enables you to integrate and read values from your external secrets management system and insert them as Secrets in your cluster. The ESO extends the Kubernetes API with the following main API resources:

  • SecretStore – This is a namespaced resource that determines how your external Secret will be accessed from an authentication perspective. It contains references to Secrets that have the credentials to access the external API.
  • ClusterSecretStore – As the name implies, this is a global or cluster-wide SecretStore that can be referenced from all namespaces to provide a central gateway to your secrets manager.
  • ExternalSecret – This resource declares the data you want to fetch from the external secrets manager. It will reference the SecretStore to know how to access sensitive data.

Below is an example of how to access data from AWS Secrets Manager and make it available in your K8s cluster as a Secret. As a prerequisite, you will need to create an AWS account. A free-tier account will suffice for this demonstration.

You can create a secret in AWS Secrets Manager as the first step. If you’ve got the AWS CLI installed and configured with your AWS profile, you can use the CLI tool to create the relevant Secret.

``` bash

aws secretsmanager create-secret --name <name-of-secret> --description <secret-description> --secret-string <secret-value> --region <aws-region>

```

Alternatively, you can create the Secret using the AWS Management Console.

As you can see in the images above, my Secret is named “alias” and has the following values:

``` json

{

  "first": "alpha",

  "second": "beta"

}

```

After you’ve created the Secret, create an IAM user with programmatic access and safely store the generated AWS credentials (access key ID and a secret access key). Make sure to limit this user’s service and resource permissions in a custom IAM Policy.

``` json

{

  "Version": "2012-10-17",

  "Statement": [

    {

      "Effect": "Allow",

      "Action": [

        "secretsmanager:GetResourcePolicy",

        "secretsmanager:GetSecretValue",

        "secretsmanager:DescribeSecret",

        "secretsmanager:ListSecretVersionIds"

      ],

      "Resource": [

        "arn:aws:secretsmanager:<aws-region>:<aws-account-id>:secret:<secret-name>",

      ]

    }

  ]

}

```

Once that is done, you can install the ESO with Helm.

``` bash

helm repo add external-secrets https://charts.external-secrets.io


helm install external-secrets \

   external-secrets/external-secrets \

    -n external-secrets \

    --create-namespace

```

Next, you can create the Secret that the SecretStore resource will reference for authentication. You can optionally seal this Secret using the approach demonstrated in the previous section that deals with encrypting Secrets with kubeseal.

``` yaml

apiVersion: v1

kind: Secret

metadata:

  name: awssm-secret

type: Opaque

data:

  accessKeyID: PUtJQTl11NKTE5...

  secretAccessKey: MklVpWFl6f2FxoTGhid3BXRU1lb1...

```

If you seal your Secret, you should get output like the code block below.

``` yaml

apiVersion: bitnami.com/v1alpha1

kind: SealedSecret

metadata:

  creationTimestamp: null

  name: awssm-secret

  namespace: default

spec:

  encryptedData:

    accessKeyID: Jcl1bC6LImu5u0khVkPcNa==...

    secretAccessKey: AgBVMUQfSOjTdyUoeNu...

  template:

    data: null

    metadata:

      creationTimestamp: null

      name: awssm-secret

      namespace: default

    type: Opaque

```

Next, you need to create the SecretStore.

``` yaml

apiVersion: external-secrets.io/v1alpha1

kind: SecretStore

metadata:

  name: awssm-secretstore

spec:

  provider:

    aws:

      service: SecretsManager

      region: eu-west-1

      auth:

        secretRef:

          accessKeyIDSecretRef:

            name: awssm-secret

            key: accessKeyID

          secretAccessKeySecretRef:

            name: awssm-secret

            key: secretAccessKey

```

The last resource to be created is the ExternalSecret.

``` yaml

apiVersion: external-secrets.io/v1alpha1

kind: ExternalSecret

metadata:

  name: awssm-external-secret

spec:

  refreshInterval: 1440m

  secretStoreRef:

    name: awssm-secretstore

    kind: SecretStore

  target:

    name: alias-secret

    creationPolicy: Owner

  data:

  - secretKey: first

    remoteRef:

      key: alias

      property: first

  - secretKey: second

    remoteRef:

      key: alias

      property: second

```

You can then chain the creation of these resources in your cluster with the following command:

``` bash

kubectl create -f sealed-secret.yaml,secret-store.yaml,external-secret.yaml

```

After this execution, you can review the results using any of the approaches below.

``` bash

kubectl get secret alias-secret -o jsonpath="{.data.first}" | base64 --decode

kubectl get secret alias-secret -o jsonpath="{.data.second}" | base64 --decode

```

You can also create a basic Job to test its access to these external secrets values as environment variables. In a real-world scenario, make sure to apply fine-grained RBAC rules to Service Accounts used by Pods. This will limit the access that Pods have to the external secrets injected into your cluster.

``` yaml

apiVersion: batch/v1

kind: Job

metadata:

  name: job-with-secret

spec:

  template:

    spec:

      containers:

        - name: busybox

          image: busybox

          command: ['sh', '-c', 'echo "First comes $ALIAS_SECRET_FIRST, then comes $ALIAS_SECRET_SECOND"']

          env:

            - name: ALIAS_SECRET_FIRST

              valueFrom:

                secretKeyRef:

                  name: alias-secret

                  key: first

            - name: ALIAS_SECRET_SECOND

              valueFrom:

                secretKeyRef:

                  name: alias-secret

                  key: second

      restartPolicy: Never

  backoffLimit: 3

```

You can then view the logs when the Job has been completed.

Conclusion

In this post, you learned that using Secrets in Kubernetes introduces risks that can be mitigated with encryption and centralized secrets managers. Furthermore, we covered how Sealed Secrets and the External Secrets Operator can be used as tools for managing your sensitive data. Alternative solutions that you can consider for encryption and management of your Secrets in Kubernetes are Mozilla SOPS and Helm Secrets. If you’re interested in a video walk-through of this post, you can watch the video below.

Let’s continue the conversation! Join the SUSE & Rancher Community, where you can further your Kubernetes knowledge and share your experience.

Kubernetes Cloud Deployments with Terraform

Monday, 28 March, 2022

Kubernetes is a rich ecosystem, and the native YAML or JSON manifest files remain a popular way to deploy applications. YAML’s support for multi-document files makes it often possible to describe complex applications with a single file. The Kubernetes CLI also allows for many individual YAML or JSON files to be applied at once by referencing their parent directory, reducing most Kubernetes deployments to a single kubectl call.  

However, anyone who frequently deploys applications to Kubernetes will discover the limitations of static files. 

The most obvious limitation is that images and their tags are hard coded as part of a pod, deployment, stateful set or daemon set resource. Updating the image tag in a Kubernetes resource file as a CI/CD pipeline that generates new images requires custom scripting, as there is no native solution. 

Helm offers a solution thanks to its ability to generate YAML from template files. But Helm doesn’t solve another common scenario where Kubernetes deployments depend on external platforms. Databases are a common example, as hosted platforms like AWS RDS or Azure SQL Database offer features that would be difficult to replicate in your own Kubernetes cluster.  

Fortunately, Terraform provides a convenient solution to all these scenarios. Terraform exposes a common declarative template syntax for all supported platforms, maintains state between deployments, and includes integrated variable support allowing frequently updated values (like image tags) to be passed at deployment time. Terraform also supports a wide range of platforms, including Kubernetes and cloud providers, so your deployments can be described and deployed with a single tool to multiple platforms. 

This post will teach you how to deploy WordPress to Kubernetes with an RDS database using Terraform. 


Prerequisites 

To follow along with this post, you’ll need to have Terraform installed. The Terraform website has instructions for installing the Terraform CLI in major operating systems. 

You’ll also deploy an RDS database in AWS. To grant Terraform access to your AWS infrastructure, you’ll need to configure the AWS CLI or define the AWS environment variables. 

Terraform will then install WordPress to an existing Kubernetes cluster. K3s is a good choice for anyone looking to test Kubernetes deployments, as it creates a cluster on your local PC with a single command. 

The code shown in this post is available from GitHub. 


Defining the Terraform providers 

To start, create a file called providers.tf. This will house the provider configuration. 

Providers are like plugins that allow Terraform to manage external resources. Both AWS and Kubernetes have providers created by Hashicorp. The providers are defined in the required_providers block, which allows Terraform to download the providers if they are not already available on your system: 

terraform { 

  required_providers { 

    aws = { 

      source  = "hashicorp/aws" 

    } 

    kubernetes = { 

      source  = "hashicorp/kubernetes" 

    } 

  } 


Configuring state 

Terraform persists the state of any resources it creates between executions in a backend. By default, the state will be saved locally, but since you are working with AWS, it is convenient to save the state in a shared S3 bucket. This way, if Terraform is executed as part of a CI/CD workflow, the build server can access the shared state files. 

The following configuration defines the bucket and region where the Terraform state will be saved. You’ll need to choose your own bucket, as S3 buckets require universally unique names, and so the name I’ve chosen here won’t be available: 

  backend "s3" { 

    bucket = "mattc-tf-bucket" 

    key    = "wordpress" 

    region = "us-west-2" 

  } 

} 


Configuring the providers 

Then the providers are configured. Here you set the default region for AWS and configure the Kubernetes provider to access the cluster defined in the local config file: 

provider "aws" { 

  region = "us-west-2" 

} 


provider "kubernetes" { 

  # Set this value to "/etc/rancher/k3s/k3s.yaml" if using K3s 

  config_path    = "~/.kube/config" 

} 


There are many different ways to access a Kubernetes cluster, and the Kubernetes provider has many different authentication options. You may want to use some of these alternative configuration options to connect to your cluster. 


Creating a VPC 

Your RDS database requires a VPC. The VPC is created with a module that abstracts away many of the finer points of AWS networking. All you need to do is give the VPC a name, define the VPC CIDR block, enable DNS support (RDS requires this), set the subnet availability zones and define the subnet CIDR blocks. 

Add the following code to a file called vpc.tf to create a VPC to host the RDS database: 

module "vpc" { 

  source = "terraform-aws-modules/vpc/aws" 


  name = "my-vpc" 

  cidr = "10.0.0.0/16" 


  enable_dns_hostnames = true 

  enable_dns_support   = true 


  azs             = ["us-west-2a", "us-west-2b"] 

  public_subnets  = ["10.0.101.0/24", "10.0.102.0/24"] 

} 


Create the database security group 

You’ll need to define a security group to grant access to the RDS database. Security groups are like firewalls that permit or deny network traffic. You’ll create a new security group with the security group module.  

For this example, you’ll grant public access to port 3306, the default MySQL port. Add the following code to the sg.tf file: 

module "mysql_sg" { 

  source = "terraform-aws-modules/security-group/aws" 


  name        = "mysql-service" 

  description = "Allows access to MySQL" 

  vpc_id      = module.vpc.vpc_id 


  ingress_with_cidr_blocks = [ 

    { 

      from_port   = 3306 

      to_port     = 3306 

      protocol    = "tcp" 

      description = "MySQL" 

      cidr_blocks = "0.0.0.0/0" 

    } 

  ] 

} 

Create the RDS instance 

With the VPC and security group configured, you can now create a MySQL RDS instance. This is done with the RDS module. 

Save the following to the file rds.tf to create a small MySQL RDS instance with public access in the VPC and with the security group created in the previous sections: 

module "db" { 

  source  = "terraform-aws-modules/rds/aws" 


  identifier = "wordpress" 


  publicly_accessible = true 


  engine            = "mysql" 

  engine_version    = "5.7.25" 

  instance_class    = "db.t3.small" 

  allocated_storage = 5 


  db_name  = "wordpress" 

  username = "user" 

  port     = "3306" 


  iam_database_authentication_enabled = true 


  vpc_security_group_ids = [module.mysql_sg.security_group_id] 


  maintenance_window = "Mon:00:00-Mon:03:00" 

  backup_window      = "03:00-06:00" 


  # DB subnet group 

  create_db_subnet_group = true 

  subnet_ids             = [module.vpc.public_subnets[0], module.vpc.public_subnets[1]] 


  # DB parameter group 

  family = "mysql5.7" 


  # DB option group 

  major_engine_version = "5.7" 

} 

Deploy WordPress to Kubernetes 

You now have all the AWS resources required to support a WordPress installation. WordPress itself will be hosted as a Kubernetes deployment and exposed by a Kubernetes service. 

The AWS resources in the previous sections were created via Terraform modules, which usually group together many related resources deployed with each other to create common infrastructure stacks. 

There is no need to use modules to deploy the Kubernetes resources, though. Kubernetes has already abstracted away much of the underlying infrastructure behind resources like pods and deployments. The Terraform provider exposes Kubernetes resources almost as you would find them in a YAML file. 

Terraform HCL files are far more flexible than the plain YAML used by Kubernetes. In the template below, you can see that the image being deployed is defined as wordpress:${var.wordpress_tag}, where wordpress_tag is a Terraform variable. You will also notice several environment variables defined with the values returned by creating the AWS RDS instance. For example, the database hostname is set as module.db.db_instance_address, which is the RDS instance address returned by the db module. 

Create the following template in a file called wordpress.tf:

resource "kubernetes_deployment" "wordpress" { 

  metadata { 

    name      = "wordpress" 

    namespace = "default" 

  } 

  spec { 

    replicas = 1 

    selector { 

      match_labels = { 

        app = "wordpress" 

      } 

    } 

    template { 

      metadata { 

        labels = { 

          app = "wordpress" 

        } 

      } 

      spec { 

        container { 

          image = "wordpress:${var.wordpress_tag}" 

          name  = "wordpress" 

          port { 

            container_port = 80 

          } 

          env { 

            name = "WORDPRESS_DB_HOST" 

            value = module.db.db_instance_address 

          } 

          env { 

            name = "WORDPRESS_DB_PASSWORD" 

            value = module.db.db_instance_password 

          } 

          env { 

            name = "WORDPRESS_DB_USER" 

            value = module.db.db_instance_username 

          } 

        } 

      } 

    } 

  } 

} 


resource "kubernetes_service" "wordpress" { 

  metadata { 

    name      = "wordpress" 

    namespace = "default" 

  } 

  spec { 

    selector = { 

      app = kubernetes_deployment.wordpress.spec.0.template.0.metadata.0.labels.app 

    } 

    type = "ClusterIP" 

    port { 

      port        = 80 

      target_port = 80 

    } 

  } 

} 


Defining variables 

The final step is to expose the variables used by the Terraform deployment. As noted in the previous section, the WordPress image tag deployed by Terraform is defined in the variable wordpress_tag. 

Save the following template to a file called vars.tf: 

variable "wordpress_tag" { 

  type = string 

  default = "4.8-apache" 

} 


Deploying the resources 

Ensure you have a valid Kubernetes configuration file saved at ~/.kube/config and have configured the AWS CLI (see the prerequisites section for more information). Then instruct Terraform to download the providers by running the command: 

terraform init 


To deploy the resources without any additional prompts, run the command: 

terraform apply --auto-approve 


At this point, Terraform will proceed to deploy the AWS and Kubernetes resources, giving you a complete infrastructure stack with two simple commands. 

To define the wordpress image tag used by the deployment, set the wordpress_tag variable with the -var argument: 

terraform apply --auto-approve -var "wordpress_tag=5.9.0-apache" 


Conclusion 

The ability to deploy multiple resources across many platforms is a powerful feature of Terraform. It allows DevOps teams to use the best solution for the job rather than limit themselves to the features of any single platform. In addition, Terraform’s support for variables allows commonly updated fields, like image tags, to be defined at deployment time. 

In this post, you learned how to use Terraform to deploy WordPress to Kubernetes backed by an AWS RDS database, taking advantage of variables to define the WordPress version at deployment time.

Let’s continue the conversation! Join the SUSE & Rancher Community where you can further your Kubernetes knowledge and share your experience.

Running Serverless Applications on Kubernetes with Knative

Friday, 11 March, 2022

Kubernetes provides a set of primitives to run resilient, distributed applications. It takes care of scaling and automatic failover for your application and it provides deployment patterns and APIs that allow you to automate resource management and provision new workloads.

One of the main challenges that developers face is how to focus more on the details of the code rather than the infrastructure where that code runs. For that, serverless is one of the leading architectural paradigms to address this challenge. There are various platforms that allow you to run serverless applications either deployed as single functions or running inside containers, such as AWS Lambda, AWS Fargate, and Azure Functions. These managed platforms come with some drawbacks like:

-Vendor lock-in

-Constraint in the size of the application binary/artifacts

-Cold start performance

You could be in a situation where you’re only allowed to run applications within a private data center, or you may be using Kubernetes but you’d like to harness the benefits of serverless. There are different open source platforms, such as Knative and OpenFaaS, that use Kubernetes to abstract the infrastructure from the developer, allowing you to deploy and manage your applications using serverless architecture and patterns. Using any of those platforms takes away the problems mentioned in the previous paragraph.

This article will show you how to deploy and manage serverless applications using Knative and Kubernetes.

Serverless Landscape

Serverless computing is a development model that allows you to build and run applications without having to manage servers. It describes a model where a cloud provider handles the routine work of provisioning, maintaining, and scaling the server infrastructure, while the developers can simply package and upload their code for deployment. Serverless apps can automatically scale up and down as needed, without any extra configuration by the developer.

As stated in a white paper by the CNCF serverless working group, there are two primary serverless personas:

-Developer: Writes code for and benefits from the serverless platform that provides them with the point of view that there are no servers and that their code is always running.

-Provider: Deploys the serverless platform for an external or internal customer.

The provider needs to manage servers (or containers) and will have some cost for running the platform, even when idle. A self-hosted system can still be considered serverless: Typically, one team acts as the provider and another as the developer.

In the Kubernetes landscape, there are various ways to run serverless apps. It can be through managed serverless platforms like IBM Cloud Code and Google Cloud Run, or open source alternatives that you can self-host, such as OpenFaaS and Knative.

Introduction to Knative

Knative is a set of Kubernetes components that provides serverless capabilities. It provides an event-driven platform that can be used to deploy and run applications and services that can auto-scale based on demand, with out-of-the-box support for monitoring, automatic renewal of TLS certificates, and more.

Knative is used by a lot of companies. In fact, it powers the Google Cloud Run platform, IBM Cloud Code Engine, and Scaleway serverless functions.

The basic deployment unit for Knative is a container that can receive incoming traffic. You give it a container image to run and Knative handles every other component needed to run and scale the application. The deployment and management of the containerized apps are handled by one of the core components of Knative, called Knative Serving. Knative Serving is the component in Knative that manages the deployment and rollout of stateless services, plus its networking and autoscaling requirements.

The other core component of Knative is called Knative Eventing. This component provides an abstract way to consume Cloud Events from internal and external sources without writing extra code for different event sources. This article focuses on Knative Serving but you will learn about how to use and configure Knative Eventing for different use-cases in a future article.

Development Set Up

In order to install Knative and deploy your application, you’ll need a Kubernetes cluster and the following tools installed:

-Docker

-kubectl, the Kubernetes command-line tool

-kn CLI, the CLI for managing Knative application and configuration

Installing Docker

To install Docker, go to the URL docs.docker.com/get-docker and download the appropriate binary for your OS.

Installing kubectl

The Kubernetes command-line tool kubectl allows you to run commands against Kubernetes clusters. Docker Desktop installs kubectl for you, so if you followed the previous section in installing Docker Desktop, you should already have kubectl installed and you can skip this step. If you don’t have kubectl installed, follow the instructions below to install it.

If you’re on Linux or macOS, you can install kubectl using Homebrew by running the command brew install kubectl. Ensure that the version you installed is up to date by running the command kubectl version --client.

If you’re on Windows, run the command curl -LO https://dl.k8s.io/release/v1.21.0/bin/windows/amd64/kubectl.exe to install kubectl, and then add the binary to your PATH. Ensure that the version you installed is up to date by running the command kubectl version --client. You should have version 1.20.x or v1.21.x because in a future section, you’re going to create a server cluster with Kubernetes version 1.21.x.

Installing kn CLI

The kn CLI provides a quick and easy interface for creating Knative resources, such as services and event sources, without the need to create or modify YAML files directly. kn also simplifies completion of otherwise complex procedures, such as autoscaling and traffic splitting.

To install kn on macOS or Linux, run the command brew install kn.

To install kn on Windows, download and install a stable binary from https://mirror.openshift.com/pub/openshift-v4/clients/serverless/latest. Afterward, add the binary to the system PATH.

Creating a Kubernetes Cluster

You need a Kubernetes cluster to run Knative. For this article, you’re going to work with a local Kubernetes cluster running on Docker. You should have Docker Desktop installed.

Create a Cluster with Docker Desktop

Docker Desktop includes a standalone Kubernetes server and client. This is a single-node cluster that runs within a Docker container on your local system and should be used only for local testing.

To enable Kubernetes support and install a standalone instance of Kubernetes running as a Docker container, go to Preferences > Kubernetes and then click Enable Kubernetes.

Click Apply & Restart to save the settings and then click Install to confirm, as shown in the image below.

Figure 1: Enable Kubernetes on Docker Desktop

This instantiates the images required to run the Kubernetes server as containers.

The status of Kubernetes shows in the Docker menu and the context points to docker-desktop, as shown in the image below.

Figure 2 : kube context

Alternatively, Create a Cluster with Kind

You can also create a cluster using kind, a tool for running local Kubernetes clusters using Docker container nodes. If you have kind installed, you can run the following command to create your kind cluster and set the kubectl context.

curl -sL https://raw.githubusercontent.com/csantanapr/knative-kind/master/01-kind.sh | sh

Install Knative Serving

Knative Serving manages service deployments, revisions, networking, and scaling. The Knative Serving component exposes your service via an HTTP URL and has safe defaults for its configurations.

For kind users, follow these instructions to install Knative Serving:

-Run the command curl -sL https://raw.githubusercontent.com/csantanapr/knative-kind/master/02-serving.sh | sh to install Knative Serving.

-When that’s done, run the command curl -sL https://raw.githubusercontent.com/csantanapr/knative-kind/master/02-kourier.sh | sh to install and configure Kourier.

For Docker Desktop users, run the command curl -sL https://raw.githubusercontent.com/csantanapr/knative-docker-desktop/main/demo.sh | sh.

Deploying Your First Application

Next, you’ll deploy a basic Hello World application so that you can learn how to deploy and configure an application on Knative. You can deploy an application using a YAML file and the kubectl command, or using the kn command and passing the right options. For this article, I’ll be using the kn command. The sample container image you’ll use is hosted on gcr.io/knative-samples/helloworld-go.

To deploy an application, you use the kn service create command, and you need to specify the name of the application and the container image to use.

Run the following command to create a service called hello using the image https://gcr.io/knative-samples/helloworld-go.

kn service create hello \
--image gcr.io/knative-samples/helloworld-go \
--port 8080 \
--revision-name=world

The command creates and starts a new service using the specified image and port. An environment variable is set using the --env option.

The revision name is set to world using the --revision-name option. Knative uses revisions to maintain the history of each change to a service. Each time a service is updated, a new revision is created and promoted as the current version of the application. This feature allows you to roll back to previous version of the service when needed. Specifying a name for the revision allows you to easily identify them.

When the service is created and ready, you should get the following output printed in the console.

Service hello created to latest revision 'hello-world'
is available at URL: http://hello.default.127.0.0.1.nip.io

Confirm that the application is running by running the command curl http://hello.default.127.0.0.1.nip.io. You should get the output Hello World! printed in the console.

Update the Service

Suppose you want to update the service; you can use the kn service update command to make any changes to the service. Each change creates a new revision and directs all traffic to the new revision once it’s started and is healthy.

Update the TARGET environment variable by running the command:

kn service update hello \
--env TARGET=Coder \
--revision-name=coder

You should get the following output when the command has been completed.

Service 'hello' updated to latest revision
'hello-coder' is available at
URL: http://hello.default.127.0.0.1.nip.io

Run the curl command again and you should get Hello Coder! printed out.

~ curl http://hello.default.127.0.0.1.nip.io
~ Hello Coder!

Traffic Splitting and Revisions

Knative Revision is similar to a version control tag or label and it’s immutable. Every Knative Revision has a corresponding Kubernetes Deployment associated with it; it allows the application to be rolled back to any of the previous revisions. You can see the list of available revisions by running the command kn revisions list. This should print out a list of available revisions for every service, with information on how much traffic each revision gets, as shown in the image below. By default, each new revision gets routed 100% of traffic when created.

Figure 5 : Revision list

With revisions, you may wish to deploy applications using common deployment patterns such as Canary or blue-green. You need to have more than one revision of a service in order to use these patterns. The hello service you deployed in the previous section already have two revisions named hello-world and hello-coder respectively. You can split traffic 50% for each revision using the following command:

kn service update hello \
--traffic hello-world=50 \
--traffic hello-coder=50

Run the curl http://hello.default.127.0.0.1.nip.io command a few times to see that you get Hello World! sometimes, and Hello Coder! other times.

Figure 6 : Traffic Splitting

Autoscaling Services

One of the benefits of serverless is the ability to scale up and down to meet demand. When there’s no traffic coming in, it should scale down, and when it peaks, it should scale up to meet demand. Knative scales out the pods for a Knative Service based on inbound HTTP traffic. After a period of idleness (by default, 60 seconds), Knative terminates all of the pods for that service. In other words, it scales down to zero. This autoscaling capability of Knative is managed by Knative Horizontal Pod Autoscaler in conjunction with the Horizontal Pod Autoscaler built into Kubernetes.

If you’ve not accessed the hello service for more than one minute, the pods should have already been terminated. Running the command kubectl get pod -l serving.knative.dev/service=hello -w should show you an empty result. To see the autoscaling in action, open the service URL in the browser and check back to see the pods started and responding to the request. You should get an output similar to what’s shown below.

Scaling Up
Scaling Up

Scaling Down
Scaling Down

There you have the awesome autoscaling capability of serverless.

If you have an application that is badly affected by the cold-start performance, and you’d like to keep at least one instance of the application running, you can do so by running the command kn service update <SERVICE_NAME> --scale-min <VALUE>. For example, to keep at least one instance of the hello service running at all times, you can use the command kn service update hello --scale-min 1.

What’s Next?

Kubernetes has become a standard tool for managing container workloads. A lot of companies rely on it to build and scale cloud native applications, and it powers many of the products and services you use today. Although companies are adopting Kubernetes and reaping some benefits, developers aren’t interested in the low-level details of Kubernetes and therefore want to focus on their code without worrying about the infrastructure bits of running the application.

Knative provides a set of tools and CLI that developers can use to deploy their code and have Knative manage the infrastructure requirement of the application. In this article, you saw how to install the Knative Serving component and deploy services to run on it. You also learned how to deploy services and manage their configuration using the kn CLI. If you want to learn more about how to use the kn CLI, check out this free cheat sheet I made at cheatsheet.pmbanugo.me/knative-serving.

In a future article, I’ll show you how to work with Knative Eventing and how your application can respond to Cloud Events in and out of your cluster.

In the meantime, you can get my book How to build a serverless app platform on Kubernetes. It will teach you how to build a platform to deploy and manage web apps and services using Cloud Native technologies. You will learn about serverless, Knative, Tekton, GitHub Apps, Cloud Native Buildpacks, and more!

Get your copy at books.pmbanugo.me/serverless-app-platform

Let’s continue the conversation! Join the SUSE & Rancher Community where you can further your Kubernetes knowledge and share your experience.

Automate Deployments to Amazon EKS with Skaffold and GitHub Actions

Monday, 28 February, 2022

Creating a DevOps workflow to optimize application deployments to your Kubernetes cluster can be a complex journey. I recently demonstrated how to optimize your local K8s development workflow with Rancher Desktop and Skaffold. If you haven’t seen it yet, you can watch it by viewing the video below.

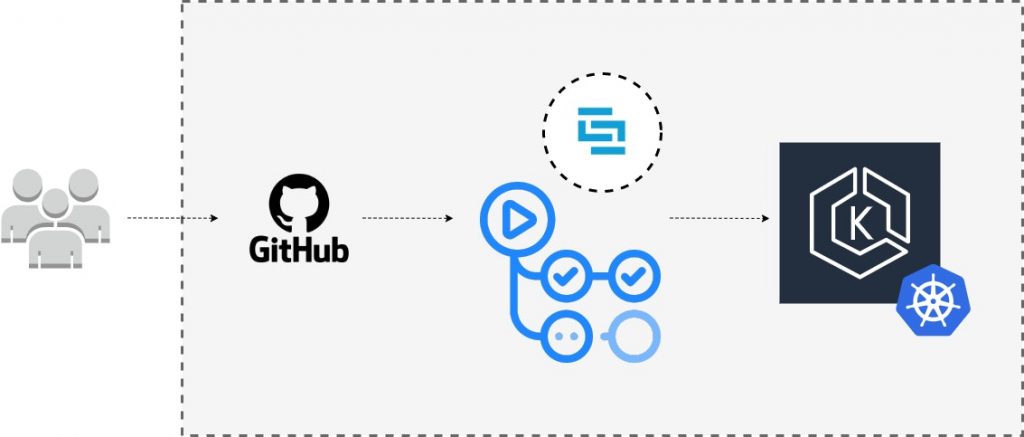
You might be wondering, “What happens next?” How do you extend this solution beyond a local setup to a real-world pipeline with a remote cluster? This tutorial responds to that question and will walk you through how to create a CI/CD pipeline for a Node.js application using Skaffold and GitHub Actions to an EKS cluster.

All the source code for this tutorial can be found in this repository.

Objectives

By the end of this tutorial, you’ll be able to:

1. Configure your application to work with Skaffold

2. Configure a CI stage for automated testing and building with GitHub Actions

3. Connect GitHub Actions CI with Amazon EKS cluster

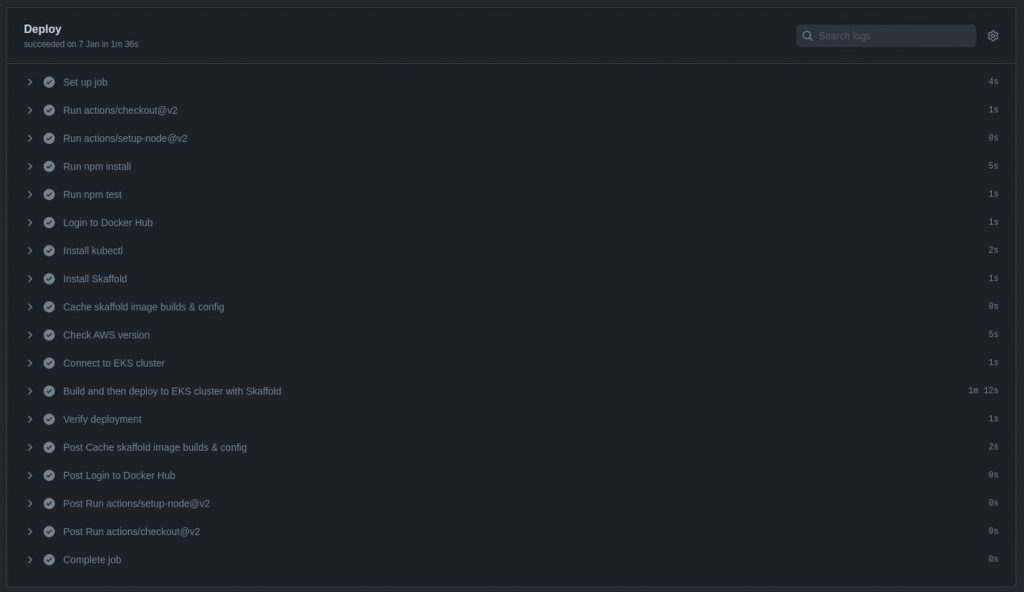
4. Automate application testing, building, and deploying to an Amazon EKS cluster.

Prerequisites

To follow this tutorial, you’ll need the following:

-An AWS account.

-AWS CLI is installed on your local machine.

-AWS profile configured with the AWS CLI. You will also use this profile for the CI stage in GitHub Actions.

-A DockerHub account.

-Node.js version 10 or higher installed on your local machine.

-kubectl is installed on your local machine.

-Have a basic understanding of JavaScript.

-Have a basic understanding of IaC (Infrastructure as Code).

-Have a basic understanding of Kubernetes.

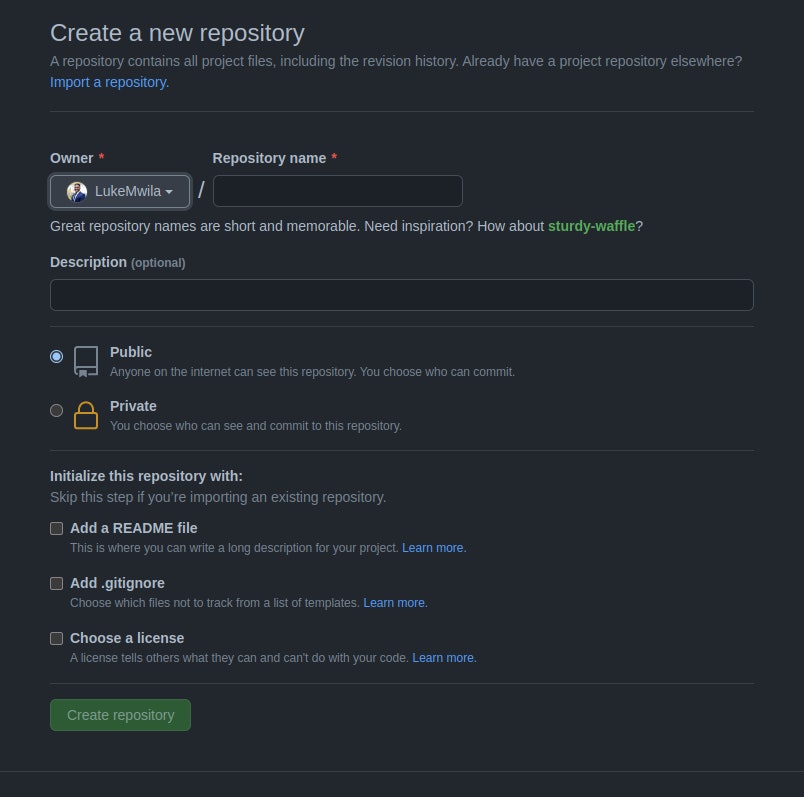
-A free GitHub account, with git installed on your local machine.

-An Amazon EKS cluster. You can clone this repository that contains a Terraform module to provision an EKS cluster in AWS. The repository README.md file contains a guide on how to use the module for cluster creation. Alternatively, you can use `eksctl` to create a cluster automatically. Running an Amazon EKS cluster will cost you $0.10 per hour. Remember to destroy your infrastructure once you are done with this tutorial to avoid additional operational charges.

Understanding CI/CD Process

Getting your CI/CD process right is a crucial step in your team’s DevOps lifecycle. The CI step is essentially automating the ongoing process of integrating the software from the different contributors in a project’s version control system, in this case, GitHub. The CI automatically tests the source code for quality checks and makes sure the application builds as expected.

The continuous deployment step picks up from there and automates the deployment of your application using the successful build from the CI stage.

Create Amazon EKS cluster

As mentioned above, you can clone or fork this repository that contains the relevant Terraform source code to automate the provisioning of an EKS cluster in your AWS account. To follow this approach, ensure that you have Terraform installed on your local machine. Alternatively, you can also use eksctl to provision your cluster. The AWS profile you use for this step will have full administrative access to the cluster by default. To communicate with the created cluster via kubectl, ensure your AWS CLI is configured with the same AWS profile.

You can view and confirm the AWS profile in use by running the following command:

aws sts get-caller-identity

Once your K8s cluster is up and running, you can verify the connection to the cluster by running `kubectl cluster-info` or `kubectl config current-context`.

Application Overview and Dockerfile

The next step is to create a directory on your local machine for the application source code. This directory should have the following folder structure (in the code block below). Ensure that the folder is a git repository by running the `git init` command.

Application Source Code

To create a package.json file from scratch, you can run the `npm init` command in the root directory and respond to the relevant questions you are prompted with. You can then proceed to install the following dependencies required for this project.

npm install body-parser cors express 
npm install -D chai mocha supertest nodemon

After that, add the following scripts to the generated package.json:

scripts: {
  start: "node src/index.js",
  dev: "nodemon src/index.js",
  test: "mocha 'src/test/**/*.js'"
},

Your final package.json file should look like the one below.

{
  "name": "nodejs-express-test",
  "version": "1.0.0",
  "description": "",
  "main": "index.js",
  "scripts": {
    "start": "node src/index.js",
    "dev": "nodemon src/index.js",
    "test": "mocha 'src/test/**/*.js'"
  },
  "repository": {
    "type": "git",
    "url": "git+<your-github-uri>"
  },
  "author": "<Your Name>",
  "license": "ISC",
  "dependencies": {
    "body-parser": "^1.19.0",
    "cors": "^2.8.5",
    "express": "^4.17.1"
  },
  "devDependencies": {
    "chai": "^4.3.4",
    "mocha": "^9.0.2",
    "nodemon": "^2.0.12",
    "supertest": "^6.1.3"
  }
}

Update the app.js file to initialize the Express web framework and add a single route for the application.

// Express App Setup
const express = require('express');
const http = require('http');
const bodyParser = require('body-parser');
const cors = require('cors');


// Initialization
const app = express();
app.use(cors());
app.use(bodyParser.json());


// Express route handlers
app.get('/test', (req, res) => {
  res.status(200).send({ text: 'Simple Node App Is Working As Expected!' });
});


module.exports = app;

Next, update the index.js in the root of the src directory with the following code to start the webserver and configure it to listen for traffic on port `8080`.

const http = require('http');
const app = require('./app');


// Server
const port = process.env.PORT || 8080;
const server = http.createServer(app);
server.listen(port, () => console.log(`Server running on port ${port}`));

The last step related to the application is the test folder which will contain the index.js file with code to test the single route you’ve added to our application.

You can redirect to the index.js file in the test folder and add code to test the route you added to the application.

const { expect } = require('chai');
const { agent } = require('supertest');
const app = require('../app');


const request = agent;


describe('Some controller', () => {
  it('Get request to /test returns some text', async () => {
    const res = await request(app).get('/test');
    const textResponse = res.body;
    expect(res.status).to.equal(200);
    expect(textResponse.text).to.be.a('string');
    expect(textResponse.text).to.equal('Simple Node App Is Working As Expected!');
  });
});

Application Dockerfile

Later on, we will configure Skaffold to use Docker to build our container image. You can proceed to create a Dockerfile with the following content:

FROM node:14-alpine
WORKDIR /usr/src/app
COPY ["package.json", "package-lock.json*", "npm-shrinkwrap.json*", "./"]
RUN npm install 
COPY . .
EXPOSE 8080
RUN chown -R node /usr/src/app
USER node
CMD ["npm", "start"]

Kubernetes Manifest Files for Application

The next step is to add the manifest files with the resources that Skaffold will deploy to your Kubernetes cluster. These files will be deployed continuously based on the integrated changes from the CI stage of the pipeline. You will be deploying a Deployment with three replicas and a LoadBalancer service to proxy traffic to the running Pods. These resources can be added to a single file called manifests.yaml.

apiVersion: apps/v1
kind: Deployment
metadata:
 name: express-test
spec:
 replicas: 3
 selector:
   matchLabels:
     app: express-test
 template:
   metadata:
     labels:
       app: express-test
   spec:
     containers:
     - name: express-test
       image: <your-docker-hub-account-id>/express-test
       resources:
          limits:
            memory: 128Mi
            cpu: 500m
       ports:
       - containerPort: 8080
---
apiVersion: v1
kind: Service
metadata:
  name: express-test-svc
spec:
  selector:
    app: express-test
  type: LoadBalancer
  ports:
  - protocol: TCP
    port: 8080
    targetPort: 8080

Skaffold Configuration File

In this section, you’ll populate your Skaffold configuration file (skaffold.yaml). This file will determine how your application is built and deployed by the Skaffold CLI tool in the CI stage of your pipeline. Your file will specify Docker as the image builder with the Dockerfile you created earlier to define the steps of how the image should be built. By default, Skaffold will use the gitCommit to tag the image create the Deployment manifest file with this image tag.

This configuration file will also contain a step for testing the application’s container image by executing the `npm run test` command that we added to the scripts section of the package.json file. Once the image has been successfully built and tested, it will be pushed to your Docker Hub account in the repository that you specify in the tag prefix.

Finally, we’ll specify that we want Skaffold to use kubectl to deploy the manifest file resources in the manifest.yaml file.

The complete configuration file will look like this:

apiVersion: skaffold/v2beta26
kind: Config
metadata:
  name: nodejs-express-test
build:
  artifacts:
  - image: <your-docker-hub-account-id>/express-test
    docker:
      dockerfile: Dockerfile
test:
  - context: .
    image: <your-docker-hub-account-id>/express-test
    custom:
      - command: npm run test
deploy:
  kubectl:
    manifests:
    - manifests.yaml

GitHub Secrets and GitHub Actions YAML File

In this section, you will create a remote repository for your project in GitHub. In addition to this, you will add secrets for your CI environment and a configuration file for the GitHub Actions CI stage.

Proceed to create a repository in GitHub and complete the fields you will be presented with. This will be the remote repository for the local one you created in an earlier step.

After you’ve created your repository, go to the repo Settings page. Under Security, select Secrets > Actions. In this section, you can create sensitive configuration data that will be exposed during the CI runtime as environment variables.

Proceed to create the following secrets:

-AWS_ACCCESS_KEY_ID – This is the AWS-generated Access Key for the profile you used to provision your cluster earlier.

-AWS_SECRET_ACCESS_KEY – This is the AWS-generated Secret Access Key for the profile you used to provision your cluster earlier.

-DOCKER_ID – This is the Docker ID for your DockerHub account.

-DOCKER_PW – This is the password for your DockerHub account.

-EKS_CLUSTER – This is the name you gave to your EKS cluster.

-EKS_REGION – This is the region where your EKS cluster has been provisioned.

Lastly, you are going to create a configuration file (main.yml) that will declare how the pipeline will be triggered, the branch to be used, and the steps that your CI/CD process should follow. As outlined at the start, this file will live in the .github/workflows folder and will be used by GitHub Actions.

The steps that we want to define are as follows:

-Expose our Repository Secrets as environment variables

-Install Node.js dependencies for the application

-Log in to Docker registry

-Install kubectl

-Install Skaffold

-Cache skaffold image builds & config

-Check that the AWS CLI is installed and configure your profile

-Connect to the EKS cluster

-Build and deploy to the EKS cluster with Skaffold

-Verify deployment

You can proceed to update the main.yml file with the following content.

name: 'Build & Deploy to EKS'
on:
  push:
    branches:
      - main
env:
  AWS_ACCESS_KEY_ID: ${{ secrets.AWS_ACCESS_KEY_ID }}
  AWS_SECRET_ACCESS_KEY: ${{ secrets.AWS_SECRET_ACCESS_KEY }}
  EKS_CLUSTER: ${{ secrets.EKS_CLUSTER }}
  EKS_REGION: ${{ secrets.EKS_REGION }}
  DOCKER_ID: ${{ secrets.DOCKER_ID }}
  DOCKER_PW: ${{ secrets.DOCKER_PW }}
jobs:
  deploy:
    name: Deploy
    runs-on: ubuntu-latest
    env:
      ACTIONS_ALLOW_UNSECURE_COMMANDS: 'true'
    steps:
      # Install Node.js dependencies
      - uses: actions/checkout@v2
      - uses: actions/setup-node@v2
        with:
          node-version: '14'
      - run: npm install
      - run: npm test
      # Login to Docker registry
      - name: Login to Docker Hub
        uses: docker/login-action@v1
        with:
          username: ${{ secrets.DOCKER_ID }}
          password: ${{ secrets.DOCKER_PW }}
      # Install kubectl
      - name: Install kubectl
        run: |
          curl -LO "https://dl.k8s.io/release/$(curl -L -s https://dl.k8s.io/release/stable.txt)/bin/linux/amd64/kubectl"
          curl -LO "https://dl.k8s.io/$(curl -L -s https://dl.k8s.io/release/stable.txt)/bin/linux/amd64/kubectl.sha256"
          echo "$(<kubectl.sha256) kubectl" | sha256sum --check


          sudo install -o root -g root -m 0755 kubectl /usr/local/bin/kubectl
          kubectl version --client
      # Install Skaffold
      - name: Install Skaffold
        run: |
          curl -Lo skaffold https://storage.googleapis.com/skaffold/releases/latest/skaffold-linux-amd64 && \
          sudo install skaffold /usr/local/bin/
          skaffold version
      # Cache skaffold image builds & config
      - name: Cache skaffold image builds & config
        uses: actions/cache@v2
        with:
          path: ~/.skaffold/
          key: fixed-${{ github.sha }}
      # Check AWS version and configure profile
      - name: Check AWS version
        run: |
          aws --version
          aws configure set aws_access_key_id $AWS_ACCESS_KEY_ID
          aws configure set aws_secret_access_key $AWS_SECRET_ACCESS_KEY
          aws configure set region $EKS_REGION
          aws sts get-caller-identity
      # Connect to EKS cluster
      - name: Connect to EKS cluster 
        run: aws eks --region $EKS_REGION update-kubeconfig --name $EKS_CLUSTER
      # Build and deploy to EKS cluster
      - name: Build and then deploy to EKS cluster with Skaffold
        run: skaffold run
      # Verify deployment
      - name: Verify the deployment
        run: kubectl get pods

Once you’ve updated this file, you can commit all the changes in your local repository and push them to the remote repository you created.

git add .
git commit -m "other: initial commit"
git remote add origin <your-remote-repository>
git push -u origin <main-branch-name>

Reviewing Pipeline Success

After pushing your changes, you can track the deployment in the Actions page of the remote repository you set up in your GitHub profile.

Conclusion

This tutorial taught you how to create automated deployments to an Amazon EKS cluster using Skaffold and GitHub Actions. As mentioned in the introduction, all the source code for this tutorial can be found in this repository. If you’re interested in a video walk-through of this post, you can watch the video below.

Make sure to destroy the following infrastructure provisioned in your AWS account:

-Load Balancer created by service resource in Kubernetes.

-Amazon EKS cluster

-VPC and all networking infrastructure created to support EKS cluster

Let’s continue the conversation! Join the SUSE & Rancher Community where you can further your Kubernetes knowledge and share your experience.

Run Your First Secure and DNS with Rancher

Monday, 29 November, 2021

In the previous article, we installed Rancher on the localhost and run the necessary CI/CD tools. This article will look at how to make our environment liveable on the Internet. We will use Route53 – domain registration and DNS-zones hosting, cert-manager – Let’s Encrypt wildcard certificates and external-dns – synchronizing Ingresses with DNS Route53.

A little personal experience

Why is Rancher good? Because those who do not want to understand the code of manifests and want to run what is required in manual mode can do this through an excellent graphical interface.

Register domain

I’m using Route53, but you can choose another supported provider for cert-manager and external-dns. The reason is that many applications work well with it and the integration is usually not difficult.

Register a new domain using the input field on the Dashboard screen. After completing the registration process in the Hosted zones section, you will see a new zone. Since we want to provide public access, we will use this zone for the production.

Create subdomain Hosted Zones

We will also have three zones: for dev.domain, stage.domain and release.domain as subdomains. Use the Create hosted zone button to create subdomains. For the subdomains to work, it is necessary to add records of NS-servers to the primary hosted zone, the way they are indicated in the subdomain zones. Create the same A-records in the main zone, this is domain and www.domain and dev.domain, stage.domain, release.domain in subdomains hosted zones. This is needed to issue certificates, since the provider checks for A-record before issuing a certificate.

The provider gives me a static IP-address and on the router, I made a forwarding to the bridge interface server IP address where we deployed everything in the previous article. It is this external address that needs to be specified in the A-records.

Create IAM for cert-manager and external-dns

In the IAM management console, create two policies with the following content:

Next, you need to create two users, assign them policies, and copy their credentials. In the documentation on cert-manager and external-dns, this is not an obvious point since they deal with cases with roles and this is misleading, but we will not use roles.

There are many articles on the Internet on how to do this in the cloud in various variations, but if you install on your local server everything is a little different.

Run cert-manager in Rancher-cluster

Add helm-char repo for cert-manager:

For cert-manager use default values.

prometheus:  
  enabled: false
installCRDs: true

Create ClusterIssuers for Hosted Zones

ClusterIssuer:

apiVersion: cert-manager.io/v1
kind: ClusterIssuer
metadata:
  name: letsencrypt-prod
spec:
  acme:
    email: certs@domain.io
    server: https://acme-v02.api.letsencrypt.org/directory
    privateKeySecretRef:
      name: domain-io-cluster-issuer-account-key
        solvers:
        - selector:
             dnsZones: 
                 - "domain.io"
      dns01:
        route53:
          region: eu-central-1
          accessKeyID: AKIAXXXXXXXXXXXXX
          secretAccessKeySecretRef:
            name: prod-route53-credentials-secret
            key: secret-access-key

And repeat this for dev.domain.io, stage.domain.io, release.domain.io, change ClusterIssuer name, and dnsZone, change privateKeySecretRef:

Request wildcard certificates for you Ingresses

We will use a wildcard certificate with validation through the provider’s DNS:

apiVersion: cert-manager.io/v1
kind: Certificate
metadata:
  name: domain-io
  namespace: domain
spec:
  secretName: domain-io-tls
  issuerRef:
    name: letsencrypt-prod
    kind: ClusterIssuer
  dnsNames:
  - '*.domain.io' 
  - domain.io

And repeat this for *.dev.domain.io, *.stage.domain.io, *.release.domain.io change namespace, secretName, ClusterIssuer Name.

Changes should occur in the section, certificates should appear, the normal status is Active and the color is green:

Run Ingresses for Your App

Since we issued wildcard certificates in advance and they will be updated independently, we can specify this secret for different domains in the settings. To synchronize secrets between namespaces, you can, for example, use a kubed.

Secure access for non-production zones

You can use client certificate validation to secure your development and test environments. To do this, you need to issue several self-signed certificates and add annotations to the ingress settings:

    nginx.ingress.kubernetes.io/auth-tls-pass-certificate-to-upstream: "true"
    nginx.ingress.kubernetes.io/auth-tls-secret: feature/ingresses-cert-dev <--feature - namespace
    nginx.ingress.kubernetes.io/auth-tls-verify-client: "on"
    nginx.ingress.kubernetes.io/auth-tls-verify-depth: "1"

More details can be found here.

For convert pem and key copy to different files, then give the command:

openssl pkcs12 -export -out developer.pfx -inkey developer.key -in developer.pem

and add pfx to chrome in settings.

Run external-dns

Add helm-chart repo:

Values:

aws:
  apiRetries: 3
  assumeRoleArn: ''
  batchChangeSize: 1000
  credentials:
    accessKey: AKIAXXXXXXXXXXXXX
    mountPath: /.aws
    secretKey: -->secret-from-iam<--
    secretName: ''
  evaluateTargetHealth: ''
  preferCNAME: ''
  region: eu-central-1
  zoneTags: []
  zoneType: ''
crd:
  apiversion: externaldns.k8s.io/v1alpha1
  create: true
  kind: DNSEndpoint
sources:
  - service
  - ingress
  - crd
txtOwnerId: sandbox
policy: sync

Create CRD: CRDmanifest

Create DNSendpoint

DNSendpoint:

apiVersion: externaldns.k8s.io/v1alpha1
kind: DNSEndpoint
metadata:
  name: examplednsrecord
  namespace: feature
spec:
  endpoints:
  - dnsName: test1.dev.domain.io
    recordTTL: 180
    recordType: A
    targets:
    - <YOU-EXTERNAL-IP-ADDRESS>

In log:

time="2021-11-25T23:19:37Z" level=info msg="All records are already up to date"
time="2021-11-25T23:20:38Z" level=info msg="Applying provider record filter for domains: [domain.io. .domain.io. release.domain.io. .release.domain.io. stage.domain.io. .stage.domain.io. dev.domain.io. .dev.domain.io.]"

Create:

time="2021-11-25T23:54:57Z" level=info msg="Desired change: CREATE test1.dev.domain.io A [Id: /hostedzone/ZXXXXXXXXXXXDN]"
time="2021-11-25T23:54:57Z" level=info msg="Desired change: CREATE test1.dev.domain.io TXT [Id: /hostedzone/ZXXXXXXXXXXXXXXXXDN]"
time="2021-11-25T23:54:57Z" level=info msg="2 record(s) in zone dev.domain.io. [Id: /hostedzone/ZXXXXXXXXXXXXXXXDN] were successfully updated"

Delete:

time="2021-11-25T23:59:59Z" level=info msg="Desired change: DELETE test1.dev.domain.io A [Id: /hostedzone/ZXXXXXXXXXXXXXDN]"
time="2021-11-25T23:59:59Z" level=info msg="Desired change: DELETE test1.dev.domain.io TXT [Id: /hostedzone/ZXXXXXXXXXXXXXDN]"
time="2021-11-25T23:59:59Z" level=info msg="2 record(s) in zone dev.domain.io. [Id: /hostedzone/ZXXXXXXXXXXXXXXXXXXDN] were successfully updated"

Conclusion

As it turns out for your own development, it is quite easy to raise the full stack on a single server and even post it on the Internet.

Test zones:

https://www.pregap.io

https://dev.pregap.io – secure access

https://stage.pregap.io – secure access

https://release.pregap.io – secure access

Is Cloud Native Development Worth It?    

Thursday, 18 November, 2021
The ‘digital transformation’ revolution across industries enables businesses to develop and deploy applications faster and simplify the management of such applications in a cloud environment. These applications are designed to embrace new technological changes with flexibility.

The idea behind cloud native app development is to design applications that leverage the power of the cloud, take advantage of its ability to scale, and quickly recover in the event of infrastructure failure. Developers and architects are increasingly using a set of tools and design principles to support the development of modern applications that run on public, private, and hybrid cloud environments.

Cloud native applications are developed based on microservices architecture. At the core of the application’s architecture, small software modules, often known as microservices, are designed to execute different functions independently. This enables developers to make changes to a single microservice without affecting the entire application. Ultimately, this leads to a more flexible and faster application delivery adaptable to the cloud architecture.

Frequent changes and updates made to the infrastructure are possible thanks to containerization, virtualization, and several other aspects constituting the entire application development being cloud native. But the real question is, is cloud native application development worth it? Are there actual benefits achieved when enterprises adopt cloud native development strategies over the legacy technology infrastructure approach? In this article, we’ll dive deeper to compare the two.

Should  You Adopt a Cloud Native over Legacy Application Development Approach?

Cloud computing is becoming more popular among enterprises offering their technology solutions online. More tech-savvy enterprises are deploying game-changing technology solutions, and cloud native applications are helping them stay ahead of the competition. Here are some of the major feature comparisons of the two.

Speed

While customers operate in a fast-paced, innovative environment, frequent changes and improvements to the infrastructure are necessary to keep up with their expectations. To keep up with these developments, enterprises must have the proper structure and policies to conveniently improve or bring new products to market without compromising security and quality.

Applications built to embrace cloud native technology enjoy the speed at which their improvements are implemented in the production environment, thanks to the following features.

Microservices

Cloud native applications are built on microservices architecture. The application is broken down into a series of independent modules or services ,with each service consuming appropriate technology stack and data. Communication between modules is often done over APIs and message brokers.

Microservices frequently improve the code to add new features and functionality without interfering with the entire application infrastructure. Microservices’ isolated nature makes it easier for new developers in the team to comprehend the code base and make contributions faster. This approach facilitates speed and flexibility at which improvements are being made to the infrastructure. In comparison,  an infrastructure consuming the monolithic architecture would slowly see new features and enhancements being pushed to production. Monolithic applications are complex and tightly coupled, meaning slight code changes must be harmonized to avoid failures. As a result, this slows down the deployment process.

CI/CD Automation Concepts

The speed at which applications are developed, deployed, and managed has primarily been attributed to adopting Continuous Integration and Continuous Development (CI/CD).

Improvement strategies include new code changes to the infrastructure through an automated checklist in a CI/CD pipeline and testing that application standards are met before being pushed to a production environment.

When implemented on cloud native applications architecture, CI/CD streamlines the entire development and deployment phases, shortening the time in which the new features are delivered to production.

Implementing CI/CD highly improves productivity in organizations to everyone’s benefit. Automated CI/CD pipelines make deployments predictable, freeing developers from repetitive tasks to focus on higher-value tasks.

On-demand infrastructure Scaling

Enterprises should opt for cloud native architecture over traditional application development approaches to easily provision computing resources to their infrastructure on demand.

Rather than having IT support applications based on estimates of what infrastructure resources are needed, the cloud native approach promotes automated provisioning of computing resources on demand.

This approach helps applications run smoothly by continuously monitoring the health of your infrastructure for workloads that would otherwise fail.

The cloud native development approach is based on orchestration technology that provides developers insights and control to scale the infrastructure to the organization’s liking. Let’s look at how the following features help achieve infrastructure scaling.

Containerization

Cloud native applications are built based on container technology where microservices, operating system libraries, and dependencies are bundled together to create single lightweight executables called container images.

These container images are stored in an online registry catalog for easy access by the runtime environment and developers making updates on them.

Microservices deployed as containers should be able to scale in and out, depending on the load spikes.

Containerization promotes portability by ensuring the executable packaging is uniform and runs consistently across the developer’s local and deployment environments.

Orchestration

Let’s talk orchestration in cloud native application development. Orchestration automates deploying, managing, and scaling microservice-based applications in containers.

Container orchestration tools communicate with user-created schedules (YAML, JSON files) to describe the desired state of your application. Once your application is deployed, the orchestration tool uses the defined specifications to manage the container throughout its lifecycle.

Auto-Scaling

Automating cloud native workflows ensures that the infrastructure automatically self-provisions itself when in need of resources. Health checks and auto-healing features are implemented in the infrastructure when under development to ensure that the infrastructure runs smoothly without manual intervention.

You are less likely to encounter service downtime because of this. Your infrastructure is automatically set to auto-detect an increase in workloads that would otherwise result in failure and automatically scales to a working machine.

Optimized Cost of Operation

Developing cloud native applications eliminates the need for hardware data centers that would otherwise sit idle at any given point. The cloud native architecture enables a pay-per-use service model where organizations only pay for the services they need to support their infrastructure.

Opting for a cloud native approach over a traditional legacy system optimizes the cost incurred that would otherwise go toward maintenance. These costs appear in areas such as scheduled security improvements, database maintenance, and managing frequent downtimes. This usually becomes a burden for the IT department and can be partially solved by migrating to the cloud.

Applications developed to leverage the cloud result in optimized costs allocated to infrastructure management while maximizing efficiency.

Ease of Management

Cloud native service providers have built-in features to manage and monitor your infrastructure effortlessly. A good example, in this case, is serverless platforms like AWS Lambda and  Azure Functions. These platforms help developers manage their workflows by providing an execution environment and managing the infrastructure’s dependencies.

This gets rid of uncertainty in dependencies version and configuration settings required to run the infrastructure. Developing applications that run on legacy systems requires developers to update and maintain the dependencies manually. Eventually, this becomes a complicated practice with no consistency. Instead, the cloud native approach makes collaborating easier without having the “This application works on my system but fails on another machine ” discussion.

Also, since the application is divided into smaller, manageable microservices, developers can easily focus on specific units without worrying about interactions between them.

Challenges

Unfortunately, there are challenges to ramping up users to adopt the new technology, especially for enterprises with long-standing legacy applications. This is often a result of infrastructure differences and complexities faced when trying to implement cloud solutions.

A perfect example to visualize this challenge would be assigning admin roles in Azure VMware solutions. The CloudAdmin role would typically create and manage workloads in your cloud, while in an Azure VMware Solution, the cloud admin role has privileges that conflict with the VMware cloud solutions and on-premises.

It is important to note that in the Azure VMware solution, the cloud admin does not have access to the administrator user account. This revokes the permission roles to add identity sources like on-premises servers to vCenter, making infrastructure role management complex.

Conclusion

Legacy vs. Cloud Native Application Development: What’s Best?

While legacy application development has always been the standard baseline structure of how applications are developed and maintained, the surge in computing demands pushed for the disruption of platforms to handle this better.

More enterprises are now adopting the cloud native structure that focuses on infrastructure improvement to maximize its full potential. Cloud native at scale is a growing trend that strives to reshape the core structure of how applications should be developed.

Cloud native application development should be adopted over the legacy structure to embrace growing technology trends.

Are you struggling with building applications for the cloud?  Watch our 4-week On Demand Academy class, Accelerate Dev Workloads. You’ll learn how to develop cloud native applications easier and faster.