CentOS Alternatives: Migrating Workloads to OpenSUSE Leap – Differences and Similarities

Whether you’re a seasoned Linux user or just starting your journey, this blog post is designed to be your go-to resource for technical guidance when transitioning from CentOS to openSUSE Leap. We understand that every migration is unique, and while we won’t cover every minute difference and similarity between the two distributions, we promise to equip you with the essential knowledge to embark on your migration journey confidently.
Versions compared:
-
CentOS 9 Stream
-
OpenSUSE Leap 15.5
Networking
- Hostname configuration:
Both CentOS and openSUSE Leap can be configured the same manner using the “hostnamectl” command. to set the hostname, execute the following in the command-line:
hostnamectl hostname myhostname.fqdn- Network Configuration
By default CentOS uses Network Manager, while openSUSE Leap installer will select either Wicked or Network Manager based on the system role we choose.
If you are already familiar with Network Manager and its tools, you can continue using it on openSUSE as well. You can always choose to use Network Manager at the installation settings confirmation screen during the installation time, or switch manually afterwards with the following commands:
systemctl enable NetworkManager
systemctl disable wicked
systemctl start NetworkManager
systemctl stop wicked
Note: When using DHCP, be aware that your server may be assigned a different IP address.
If you want to edit the network configuration files manually, you can still do it the same way as with CentOS, there is only a slight difference in the paths they use, notice the difference in red:
CentOs: /etc/sysconfig/network-scripts/ifcfg-eth0
OpenSUSE: /etc/sysconfig/network/ifcfg-eth0
For further guidance and details, please consult the official documentation and template files:
/etc/sysconfig/network/ifcfg.template
/etc/sysconfig/network/config
Tools like ethtool, ip, etc.. are the same on both OS.
NTP
On OpenSUSE Leap, Chrony is also used as the NTP client for time synchronization.
The only difference lies in the configuration management approach. While on CentOS settings were stored in a single file, /etc/chrony.conf, openSUSE offers an option to include directives within individual files located at /etc/chrony.d/<name>.conf. For instance, the list of NTP servers is typically stored in the pool.conf file. However, it is still possible to include these settings directly in /etc/chrony.confif desired.
Configuring Chrony on OpenSUSE Leap is hassle-free, and it can be easily accomplished using Yast, the system configuration tool. To begin, install the Yast NTP client module with the following command:
zypper install yast2-ntp-clientOnce the module is installed, launch Yast, and then navigate to “Network Services” -> “NTP Configuration” as shown in the screenshots below:

With Yast’s user-friendly interface, managing NTP settings becomes straightforward, ensuring accurate time synchronization for your system.
Package management
Both CentOS and SUSE use RPM (RPM package Manager) for handling packages. The main distinction lies in the package manager engine, an upper layer above RPM that automates essential tasks like package retrieval from remote repositories, handling dependencies, and searching for available packages. In CentOS YUM or DNF are used by default, whereas openSUSE uses Zypper as the default package manager.
We can still install and use DNF or YUM with the following command, but Zypper is very similar to use
zypper install dnf dnf-yumhere is a table comparing some equivalent package management operations using Zypper and DNF/YUM:
| Action | zypper | dnf/yum |
|---|---|---|
| Search for packages | zypper search <string/s> | dnf/yum search <string/s> |
| Show information about a package | zypper info <package/s> | dnf/yum info <package/s> |
| Find what package provides the indicated file or capability | zypper what-provides <file|capability> | dnf/yum whatprovides <file|capability> |
| Install a package | zypper install <package/s> | dnf/yum install <package/s> |
| Remove a package | zypper remove <package/s> | dnf/yum remove <package/s> |
| Install source code packages and their build dependencies | zypper source-install <package/s> | dnf/yum download –source <package/s>
dnf/yum builddep <package/s> 1 |
| Download a package file from a repository | zypper download <package/s> | dnf/yum download <package/s> |
| List all repositories in the system | zypper repos | dnf/yum repolist |
| Refresh repositories information | zypper refresh | dnf/yum <add –refresh option> |
| Clear caches | zypper clean | dnf/yum clean all |
| Update existing packages with latest versions from the repositories | zypper update | dnf/yum update |
| List available updates | zypper list-updates | dnf/yum check-update |
| Install all needed patches for the installed packages | zypper patch | dnf/yum update –bugfix |
| Perform a distribution upgrade | zypper dist-upgrade | dnf/yum distro-sync |
| verify the dependencies of installed packages | zypper verify | dnf/yum check –dependencies |
1Only downloads the source package, resolves build dependencies but doesn’t install the source code.
Application Package Names and Distribution
When transitioning from CentOS to openSUSE, you may encounter differences in application package names or the way these applications are split into different packages. Finding the right packages might seem daunting, but far from truth, here are some helpful tips to simplify the process:
- If you know a file used by your application in CentOS you can find which package has it in openSUSE. In the following example the command will tell us which packages provide the file /usr/sbin/httpd:
zypper search --file-list '/usr/sbin/httpd'
Note, in some cases the location may differ as such we can use only the file name instead of the full path, for example “/httpd” instead of “/usr/sbin/httpd”.
- Also, if you want to quickly search for packages that are depending on the one you want to install you can use the following command:
zypper se --requires-pkg apache2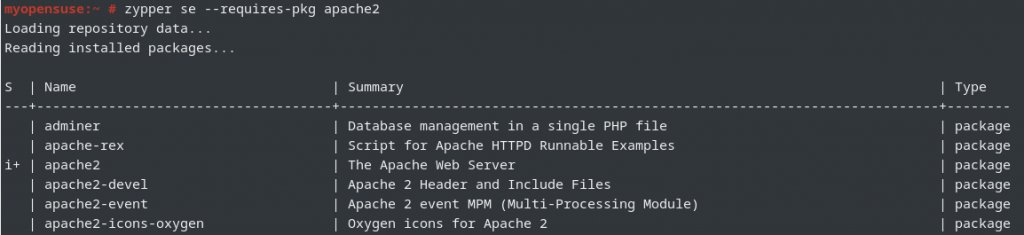
This will give you an idea of what extra packages are associated to that application you want to migrate.
- If you know the file name in CentOS but don’t know which package provides it, you can use the following command, which will work also in openSUSE.
rpm -qf /usr/sbin/httpd

These tips will help you discover the appropriate package names and dependencies when installing applications on openSUSE. While the packaging may differ between the two distributions, these commands will assist you in effectively managing your software installation and migration process.
Security
Application security
CentOS comes by default with SELinux, whilst openSUSE comes by default with AppArmor it also works with SELinux, both can protect your applications from unauthorized behavior, such as improper file access or unauthorized process execution. While SELinux is more complex to use it allows for higher abstraction and fine-grained permissions, AppArmor boasts ease of use and faster policy creation, making it less tedious to protect your applications.
We can use both to create Zero-Trust policies for our applications to ensure your applications adhere to their intended behavior.
To begin using SELinux on openSUSE, install the selinux-tools package:
zypper install selinux-toolsNote that the openSUSE Leap doesn’t come with an SELinux policy already defined, we will cover creating or migrating SELinux policies in a dedicated post.
Network security
Both CentOS and openSUSE support iptables and nftables, with firewalld available for rule management. Migrating rules from CentOS to openSUSE can be a breeze by copying the /etc/firewalld folder. Although minor configuration differences exist, they won’t impact functionality in most cases.
There are though a few different services shipped in the CentOS package. If you find missing services in openSUSE, easily copy them from your CentOS system to your openSUSE customized settings:
scp /usr/lib/firewalld/services/<myservice>.xml myopensuse:/etc/firewalld/services/
Server hardening
Both CentOS and openSUSE Leap come with openSCAP and its tooling, facilitating the implementation of security-related configuration settings. As mentioned in our previous blog posts, server hardening shouldn’t pose any challenges.
Paths and Locations
Both CentOS and openSUSE adhere to the Filesystem Hierarchy Standard (FHS) ensuring consistency in directory structures. While packaging might differ, understanding package ownership and filesystem structures is effortless using the provided commands, which work on both CentOS and openSUSE.
- To find which package owns a file or folder:
rpm -qf <file/folder> - To list files and folders owned by a package
rpm -ql <package>
If you want to know more about the default filesystem structure used, both CentOS and openSUSE have a package called “filesystem” which is responsible for creating the basic filesystem structure, you can run the following command for more details on what directories it creates:
rpm -ql filesystem
Storage and Filesystems
Whilst CentOS uses XFS as the default filesystem, openSUSE Leap prefers BTRFS.
The use of a different Filesystem is transparent to applications, we recommend to use BTRFS, but other filesystems are viable options.
BTRFS offers some advantages over XFS such as the possibility to create snapshots and rollback changes, or to set up RAID.
To find more about the filesystems available in openSUSE Leap please check out our documentation:
Additionally, CentOS defaults to using LVM, whereas openSUSE doesn’t use LVM by default to manage partitions. However, LVM can be configured during installation for those familiar with it.
Automation
For most CentOS users Ansible is the preferred tool to use when automating tasks, openSUSE can work with Ansible as well, installing it is as easy as this:
zypper install ansibleBesides multiple other automation engines, such as Salt or Terraform. Ansible is meant to be OS agnostic and adapting your playbooks to work with openSUSE shouldn’t be a big deal in most cases, we will cover a few examples in following blog posts in this series.
Release process
OpenSUSE Leap follows a regular release cadence aligned with SLES.
Expect minor releases every 12 months and major updates approximately every 36-48 months (about 4 years).
For more information, please consult our documentation.
Conclusion
We have covered the technical aspects of transitioning from CentOS to openSUSE Leap, highlighting similarities and differences for a successful migration. We will cover some practical use cases in following blog posts.
As a CentOS alternative, openSUSE brings numerous benefits, including stability, SUSE’s support to the community, powerful system management tools, advanced distro features, and access to a rich package repository. The active openSUSE community and easy migration tools further enhance the transition process. If you are seeking a robust and reliable Linux distribution for your workloads, you should consider openSUSE.
Looking for further insights into what you can achieve by migrating to SUSE and openSUSE?, check out other blogs in this series:
- From CentOS to openSUSE Leap: How to Feel at Home
- Step-by-Step Guide Installing openSUSE Leap on your virtualized environment
- Migrating Workloads From CentOS To OpenSUSE Leap – Introduction
- 10 Reasons to Migrate from CentOS to openSUSE
Ready to experience the power and flexibility of openSUSE Leap?