Does your PV need S3 access? We’ve got you covered
Increased demand for cloud storage solutions has become a crucial topic in recent years: companies are requiring data to be made more readily available for their cloud-native applications.
In a cloud-native environment, it is important to offer storage systems that can interact with clients using a standard protocol.
Simple Storage Service

Simple Storage Service, or S3, is a protocol designed by Amazon that launched in the United States market in 2006. S3 is a vast protocol that covers key concepts such as buckets, objects, keys, versioning, ACLs and regions.
To continue with this article, you need to know that the S3 API can be invoked with REST calls and that you can just store your objects inside holders called buckets. For more information, there are other resources available online.
K3s and Rancher
![]()
This article explores the use of K3s and Rancher as foundations for experiments with an S3 gateway.
K3s is a lightweight Kubernetes distribution that runs smoothly on Edge low resource devices. Rancher is a graphical user manager that simplifies the underlying complexity of a Kubernetes cluster. With Rancher, you can manage a cluster in a user-friendly fashion, regardless of the Kubernetes version being used.
![]()
Longhorn

A Kubernetes cluster and manager alone are not sufficient when dealing with cloud storage. You could use the primitive resources offered by a standard Kubernetes cluster such as the basic persistent volume types, but we recommend installing a component that takes care of providing your pods with some advanced storage resource.
It is desirable to have a system that can take care of your data securely and in a redundant fasion and expose volumes with the standard Kubernetes interfaces. Longhorn is the right system for this kind of need. Built from scratch to work natively with Kubernetes, Longhorn allows pods to obtain highly available persistent volumes. The portion of storage managed by Longhorn is replicated so that a hardware failure does not compromise user’s data.
s3gw
![]()
Having Longhorn deployed on your cluster allows the persistent volumes to be consumed by internal applications deployed on Kubernetes. If you want to give access to the data to external clients, you need an S3 gateway.
External clients can store and read data to and from the cluster using the S3 API. For this role, we are going to employ s3gw.
s3gw is being developed on the foundations of Ceph S3 gateway: radosgw. Even if s3gw is still in its infancy and still in an early stage of development, it can already be used to test and play with S3 functionalities.
Let’s start cooking ingredients
Now that you have identified all the pieces, you are ready to start building your environment.
For this tutorial, we are installing K3s on an OpenSUSE Linux OS. For the sake of simplicity, because Kubernetes needs to have certain networking resources available, it can be worth completely disabling the system firewall.
If you prefer to keep your firewall on, have a look here.
Stop Firewall
From a shell prompt, run the following command:
$ sudo systemctl stop firewalld.service
Install K3s
From a shell prompt, run the following command:
$ curl -sfL https://get.k3s.io | INSTALL_K3S_VERSION=v1.23.9+k3s1 sh -
After installation has terminated, you can check that the cluster is running with:
$ sudo kubectl get nodes
If everything is ok, you should see something similar:
NAME STATUS ROLES                AGE   VERSION
suse Ready  control-plane,master 56s   v1.23.8+k3s1
If you prefer using K3s with your regular user and not as root, you can run:
$ sudo cp /etc/rancher/k3s/k3s.yaml ~/.kube/config && chown $USER ~/.kube/config && chmod 600 ~/.kube/config && export KUBECONFIG=~/.kube/config
After this, you will be able to operate on K3s with your user.
Install Helm

We are going to install Rancher using an Helm chart, so you must first install Helm on the system:
$ sudo zypper install helm
Deploy Rancher
Let’s begin to install Rancher adding the its latest repo to Helm:
$ helm repo add rancher-latest https://releases.rancher.com/server-charts/latest
After this, you must define a new Kubernetes namespace where Rancher will install:
$ kubectl create namespace cattle-system
As the official documentation dictates, this must be named cattle-system.
Because Rancher management server is designed to be secure by default and requires SSL/TLS configuration you must deploy some additional resource:
$ kubectl apply -f https://github.com/cert-manager/cert-manager/releases/download/v1.7.1/cert-manager.crds.yaml

$ helm repo add jetstack https://charts.jetstack.io

$ helm install cert-manager jetstack/cert-manager \
 --namespace cert-manager \
 --create-namespace \
 --version v1.7.1
Let’s check that the cert-manager has successfully deployed and the related pods are running:
$ kubectl get pods --namespace cert-manager
NAME                                       READY   STATUS    RESTARTS   AGE
cert-manager-5c6866597-zw7kh               1/1     Running   0          2m
cert-manager-cainjector-577f6d9fd7-tr77l   1/1     Running   0          2m
cert-manager-webhook-787858fcdb-nlzsq      1/1     Running   0          2m
Now, you are required to define an hostname in /etc/hosts pointing to the ip address of one of the host’s physical interfaces, for example:
10.0.0.2 rancher.local
After this, you can finally launch the Rancher installation command:
helm install rancher rancher-latest/rancher \
 --namespace cattle-system \
 --set hostname=rancher.local \
 --set bootstrapPassword=admin
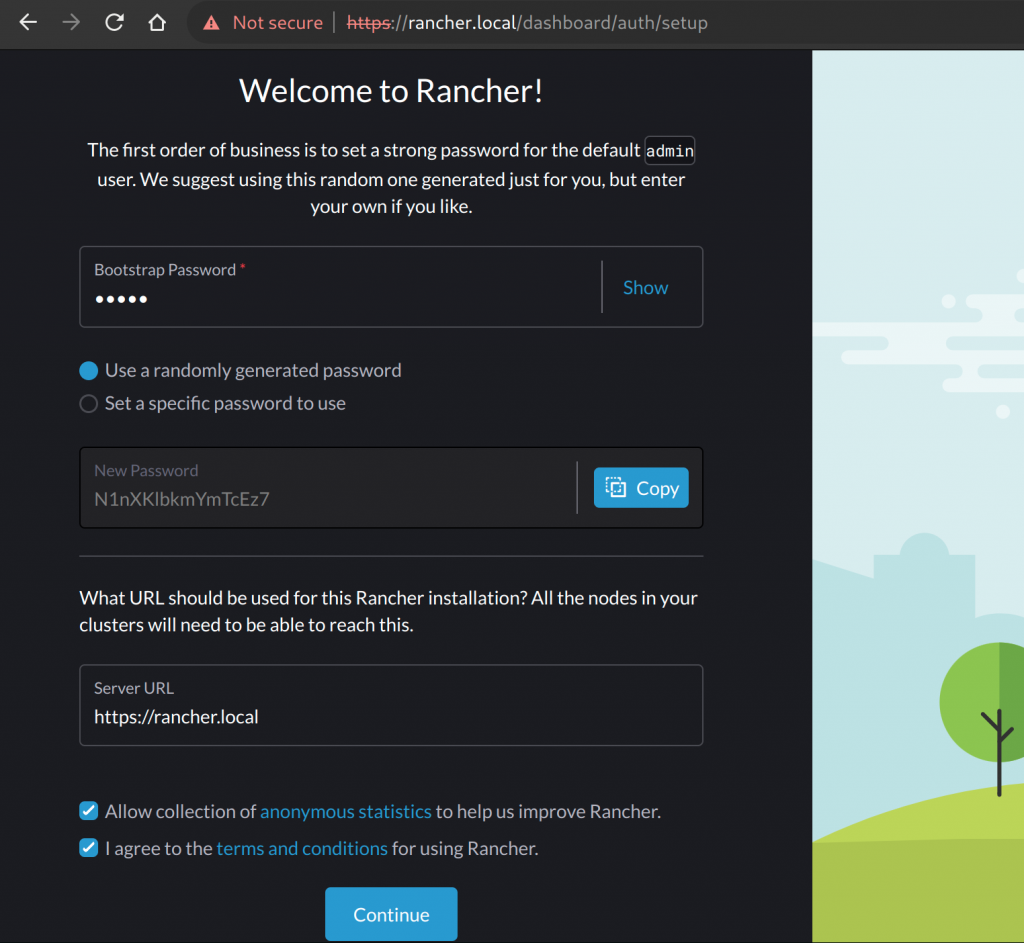
When Rancher’s pods have booted up, with your browser you can navigate to: https://rancher.local and complete the initial setup:
Once you have completed the step, and saved the password, you can start exploring your local cluster with the graphical manager:
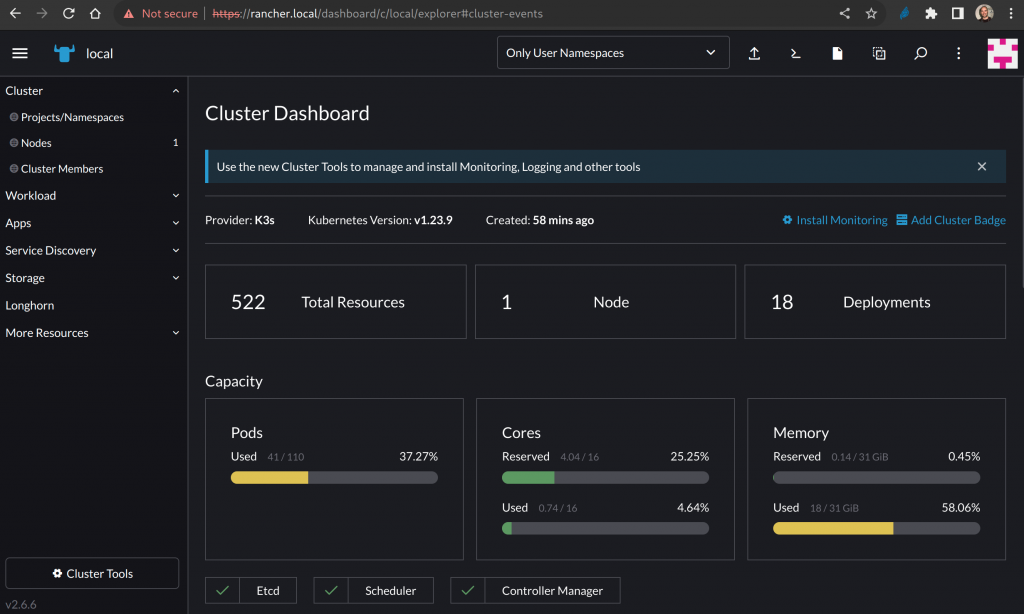
Depending on what you have deployed on the cluster, you could see more or less resource consumption.
Deploy Longhorn
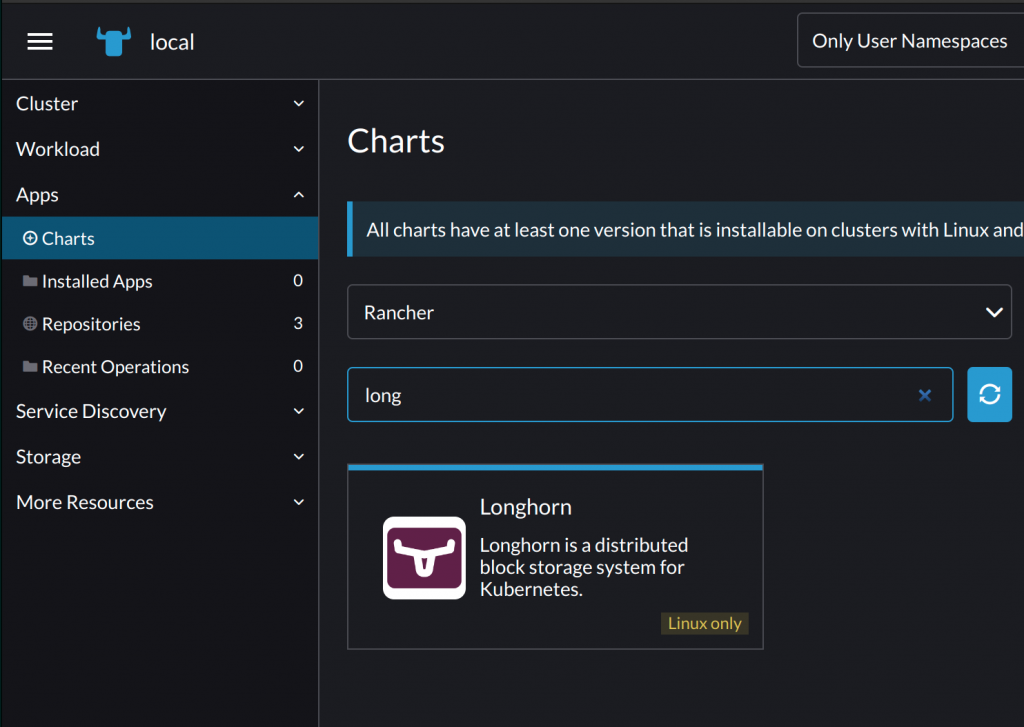
You can now deploy Longhorn using the Charts chooser under the Apps section on the left of the Rancher’s dashboard:
The installation is pretty straightforward and you don’t need to change any default value of the chart.
In the end, if everything has gone well, you should see the Rancher’s console showing:

After Longhorn has been installed, you can simply click on the Longhorn entry on the left Rancher’s menu to be redirected to the Longhorn’s dashboard:
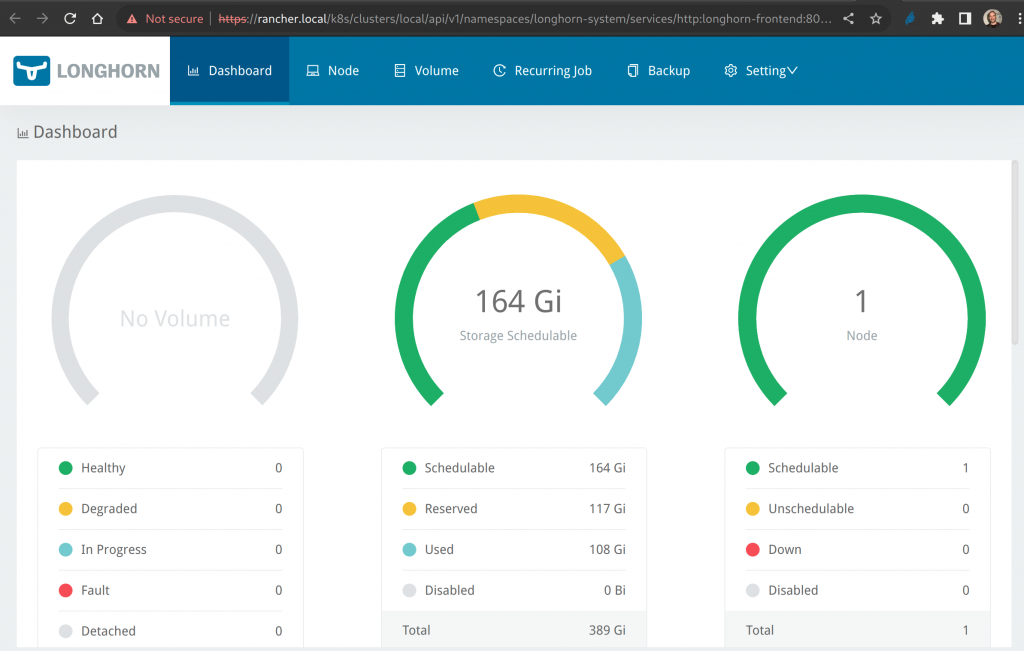
A freshly installation of Longhorn shows that still no application is using a persistent volume.
Deploy s3gw
You are now ready to add the last ingredient to your system: s3gw, the S3 gateway.
Rancher does not bundle with the Helm repository of s3gw set by default, so you must add it from the dashboard:
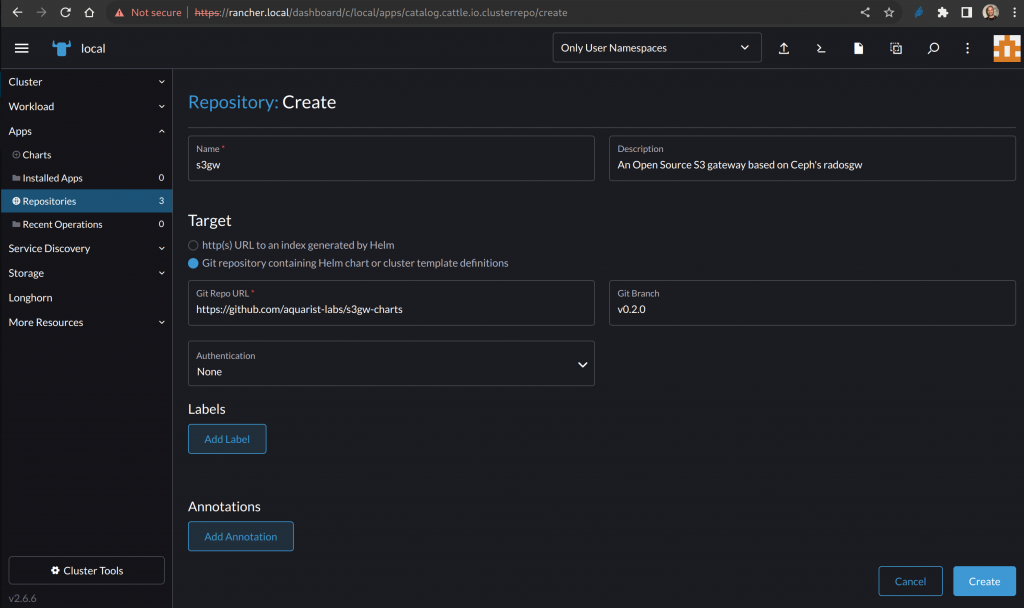
You can choose an unique name: for example: s3gw.
For the Target field you have to choose Git repository and the repository URL:
https://github.com/aquarist-labs/s3gw-charts
In the Git Branch field put the latest available release:
v0.2.0
You can now click on Create button.
On Apps section, you can now find the s3gw chart:
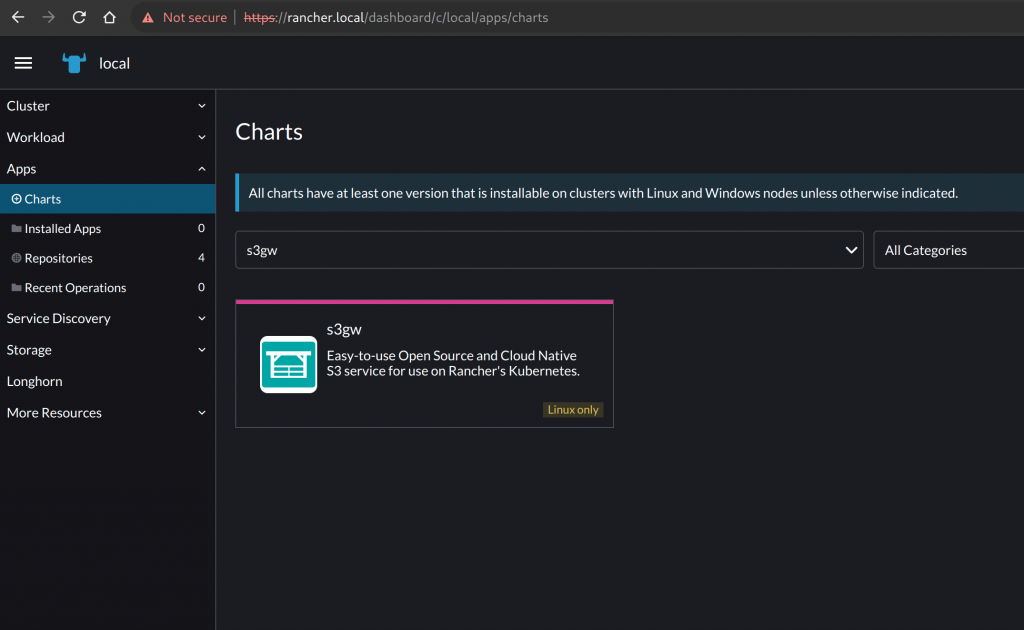
So let’s proceed with installation; you can choose a namespace and a name for s3gw:
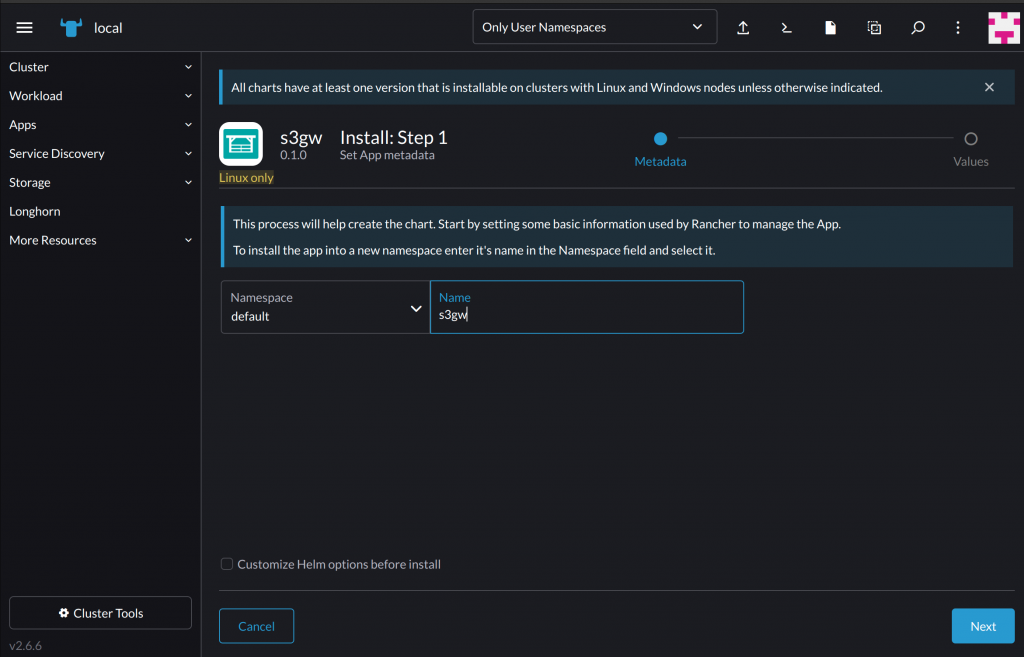
You don’t need to customize the chart, so you can leave the bottom checkbox unchecked.
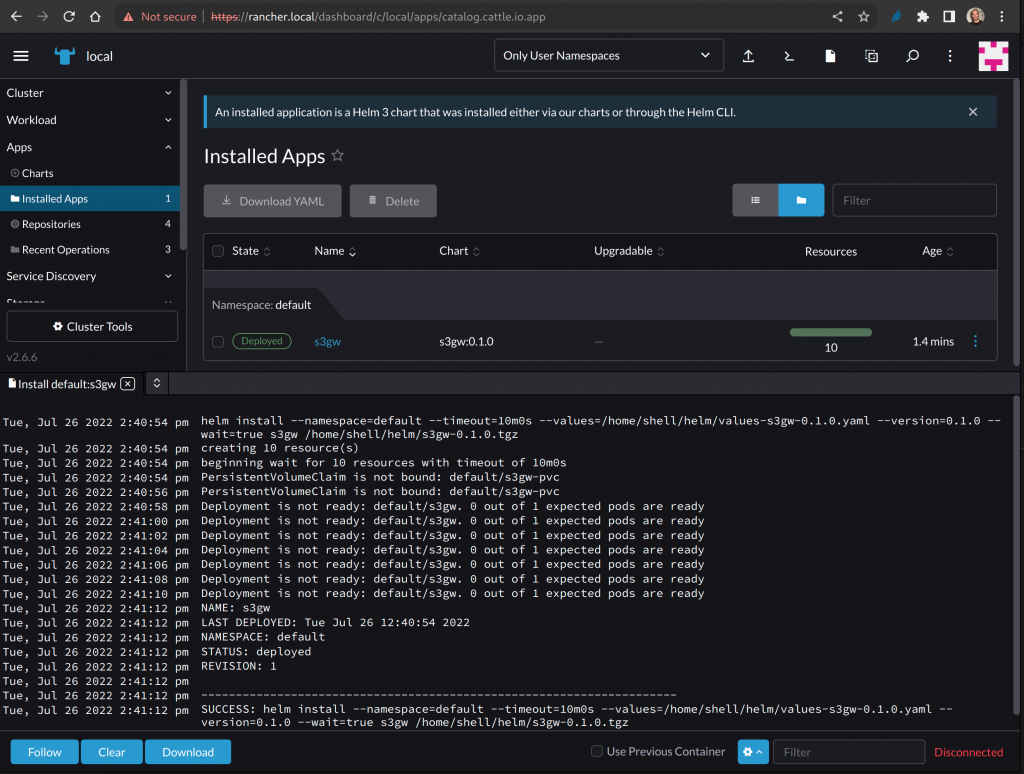
Once the installation completed, if everything has gone well, you should see the Rancher’s console showing:
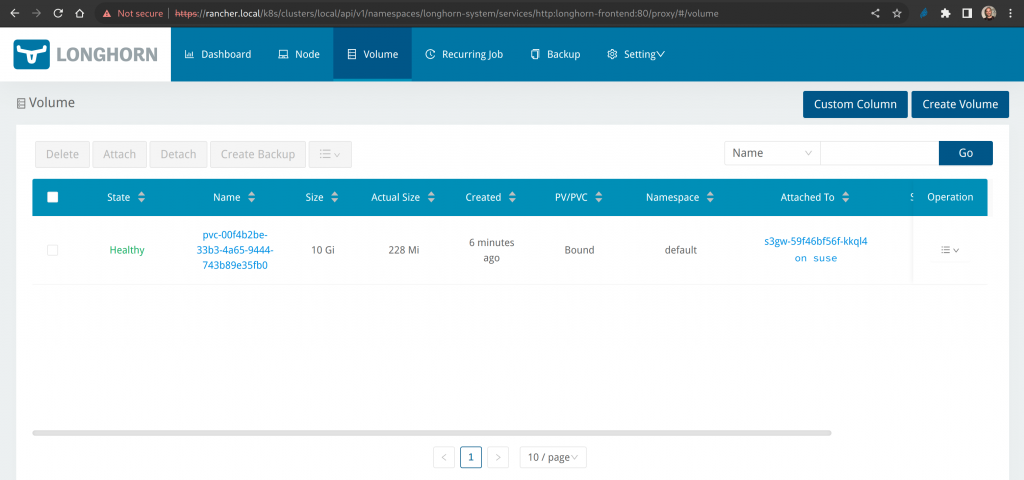
On Longhorn dashboard, you can verify that the application is using a Longhorn persistent volume:
Test the S3 gateway
By default the s3gw chart configures an ingress resource pointing to the S3 gateway with the FQDN: s3gw.local .
Thus, you must define s3gw.local in /etc/hosts pointing to the ip address of one of the host’s physical interfaces, for example:
10.0.0.2 s3gw.local
For testing the S3 gateway you can rely on s3cmd that is a popular command line S3 client.
You can install it choosing a method listed here.
Once you have installed it, you can take the s3cmd configuration file from here and use that as it is against s3gw.
All you need to to is to create a directory, put s3cmd.cfg inside that and finally invoke s3cmd.
Create a bucket
$ s3cmd -c s3cmd.cfg mb s3://foo
Put some objects in the bucket
Let’s create a 1mb file filled with random data and put it in the bucket:
$ dd if=/dev/random bs=1k count=1k of=obj.1mb.bin
$ s3cmd -c s3cmd.cfg put obj.1mb.bin s3://foo
Let’s create a 10mb file filled with random data and put it in the bucket:
$ dd if=/dev/random bs=1k count=10k of=obj.10mb.bin
$ s3cmd -c s3cmd.cfg put obj.10mb.bin s3://foo
List objects contained in a bucket
$ s3cmd -c s3cmd.cfg ls s3://foo
2022-07-26 15:03 10485760  s3://foo/obj.10mb.bin
2022-07-26 15:01 1048576   s3://foo/obj.1mb.bin
Delete an object
$ s3cmd -c s3cmd.cfg rm s3://foo/obj.10mb.bin
In summary
In this tutorial, you’ve seen how to set up a K3s cluster, manage it with Rancher, install Longhorn and finally enrich the system with a S3 gateway. K3s, Rancher and Longhorn are powerful tools to set up an environment providing resilient and performing storage capabilities. If you need to expose the storage to external clients, you can choose to install s3gw with a near zero effort.
To know more and to contribute to the s3gw project
Related Articles
Mar 05th, 2025