Preview Rancher at AWS re:Invent 2016

Tuesday, 22 November, 2016

In less than a week, over 24,000 developers, sysadmins, and engineers
will arrive in Las Vegas to attend AWS re:Invent (Nov. 28 – Dec 2). If
you’re headed to the conference, we look forward to seeing you there!
We’ll be onsite previewing enhancements included in our upcoming Rancher
v1.2 release:

Support for the latest versions of Kubernetes and Docker: As we’ve
previously
mentioned
,
we’re committed to supporting multiple container orchestration
frameworks, and we’re eager to show off our latest support for Docker
Native Orchestration and Kubernetes.

Better load balancing for AWS: We recently completed additional work
on the external load balancer for AWS, which is also available via
Rancher
catalog
.

An update to our storage and networking services: While we’ve
covered some changes to how we handle container networking and storage
in our prior meetups,
we’ve built more improvements to show off since then.

Come say hello and check out the newest features! The Rancher team will
be at booth #110, with great swag and prizes, and we’re always excited
to meet our users and community in person. Not attending AWS re:Invent?
Stay up-to-date with Rancher and with our upcoming release by following
us on Twitter @Rancher_Labs. **You might
also be interested in: **

Running Kubernetes on AWS with Rancher

Wednesday, 7 September, 2016

As everyone is aware, Amazon has EC2 Container Services, the Amazon
solution for running Docker containers. I haven’t had much luck with
this, so now I’m testing Rancher and Kubernetes on Amazon Web Services.
Kubernetes is an open-source system
for automating deployment, scaling, and management of containerized
applications, and Rancher is a
complete platform running containers within enterprises, providing
enterprise-level access control and container orchestration. I started
first by creating a new Virtual Private Cloud, using the default wizard.
This VPC is being used for the complete Rancher farm. Next thing is to
create one or more new hosts; where the Rancher documentation says to
install Docker manually, I’ve chosen the RancherOS AMI itself.
That AMI is specially built for this purposes, and very minimal (even
curl isn’t installed):
1
The security group enables traffic to TCP port 8080 for my IP only. This
is important, as there is no authorization enabled by default. It is
also a good idea to add traffic between several hosts itself; this can
be done by saving the security group (then it well get an sg-
identifier), and add All Traffic permissions to that security group.
2
When the new instance is ready, just connect using ssh and start the
Rancher server Docker image using
sudo docker run -d --restart=always -p 8080:8080 rancher/server. The
Rancher applications will run within the Docker images themselves.

$ sudo docker run -d --restart=always -p 8080:8080 rancher/server
Unable to find image 'rancher/server:latest' locally latest: Pulling from rancher/server
...
Status: Downloaded newer image for rancher/server:latest 3baee4a975200c3eb4b18fd1351b07393cdd09455cf7917d46879a278399c02e

You can tail the logs using the docker logs -f {containerid} command:

[rancher@ip-10-0-0-29 ~]$ sudo docker logs -f 3baee4a975200c3eb4b18fd1351b07393cdd09455cf7917d46879a278399c02e 160901 8:40:30
[Note] /usr/sbin/mysqld (mysqld 5.5.49-0ubuntu0.14.04.1) starting as process 25
...
Uptime: 8 Threads: 1 Questions: 2 Slow queries: 0 Opens: 33 Flush tables: 1 Open tables: 26 Queries per second avg: 0.250
Setting up database
Importing schema

Perfect. Rancher server is starting, and will be finished soon. You can
browse to the IP of the instance, and by default, Rancher server will
run on port 8080. The public IP will be reachable for all hosts, which
is an issue when having the hosts in a VPC, so you can use the private
IP instead. This can be changed within Admin and Settings.
3
When Rancher server is up and running, we need to add some Docker hosts.
You can launch a new host (the More Like This option is awesome – it
just starts another instance of the same configuration), or add the same
host as server (but that’s not a best practice). Next, add a new host
within Rancher Server, click on Infrastructure, and next on Add Host.
When the host(s) have been added, you can add the Kubernetes
environment. Kubernetes will then be deployed automatically to the new
host(s).
4
This will take a few minutes, and you can monitor its current status by
selecting the environment:
5
As the Kubernetes environment finishes, you navigate to Catalog and
deploy a container. For example, select the K8S Example Ghost container
– this will be up and running in no time:
6
During the deployment Kubernetes, the stack is created with the
following instances:

  • Rancher Ingress Controller 1 (rancher/ingress-controller): The
    Rancher Ingress Controller will leverage the existing load balancing
    functionality within Rancher and convert what is in Kubernetes
    ingress to a load balancer in Rancher (read more about this
    here)
  • **Rancher Server (rancher/server): **The Rancher management server,
    this will run the web frontend and API.
  • Rancher Agent (rancher/agent): Each node will get an individual
    agent, which manages the node
  • Rancher Kubernetes Agent 1 (rancher/kubernetes-agent): Agent
    responsible for handling communications between Rancher and
    Kubernetes
  • Rancher Agent Instance (rancher/agent-instance): Agent instance
    image for Rancher
  • Kubernetes ETCD 1 (rancher/etc): etcd is the highly-available
    key value store used for persistent, safe, and distributed storage
    of objects and metadata
  • Kubernetes Proxy 1 (rancher/k8s): The Kubernetes network proxy
    runs on each node
  • Kubernetes Scheduler 1 (rancher/k8s): The Kubernetes controller
    manager is a daemon that embeds the core control loops shipped with
    Kubernetes
  • Kubelet 1 (rancher/k8s): The kubelet is the primary “node
    agent” that runs on each node.

When adding an extra host the following will be added as well:

  • Kubernetes Proxy 2
  • Kubernetes Etcd 2
  • Kubelet 2

Because I don’t want to maintain my own registry, I’ve created an
Amazon Container Registry, and used the registry within Rancher. You can
just copy the address, username AWS (note, this is case sensitive), and
password (the long base64 encoded string). You can get the credentials
using

aws ecr get-login --region us-east-1

Then build the Docker image:

docker build -t dutchcoders .

Tag the image and register it:

docker tag dutchcoders:latest {url}/dutchoders:latest

Push the image to the registry:

docker push {url}/dutchcoders:latest

If you want to read more about running Kubernetes with Rancher, check
this, join the Kubernetes LinkedIn
group
, or check out the free
eBook on deploying and scaling Kubernetes with
Rancher
.
Let me know if you’ve got any questions running Rancher with Kubernetes
on Amazon Web Services. You can reach Rancher Labs on Twitter,
@Rancher_Labs, and me
@remco_verhoef. About the
Author
: Remco Verhoef is a tech enthusiast experimenting with
Kubernetes and developing in Golang and Rust.

Tags: Category: Products, Rancher Kubernetes Comments closed

Running Docker on AWS with Rancher – December Recorded Meetup

Friday, 18 December, 2015

Running Docker on AWSAmazon
Web Services (AWS) is one of the most popular clouds for running Docker
workloads, and we’ve seen more and more users deploy Rancher in
conjunction with multiple AWS services to deliver a resilient production
grade service. In our December online meetup, we discussed best
practices for running applications using Docker on AWS with Rancher.
We’ll demosntrate how to deploy, scale and manage deployments while
using underlying AWS features, such as EBS, ELB, Route53, RDS, and more.
During the meetup Darren Shepherd demonstrated: • Deploying Rancher
using RDS, ELB and Route53 • Deploy capacity in AWS with Docker Machine
• Deploying persistent applications using NFS storage • Using
autoscaling groups with Rancher • Leveraging ELB and Route53 for load
balancing. • Dynamically utilizing spot instances to reduce costs We
also had a demo from Spotinst, on how to automate management of Spot
Instances. You can view a recording of the entire meetup below, or
download the slides
on Slidshare.
Please join us for next months meetup, which you can register for below.

Category: Rancher Blog Comments closed

Deploying a Grafana environment on AWS with Rancher, RancherOS and Docker Machine

Tuesday, 7 April, 2015

Rancher Server has recently added Docker Machine
support
,
enabling us to easily deploy new Docker hosts on multiple cloud
providers via Rancher’s UI/API and automatically have those hosts
registered with Rancher. For now Rancher supports DigitalOcean and
Amazon EC2 clouds, and more providers will be supported in the future.
Another significant feature of Rancher is its networking implementation,
because it enhances and facilitates the way you connect Docker
containers and those services running on them. Rancher creates a private
network across all Docker hosts that allows containers to communicate as
if they were in the same subnet. In this post we will see how to use the
new Docker Machine support and Rancher networking by deploying a Grafana
dashboard installation on Amazon EC2. We are creating EC2 instances directly from
Rancher UI and all our containers are being connected through the
Rancher network. If you have never heard of Grafana, it is an open
source rich metric web dashboard and graph editor for Graphite, influxDB
and OpenTSBD metric storages. To set this up we are using these docker
images:

  • tutum/influxdb for storing metrics and grafana dashboards
  • tutum/grafana for graphing influxDB metrics and serving
    dashboards
  • a custom linux image that will send linux O.S. metrics to influxDB
    using sysinfo_influxdb (CPU, memory, load, disks I/O, network
    traffic).

In a test environment you may want to deploy docker images in the same
host, but we are using a total of 4 AWS instances listed below in order
to mimic a large-scale production deployment and also to see how Rancher
networking works.

  • 1 as a Rancher Server to provision and manage application stack AWS
    instances,
  • 1 running influxDB docker image (tutum/influxdb)
  • 1 running grafana docker image (tutum/grafana)
  • 1 running sysinfo docker image (nixel/sysinfo_influxdb)

Preparing AWS Environment

First you will need to create the following in AWS Console: a Key Pair
for connecting to your servers, a Security Group to give you access to
Rancher Console, and a Access Key for Rancher to provision EC2
instances. Creating a Key Pair Enter AWS EC2 Console, go to Key
Pairs
section, click Create Key Pair button and then enter a name for
your Key Pair. Once created, your browser downloads a pem certificate.
You will need it if you want to connect to your AWS instances.
Creating a Security Group First of all go to VPC Console and enter
Subnets section. You will get a list of available subnets in default
VPC, choose one for deploying AWS instances and copy its ID and CIDR.
Also copy VPC ID, you will need all this data later when creating Docker
hosts with Machine integration. I am using subnet 172.31.32.0/20 for
this tutorial.
AWS-VPC-Subnets
Then enter AWS EC2 Console, go to Security Groups section and click
Create Security Group button. Enter the following data:

  • Security Group Name: Rancher and Grafana
  • Description: Open Rancher and Grafana ports
  • VPC: select the default one
  • Add a new inbound rule to allow 22 TCP port to be accessible only
    from your IP
  • Add a new inbound rule to allow 8080 TCP port to be accessible only
    from your IP
  • Add a new inbound rule to allow 9345-9346 TCP ports to be accessible
    from anywhere
  • Add a new inbound rule to allow all traffic from your VPC network.
    In this case source is 172.31.32.0/20, change it accordingly to your
    environment.

AWS-Security-Group-RancherServer
Creating an Access Key Enter EC2 Console and click your user name in
the top menu bar, click Security Credentials and then expand Access
Keys
option. Click Create New Access Key button and after it has been
created you will click Show Access Key to get the ID and Secret Key.
Save them because you are needing them later to create Docker hosts.

Rancher Server Setup

For launching Rancher Server you will need an AWS instance. I am using
the t1.micro instance for writing this guide, but it is recommended to
use a larger instance for real environments. Enter AWS EC2 Console and
go to Instances section, click Launch Instance button, click
Community AMIs and then search for RancherOS and select last version,
for example rancheros-v0.2.1. Choose an instance type and click Next:
Configure instance details
button. In configuration screen be sure to
select the same subnet you chose for Security Group. Expand Advanced
Details
section and enter this user data to initialize your instance
and get Rancher Server installed and running.

#!/bin/bash
docker run -d -p 8080:8080 rancher/server:v0.14.1

AWS-RancherServer-userData
You may keep default options for all steps excepting Security Group
(choose Security Group named Rancher and Grafana). When launching AWS
instance you are asked to choose a Key Pair, be sure to select the one
that we created before. Go to Instances section and click your Rancher
Server instance to know its private and public IPs. Wait a few minutes
and then browse to
http://RANCHER_SERVER_PUBLIC_IP:8080
to enter Rancher Web Console and click Add Host. You will be asked to
confirm Rancher Server IP address, click Something else and enter
RANCHER_SERVER_PRIVATE_IP:8080, finally click Save button.
AWS-RancherServer-Host-setup

Docker hosts setup

Go to Rancher Console, click Add Host and select Amazon EC2. Here
you will need to enter the new host name, the Access Key and the
Secret Key. Also be sure to set the same Region, Zone, and VPC
ID
as those used by Rancher Server. Leave all other parameters with
their default values. Repeat this process to create our three Docker
hosts that will appear up and running after a while.
AWS-DockerHosts
Security Group for grafana Rancher Server has created a Security
Group named docker-machine for your Docker hosts. Now in order to be
able to connect to grafana you must go to VPC Console and add the
following Inbound rules:

  • Add a new inbound rule to allow 80 TCP port to be accessible only
    from your IP
  • Add a new inbound rule to allow 8083-8084 TCP ports to be accessible
    only from your IP
  • Add a new inbound rule to allow 8086 TCP port to be accessible only
    from your IP
  • Add a new inbound rule to allow all traffic from your VPC network.
    In this case source is 172.31.32.0/20, change it accordingly to your
    environment.

AWS-DockerMachine-SecurityGroup

Installing application containers

This step consists of installing and configuring influxDB, grafana, and
an ubuntu container running sysinfo_influxdb. This container will send
O.S. metrics to influxDB which will be graphed in grafana.
Installing influxDB container Go to Rancher Web Console and click +
Add Container
button at your first host, enter a container name like
influxdb and tutum/influxdb in Select Image field. Add these
three port mappings, all of them are TCP:

  • 8083 (on host) to 8083 (in container)
  • 8084 (on host) to 8084 (in container)
  • 8086 (on host) to 8086 (in container)

Expand Advanced Options section an add an environment variable named
PRE_CREATE_DB which value is grafana, so influxDB will create
an empty database for grafana metrics. Now go to Networking section
and enter a hostname like influxdb for this container. Be sure that
Network type is Managed Network on docker0 so this container can be
reached by grafana and sysinfo_influxdb. You can leave other options
with their default values. After a few minutes you will see your
influxDB container launched and running in your host. Note that influxdb
container has a private IP address, copy it to configure
sysinfo_influxdb later. Copy also the public IP of host that is running
this container, you will need it later to configure grafana.
AWS-grafana1-host

Installing grafana container Go to Rancher Web Console and click +
Add Container
button at your second host, enter a container name like
grafana and tutum/grafana in Select Image field. Add this TCP
port mapping:

  • 80 (on host) to 80 (in container)

Expand Advanced Options section and enter the following environment
variables needed by grafana:


Variable name Variable value Used for
HTTP_USER admin User login for grafana basic HTTP authentication
HTTP_PASS Some password User password for grafana basic HTTP authentication
INFLUXDB_HOST 52.11.32.51 InfluxDB host’s public IP. Adapt this to your environment
INFLUXDB_PORT 8086 InfluxDB port
INFLUXDB_NAME grafana Name of previously created database
INFLUXDB_USER root InfluxDB user credentials
INFLUXDB_PASS root InfluxDB user credentials
INFLUXDB_IS_GRAFANADB true Tell grafana to use InfluxDB for storing dashboards


AWS-Grafana-Env-Vars
Grafana makes your browser to connect to influxDB directly. This is why
we need to configure a public IP in INFLUXDB_HOST variable here. If
not, your browser could not reach influxDB when reading metric values.
Go to Networking section and enter a hostname like grafana for this
container. Be sure that Network type is Managed Network on docker0 so
this container can connect to influxdb. You can leave other options with
their default values and after a few minutes you will see your grafana
container launched and running in your host.
AWS-grafana2-host
Now go to Instances section in EC2 Console, click on the instance which
is running grafana container and copy its public IP. Type the following
url in your browser:
http://GRAFANA_HOST_PUBLIC_IP, use
HTTP_USER and HTTP_PASS credentials to log in.
Grafana-Main-Page
Installing sysinfo_influxdb container Go to Rancher Web Console and
click + Add Container button at your third host, enter sysinfo in
container name and nixel/sysinfo_influxdb in Select Image
field. No port mapping is needed. Expand Advanced Options section and
enter these environment variables which are needed by this container:


Variable name Variable value Used for
INFLUXDB_HOST 10.42.169.239 InfluxDB container private IP. Adapt this to your environment
INFLUXDB_PORT 8086 InfluxDB port
INFLUXDB_NAME grafana Name of previously created database
INFLUXDB_USER root InfluxDB user credentials
INFLUXDB_PASS root InfluxDB user credentials
SYSINFO_INTERVAL 5m Sysinfo frequency to update metric values. Default is 5m


Rancher-Sysinfo-Env-Vars
Note that in this case INFLUXDB_HOST contains influxDB container
private IP. This is because sysinfo_influxdb will directly connect to
influxDB, using the VPN created by Rancher. Go to Networking section
and be sure the container hostname is sysinfo because you will later
import a sample grafana dashboard which needs this. Be sure that Network
type is Managed Network on docker0 so this container can connect to
influxdb. You can leave other options with their default values and
after a few minutes you will see your sysinfo container launched and
running in your host.
AWS-grafana3-host

Graph metrics with grafana

At this point sysinfo container is collecting O.S. metrics and sending
them to influxDB every 5 minutes using Rancher networking. In this final
step we are graphing those metrics in grafana. First let’s import a
sample grafana dashboard that is already configured. Execute the
following command to download the dashboard definition:

curl -o https://raw.githubusercontent.com/nixelsolutions/sysinfo_influxdb/master/grafana_dashboard.json

Then open grafana web, browse
to http://GRAFANA_HOST_PUBLIC_IP and
click folder icon on top.
Grafana-Import-dashboard
Click import button and upload the file you have just downloaded. Click
save button on top and now you will be able to see CPU, Load Average,
RAM, Swap and Disks metrics that are being collected in your sysinfo
container.
Grafana-metrics

Conclusion

Rancher implements a networking solution that really simplifies the way
you bring connectivity to those services running in your containers.
Instead of managing port mappings it automatically puts all your
containers into the same network without requiring any configuration
from you. This is an important feature because, in fact, it brings
containers closer to enterprise production platforms because it makes
easier to deploy complex scenarios where some containers need to connect
with others. With Rancher you can deploy any container on any host at
any time without reconfiguring your environment, and there is no need to
worry about defining, configuring or maintaining port mappings when
interconnecting containers. To get more information on Rancher, feel
free at any time to request a demonstration from one of our
engineers
, or sign up
for an upcoming online meetup.

Manel Martinez
is a Linux systems engineer with experience in the design and management
of scalable, distributable and highly available open source web
infrastructures based on products like KVM, Docker, Apache, Nginx,
Tomcat, Jboss, RabbitMQ, HAProxy, MySQL and XtraDB. He lives in spain,
and you can find him on Twitter
@manel_martinezg.

Tags: Category: Uncategorized Comments closed

Riak Cluster Deployment Using Rancher And RancherOS on AWS

Thursday, 2 April, 2015

Recently I have been playing around with Riak and I wanted to get it
running with Docker, using RancherOS and Rancher. If you’re not
familiar with Riak, it is a distributed key/value store which is
designed for high availability, fault tolerance, simplicity, and
near-linear scalability. Riak is written in Erlang programming language
and it runs on an Erlang virtual machine. Riak provides availability
through replication and faster operations and more capacity through
partitions, using the ring design to its cluster, hashed keys
are partitioned by default to 64 partitions (or vnodes), each vnode will
be assigned to one physical node as following: Riak_ring
From Relational to Riak
Whitepaper

For example, if the cluster consists of 4 nodes: Node1, Node2, Node3,
and Node4, we will count around the nodes assigning each vnode to a
physical node until the all vnodes are accounted for, so in the previous
figure, Riak used 32 partition with 4 node cluster so we get:

Node0 : [1, 5, 9, 13, 17, 21, 25, 29]
Node1 : [2, 6, 10, 14, 18, 22, 26, 30]
Node3 : [3, 7, 11, 15, 19, 23, 27, 31]
Node4 : [4, 8, 12, 16, 20, 24, 28, 32]

So how about replication? Every time a write process happens Raik will
replicate the value to the next N vnodes, where N is the value of
the n_val setting in Riak cluster. By default, N is 3. To explain
this, assume we will use the default n_val value and we will use
the previous cluster setup with 4 nodes and 32 partitions, now lets
assume we will write a key/value to partition (vnode) 2 which is
assigned to the second node then the value will be replicated to vnode 3
and vnode 4 which are assigned to the 3rd and 4th nodes respectively.
For more information about Riak cluster, visit the official riak
documentation
. In this post, I am
going to deploy Riak cluster using Docker on RancherOS, the setup will
include:

  • Five Docker containers as Riak nodes.
  • Each Container will be on separate EC2 Instance.
  • RancherOS will be installed on each EC2 instance.
  • The whole setup will be managed using Rancher platform.

##

The Riak Docker Image

Before launching your EC2 instances and the Rancher platform, you should
create the Riak Docker image that will run each instance. I used the
implementation of Riak Docker image of
hectcastro, although I
added and removed some parts to become suitable to run on RancherOS.
First the Dockerfile:

FROM phusion/baseimage:latest
MAINTAINER Hussein Galal hussein.galal.ahmed.11@gmail.com

RUN sed -i.bak 's/main$/main universe/' /etc/apt/sources.list
RUN apt-get update -qq && apt-get install -y software-properties-common && 
    apt-add-repository ppa:webupd8team/java -y && apt-get update -qq && 
    echo oracle-java7-installer shared/accepted-oracle-license-v1-1 select true | /usr/bin/debconf-set-selections && 
    apt-get install -y oracle-java7-installer

# Install Riak
RUN curl https://packagecloud.io/install/repositories/basho/riak/script.deb | bash
RUN apt-get install -y riak

# Setup the Riak service
RUN mkdir -p /etc/service/riak
ADD scripts/riak.sh /etc/service/riak/run

RUN sed -i.bak 's/listener.http.internal = 127.0.0.1/listener.http.internal = 0.0.0.0/' /etc/riak/riak.conf && sed -i.bak 's/listener.protobuf.internal = 127.0.0.1/listener.protobuf.internal = 0.0.0.0/' /etc/riak/riak.conf && 
    echo "anti_entropy.concurrency_limit = 1" >> /etc/riak/riak.conf && 
    echo "javascript.map_pool_size = 0" >> /etc/riak/riak.conf && 
    echo "javascript.reduce_pool_size = 0" >> /etc/riak/riak.conf && 
    echo "javascript.hook_pool_size = 0" >> /etc/riak/riak.conf

# Add Automatic cluster support
ADD scripts/run.sh /etc/my_init.d/99_automatic_cluster.sh
RUN chmod u+x /etc/my_init.d/99_automatic_cluster.sh
RUN chmod u+x /etc/service/riak/run

# Enable insecure SSH key
RUN /usr/sbin/enable_insecure_key.sh

EXPOSE 22 8098 8087
CMD ["/sbin/my_init"]

A couple of notes on the previous Dockerfile. The phusion/baseimage is
used as the Docker base image, 2 important scripts were added to the
image (riak.sh, automatic_cluster.sh) which I will explain in a second,
the ports 8098 and 8087 are used for HTTP and Protocol Buffers and
finally ssh support through insecure key was added. The purpose of the
riak.sh script is to start the Riak service and ensure that the node
name is set correctly, while the automatic_cluster.sh script is used to
join the node to the cluster only if the RIAK_JOINING_IP is set
during the starting of the contianer. riak.sh

#! /bin/sh

# Ensure correct ownership and permissions on volumes
chown riak:riak /var/lib/riak /var/log/riak
chmod 755 /var/lib/riak /var/log/riak

# Open file descriptor limit
ulimit -n 4096
IP_ADDRESS=$(ip -o -4 addr list eth0 | awk '{print $4}' | cut -d/ -f1 | sed -n 2p)

# Ensure the Erlang node name is set correctly
sed -i.bak "s/riak@127.0.0.1/riak@${IP_ADDRESS}/" /etc/riak/riak.conf
rm  -rf /var/lib/riak/ring/*

# Start Riak
exec /sbin/setuser riak "$(ls -d /usr/lib/riak/erts*)/bin/run_erl" "/tmp/riak" 
"/var/log/riak" "exec /usr/sbin/riak console"

automatic_cluster.sh

#!/bin/sh
sleep 10
if env | grep -q "RIAK_JOINING_IP"; then
  # Join node to the cluster
  (sleep 5;riak-admin cluster join "riak@${RIAK_JOINING_IP}"  && echo -e "Node Joined The Cluster") &

  # Are we the last node to join?
  (sleep 8; if riak-admin member-status | egrep "joining|valid" | wc -l | grep -q "${RIAK_CLUSTER_SIZE}"; then
    riak-admin cluster plan  && riak-admin cluster commit && echo -e "nCommiting The Changes..."
  fi) &
fi

Also note that RIAK_CLUSTER_SIZE is used to specify the size of the
cluster used in this setup. We don’t need more than that to start the
cluster, now build the image and push it to Docker Hub to be used later.

# docker build -t husseingalal/riak2 .
# docker push husseingalal/riak2

Launch Rancher Platform

The Rancher Management platform will be used manage the Docker
containers on RancherOS instances. First you need to run Rancher
platform on a machine using the following command:

# docker run -d -p 8080:8080 rancher/server

Rancher_platform1

Create RancherOS EC2 Instances

RancherOS is available as an Amazon Web Services AMI, and can be easily
run on EC2, the next step is to create 5 EC2 instances to setup the
cluster:
riak1
You will get something like that after creating five instances with
Amazon AWS:
riak3
After creating the five instances, its time to register each instance
with Rancher by running the following command on each server:

[rancher@rancher ~]$ sudo docker run --rm -it --privileged -v /var/run/docker.sock:/var/run/docker.sock rancher/agent http://<ip-address>:8080/v1/scripts/4E1D4A26B07A1539CD33:1426626000000:jZskPi71YEPSJo1uMISMEOpbUo

After running the previous command on each server you will see that the
servers have been registered with Rancher:
riak4

Running The Riak cluster

The RIAK_CLUSTER_SIZE will provide the number of instances needed
to be added to the cluster before committing the changes, its
recommended to add 5 Riak nodes to the cluster of a production
environment, although you can set the RIAK_CLUSTER_SIZE to more or
fewer as needed. **** **** To create a Docker container using the
Rancher platform, on any instance click on “Add Container”:
riak_6
On the first node you just need to specify the name of the container
and select the Riak image, but for other Riak nodes you need to specify
two more environment variables which will help the node to connect to
the cluster the RIAK_JOINING_IP which tells the Riak node to
connect to a node in the cluster and RIAK_CLUSTER_SIZE which used
to specify the number of nodes joining the cluster:
riakn_6

Testing The Riak Cluster

From Rancher we can view the logs of the running containers, similar to
using docker logs -f container-name. This allows us to see the logs of
the Riak containers and ensure that everything is running as planned:
Screenshot from 2015-03-17 23:41:26
Screenshot from 2015-03-28 01:22:57
At the last node you will see something different. Since the number of
the node that joined the cluster matches the value of the environment
variable RIAK_CLUSTER_SIZE, so the changes will be committed and the
cluster will be up and running: Screenshot from 2015-03-28 00:25:58
To see that the nodes are connected to the cluster, you can write
the following command inside the shell of any of the Riak containers:

# riak-admin member-status

And you will get the following output: Screenshot from 2015-03-28 01:40:31
This indicates that each node is a valid member of the cluster and
acquire a roughly equal percentage of the ring. Now to test the cluster
from outside the environment, you should map the ports of the Docker
containers to the host’s ports, this can be achieved dynamically using
Rancher platform:
19
I already created and activated a bucket-type called “cluster,” which I
used to test via the Riak HTTP API. You can see from below the
environment is up and running now.

$ export RIAK=http://52.0.119.255:8098
$ curl -XPUT "$RIAK/types/cluster/buckets/rancher/keys/hello" 
-H "Content-Type:text/plain" 
-d "World.. Riak"


$ curl -i "$RIAK/types/cluster/buckets/rancher/keys/hello"
HTTP/1.1 200 OK
X-Riak-Vclock: a85hYGBgzGDKBVIcqZfePk3k6vPOYEpkzGNlYAroOseXBQA=
Vary: Accept-Encoding
Server: MochiWeb/1.1 WebMachine/1.10.5 (jokes are better explained)
url: </buckets/rancher>; rel="up"
Last-Modified: Fri, 27 Mar 2015 22:04:50 GMT
ETag: "4flAtEZ59hdYsKhSGVhKpZ"
Date: Fri, 27 Mar 2015 22:11:23 GMT
Content-Type: text/plain
Content-Length: 5

World.. Riak

Conclusion

Riak cluster provides a distributed, high available, and simple
key-value store. Building the Riak cluster using RancherOS and Rancher
platform provide docker management and networking capabilities, making
installation quick and making it simple to upgrade and scale the
environment in the future. You can download Riak
here. To download Rancher
or RancherOS please visit our GitHub
site
. You can find a detailed getting
started
guide
for
RancherOS on GitHub as well. If you would like to learn more, please
join our next online meetup to meet the team and learn about the latest
with Rancher and RancherOS. Hussein Galal is
a Linux System Administrator, with experience in Linux, Unix,
Networking, and open source technologies like Nginx, Apache, PHP-FPM,
Passenger, MySQL, LXC, and Docker. You can follow Hussein
on Twitter @galal_hussein.

Tags: ,,,,, Category: Rancher Blog Comments closed

Creating a Magento Cluster on AWS using Docker and Rancher

Monday, 2 March, 2015

magento-logo2

[Usman is a server and infrastructure engineer, with experience in
building large scale distributed services on top of various cloud
platforms. You can read more of his work at
techtraits.com, or follow him on twitter
@usman_ismailor on
GitHub.]

Magento is an open-source content management
system (CMS) offering a powerful tool-set for managing eCommerce
web-sites. Magento is used by thousands of companies including Nike and
Office Max. Today we are going to walk through the process of setting up
a Magento cluster using Docker and Rancher on the Amazon Elastic Compute
Cloud (EC2). We use Docker because it makes deployments simple,
repeatable, and portable across cloud service providers and in-house
hardware. Using Rancher we can extend the Docker primitives across
multiple servers even if those servers are on different cloud providers.

We will be using the Official MySQL
image
, Official Memcached
Image
and
a Magento image I
created. Despite its many benefits, one area where Docker is still
evolving is managing entire clusters. It is possible to have multi-node
deployments with Docker installed on each node, but you have to manage
the containers on each node independently by connecting through ssh.
Furthermore, we lose the ability to connect containers using Docker
linking. This is where Rancher comes in. Rancher creates a Virtual
Private Network (VPN) using IPSec between all Docker containers and
allows us to communicate between containers using standard Docker
primitives. Additionally, Rancher gives us a nice UI to launch and
manage containers without having to ssh into individual servers. We are
launching all nodes on EC2, however you could use any combination of
servers–some from EC2 or from in-house hardware or from Digital Ocean
if you choose.

The next sections walk through setting up the Amazon environment,
Rancher server, and a array of Rancher compute nodes. We will then use
those nodes to launch our Magneto deployment.

Amazon Environment Setup

We are going to bring up our cluster on top of Amazon EC2, and for this
we need an Amazon Web Services (AWS) account
and some familiarity with the AWS Console.
If you need a refresher you can peruse the AWS Console
Documentation
.
Once you are signed into the console, click through to the EC2 service
and from there select the Key Pairs menu item in the Network and
Security
section of the side menu. Click Create Key Pair and specify
a name in the pop-up screen to create a key. When you click Create, a
pem file will be downloaded to your computer. Keep the key file
somewhere safe as it is needed to login to your servers and also allows
someone to access your servers if they gain access to it. We will also
need to setup a security group by selecting the Security Groups option
in the side menu and clicking the Create Security Group button. Select
the default Virtual Private Cloud (VPC) to create the security group in
and open; port 8080, 9345 and 9346 to the internet. You will also need
to expose port 22 so that you can ssh into your server if necessary. For
this port, you can select the *My IP *option instead of Anywhere if you
would like to keep login access to your nodes limited.

racher-security-group

Rancher Server Launch

We are now ready to launch our Rancher server; for this we will Select
the Instances option from the side menu and then click Launch
Instance
. This is a 7-step process beginning with Selecting an Amazon
Machine Image (AMI). We will just use the default Amazon Linux AMI. Step
two requires us to choose an instance size for the Rancher server. We
will use the *t2.micro, *the least expensive instance type but recommend
you use a larger instance type for a real deployment. In step three, we
have to specify instance details; you can leave most fields set to their
defaults values but make sure the Auto-assign Public IP setting is set
to enabled otherwise you will not be able to access your server.

instance-details

Scroll to the bottom of the page and expand the Advanced
Details
section and add the following code into the User data text
box. Amazon uses this as an initializer for your instance and will make
sure that Docker and the Rancher Server is installed and running. Note
that we are using the package manager yum to install Docker and then
overwriting the binary with the latest one from Docker.com. We do this
because Rancher requires Docker version 1.5 or higher but the
repositories have not been updated past version 1.3 as yet.

#!/bin/bash
yum install docker -y
wget https://get.docker.com/builds/Linux/x86_64/docker-latest -O docker
chmod +x docker
mv -f ./docker $(which docker)
service docker restart
docker run -d -p 8080:8080 rancher/server

You may select the defaults for all subsequent options other than
Security Group for which you should select the one we created earlier.
Similarly when asked to select ssh key select the one we created
earlier. A few minutes after you create your instance the Rancher server
should be up and running. You can find your servers Public IP by
selecting the server in the console and then browse to
http://RANCHER_SERVER_IP:8080/ in a browser of your choice and you
will see the Rancher web console. Also note the Private IP of Rancher
from the details section of the Amazon Console; we will need this later
on.

rancher-server

Rancher Compute Node Setuprancher-ui

The first step in creating your Rancher compute nodes is to get the
agent launch command from the Rancher server. To do this, open up your
Rancher server in a browser and click Register a new host. You will be
presented with a pop window with a Docker run command that you can use
to bring up a Docker agent. Copy that command, and replace the Public IP
of the Rancher Server with its private IP. This is so required because
Rancher uses the private network for inter-server communication and
hence is not blocked by the Security Groups. You will also have to
remove the ‘-it’ switch and replace it with ‘-d’ to reflect the fact
that we are running this container in a non-interactive shell. Also note
that the IP Address (52.1.151.186) and secret (6C97B49FE39413B…) shown
below are unique to each setup and will be different for you.

docker run --rm -it --privileged -v /var/run/docker.sock:/var/run/docker.sock
      rancher/agent http://52.1.151.186:8080/v1/scripts/6C97B49FE39413B2B76B:
      1424538000000:6UL0o28EXZIkjZbmPOYMGxmM9RU

With this command we can now create our array launch configuration. We
do this by selecting the Launch Configurations item from the side menu
and clicking *Create Launch Configuration. You will then be asked to
follow the same 7-step form that you followed for the Rancher Server
instance launch
. As before,* select the Amazon Linux AMI, an instance
type of your choice, storage size, and the security group and ssh key we
created earlier. The only difference for the instance setup form is on
Step 3, Configure Launch Configuration. In the Advanced details
section you must select “Assign a public IP to every instance” to
every instance if you wish for your Docker containers to be publicly
accessible. In addition add the following lines into the User data text
box. This script is identical to the one we used to launch Rancher
server other than the last line. We replaced the Docker run for the
Rancher server command with the modified Docker run command for the
Rancher agent which we copied from the UI.

#!/bin/bash
yum install docker -y
wget https://get.docker.com/builds/Linux/x86_64/docker-latest -O docker
chmod +x docker
mv -f ./docker $(which docker)
service docker restart
docker run --rm -d --privileged -v /var/run/docker.sock:/var/run/docker.sock Rancher/agent http://172.30.2.200:8080/

Now that we have created the launch configuration we can create an
autoscaling array with our configuration. We select the Auto Scaling
Groups
option of the side menu and click *Create Auto Scaling
Group. *In the first step we will be asked to specify the launch
configuration, select the launch configuration we just created in the
previous paragraph. In the second step specify a name for this auto
scaling group, set the group size to however many compute nodes you
require. Note that this value can be changed later if your needs
increase or decrease. We will be using two agents to illustrate the
network connectivity features of Rancher.
For Network and Subnet choose the default VPC and the same
availability zone you used for the Rancher server. The rest of the steps
can be left at default settings. Once you have created your auto scaling
group wait a few minutes for the instances to be launched and then
browse to the Rancher Server URL to see that the new agents have been
registered. Note that you can always add more agents to your cluster by
editing the Desired Nodes setting in the Auto scaling group
configuration. With our launch configuration setup all new nodes will
register themselves with the Rancher server automatically.

Magento Setup

Now that we have our two node Rancher cluster launched we can setup our
Magento containers. However before we launch our Magento Cluster we must
first launch a MySQL container to serve as our database and a Memcached
cluster for caching. Let’s launch our MySQL container first on one of
the compute nodes. We do this by mouse hovering over the server in the
Rancher Server UI and clicking the plus icon. In the pop up menu we need
to specify a name for our container and mysql as the source image.
Select the *Command *tab in the menu to the left and add 4 Environment
Variables: mysql root password, mysql user, mysql password, and mysql
database. You may choose any values for these variables except mysql
database which must be set to Magento. After adding all of these
environment variables, hit create to create the container. Note that
mysql is official Docker mysql image and details of what is inside this
container can be found on
its dockerhub page.

mysql_env

Next we will create the Memcached container on the empty compute node by
hitting the plus icon. We again give the container a name and specify
its source image as memcached. The Memcached container does not
require any further configuration and therefore we can just click create
to setup the container. Details of the memcached official container we
use can be found on
its dockerhub page.
Lastly we will create the Magento container from an image I created
called usman/magento.
Create the Magento container on the same compute node as the cache (so
that cache is accessible faster). Specify usman/magento as the source
image. In the ports section add a mapping from 8080 public to 80 in host
ports. Make sure that you select theManaged Network on docker0 option
for both mysql and memcached containers so that we can connect to them
from our Magento container.

links

In the links section, add links to the mysql and memcached containers
that we just setup. It is important the mysql container be named db and
the memcached container be named cache as shown in the image to the
right. We need to choose these names because Rancher creates environment
variables in the Magento container telling it where to connect to MySQL
and Memcached. These variables are based on the name of the linked
container and hence we the need the values to remain the same. By
linking containers through Rancher the containers are able to
communicate even though we did not expose their ports. Rancher extends
Docker’s linking concept to support multiple nodes by providing
a virtual private network between the hosts using IPsec tunneling. We
will need to know the IP and Port at which MySQL is available to the
Magento container so that we can use it later when we configure Magento
through the web interface. So go head and hit create and wait for the
container to get into the Running state.

exec-shell

Once the container is running we can use another Rancher feature to open
a shell into containers directly from the UI to retrieve the network
information we require. Click the inverted chevron next to the Magento
container and select Execute Shell. You will be presented with pop up
window and an embedded shell connected to the container. In the shell
use the env command to list the environment variables and grep
for DB_PORT_3306_TCP_. This will list the IP, Port and Protocol at
which the DB is available. As an aside the ADDR will be the IP of the
Network Agent on the server that Magento is running. This is because the
network agent will be proxying traffic to the remote container.

env | grep DB_PORT_3306_TCP_
DB_PORT_3306_TCP_PORT=28428
DB_PORT_3306_TCP_PROTO=tcp
DB_PORT_3306_TCP_ADDR=10.42.81.155

The Magento container should be up by now and you can browse to port
8080 on the public interface of the Amazon server running Magento. Note
that the public IP is not shown inside Rancher as we used the private
interfaces to setup agents–you will have to lookup the IP from the
Amazon console. If everything is working correctly you should see the
Magento installation wizard that will guide you through the rest of the
process. The initial page will ask you to accept the Terms of Service,
and then subsequent pages will as ask for locale information and
database configuration. For database configuration enter the value of
the $DB_PORT_3306_TCP_ADDR that we looked up earlier followed by
a colon and $DB_PORT_3306_TCP_PORT in to the Host field. Also
specify the database name as *magento and username *and password to
match values you selected for MYSQL_USER and MYSQL_PASSWORD
respectively. Next you will be asked to create an administrator user and
password for Magento and with that you are done. You should have a fully
functional, albeit empty Magento website.

magento-configruation

If you got this far, you have successfully launched a Rancher cluster on
the Amazon Compute Cloud and created a distributed Magento deployment
using Docker containers. We have also used two salient features of
Rancher–the VPN that allows private communication between containers
and the ability to manage containers on the entire cluster from a
web-UI. During this entire tutorial we never had to ssh into any of our
servers. Although the Magento cluster we setup was just meant to be an
example, with a few modifications such as using a replicated MySQL
database and a larger array of Rancher compute nodes, we could very
easily use Rancher for a production Magento deployment.

A word of caution if you do plan on using Rancher for large-scale
deployments: Rancher is still in its infancy, and there are some
features that have not been released yet. For example if we were to run
multiple Magento containers, we would need to setup our own
load-balancing solution to distribute traffic to the containers. Another
issue is that container configuration is stored on the agents where the
containers are running and hence losing an agent means not only losing
the containers running on it but also the configuration used to launch
them. The containers we launched today are fairly simple but this is not
always the case. Both ELBs and support for Docker Compose with some form
of templating are on the Rancher roadmap, so hopefully these items will
be addressed soon. I am not using Rancher on user-facing productions
systems just yet but it is going to be a larger and larger part of the
Docker based systems I manage.

If you would like to learn more about Rancher, please request a
one-on-one demo to get a better understanding of how the platform works.

[Usman is a server and infrastructure engineer, with experience in
building large scale distributed services on top of various cloud
platforms. You can read more of his work at
techtraits.com, or follow him on twitter
@usman_ismailor on
GitHub.]

Tags: ,,,,, Category: Uncategorized Comments closed

Meet the Rancher team at AWS Re:Invent

Wednesday, 5 November, 2014

After months of work we will be previewing Rancher at AWS Re:Invent
November 11-14. Stop by Booth #455 to meet our team and get the latest
on what we’re planning over the next few months.

Category: Uncategorized Comments closed

Uwaga użytkownicy CentOS: nadszedł czas na działanie!

Tuesday, 2 January, 2024

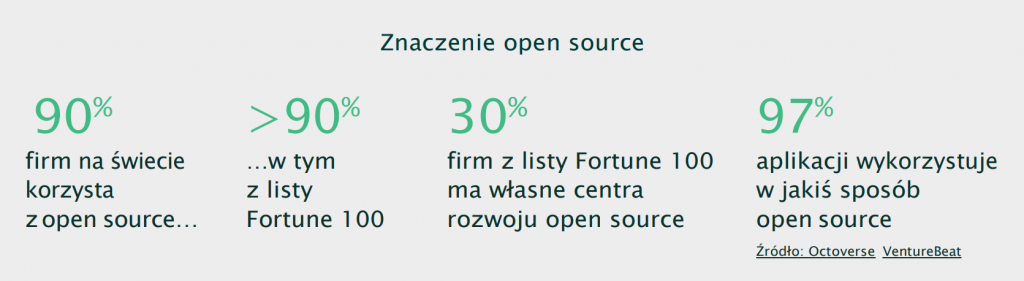
Oprogramowanie open source stało się kluczowym elementem nowoczesnych środowisk IT. Firmy korzystają przede wszystkim z systemów Linux – największego projektu open source, który napędza ich operacje biznesowe. Co za tym idzie, organizacje są zależne od zdrowego, dobrze prosperującego ekosystemu open source skupionego wokół Linuksa, ale także całej gamy innego oprogramowania i narzędzi.

Linux i oprogramowanie open source stanowią kluczowy element większości obecnych strategii transformacji cyfrowej, od chmury hybrydowej i rozwiązań wielochmurowych po kontenery i mikrousługi. Mają absolutnie fundamentalne znaczenie dla każdej firmy wykorzystującej najnowsze technologie do rozwoju swojej działalności. Jednak za sukcesem Linuksa i ogólnie open source nie stoi tylko jego wartość biznesowa, ale przede wszystkim wspierająca go społeczność i sposób rozwoju otwartego oprogramowania.

To właśnie sprawia, że open source jest dziś tak ważny dla przedsiębiorstw. Główne zasady open source, takie jak współpraca i wspólny sukces, są dobre dla wszystkich. Musimy bronić tych wartości i zadbać o dobro społeczności open source dla przyszłych pokoleń. Organizacje, które czerpią korzyści ze społeczności open source, mają szczególny obowiązek zwrócenia tyle samo, ile otrzymują.

Tak właśnie działamy w SUSE od 30 lat. Jesteśmy zaangażowani zarówno w rozwój open source, jak i jego społeczności, i będziemy to robić przez kolejne dziesięciolecia.

Co się wydarzyło w świecie systemów open source, w tym Linux?

Ostatnio niektórzy dostawcy dystrybucji Linuksa zmienili swoje modele komercyjne, co zmusiło użytkowników do ponownej oceny planów dla posiadanej infrastruktury linuksowej. Na przykład zmiany wprowadzone w systemie CentOS spowodowały, że CentOS 7 osiągnie koniec okresu eksploatacji w czerwcu 2024 r. – bez dodatkowego wsparcia ani aktualizacji. Stanowi to poważne wyzwanie dla przedsiębiorstw, które polegają na CentOS:

  • Brak wsparcia i ochrony: Gdy CentOS osiągnie koniec okresu eksploatacji, użytkownicy nie będą już otrzymywać wsparcia, aktualizacji ani poprawek bezpieczeństwa, a ich systemy będą podatne na zagrożenia.
  • Brak kompatybilności oprogramowania: Kompatybilność aplikacji i możliwość integracji może być zagrożona, ponieważ oprogramowanie staje się przestarzałe, bez nowych funkcji czy aktualizacji.

Chociaż zmiany te są zgodne z literą licencji GPL, nie są one zgodne z ideą open source. Konkurencja między dostawcami open source nie powinna prowadzić do tego, że firmy te zamykają swój kod i stają się bardziej restrykcyjne w sposobie, w jaki klienci i programiści mogą z niego korzystać. Prowadzi to do uzależnienia się od jednego dostawcy, mniejszej elastyczności i ograniczenia swobody wyboru. Niemniej „koniec życia” systemu to nie koniec drogi.

Co robimy w tej sprawie: SUSE umożliwia wybór

SUSE pozostaje niezłomne w swoim zobowiązaniu do utrzymywania otwartego kodu i wnoszenia wkładu w społeczności, których jest częścią. W ramach oferty SUSE Liberty Linux będziemy utrzymywać i wspierać istniejące systemy CentOS 7 i CentOS 8.5 „takie jakie obecnie są” do 2028 r. – bez konieczności migracji lub innych poważnych zmian. Dysponujemy potrzebnymi narzędziami, usługami, personelem i doświadczeniem. Zapewniamy rozszerzone wsparcie, płynne przejście, kompleksową wiedzę specjalistyczną i obsługę praktycznie wszystkich dystrybucji systemu Linux dla przedsiębiorstw, a także utrzymanie założonego budżetu i uniknięcie wysokich kosztów licencjonowania.

SUSE, poza inwestycjami finansowymi i technicznymi, będzie ściśle współpracować ze społecznością open source, aby zapewnić, że nowy fork będzie trwałą, kompatybilną alternatywą dla użytkowników systemu CentOS.

Obiecujemy – jak zawsze – zachować otwarty kod. Docelowo przekażemy projekt fundacji open source, co dodatkowo zagwarantuje bezpłatny dostęp do alternatywnego kodu źródłowego w perspektywie długoterminowej. Jesteśmy zaangażowani w interoperacyjność, otwarte standardy i wsparcie dla środowisk złożonych z różnych technologii, zapewniając wybór, elastyczność i niezawodność. Nasze zaangażowanie w zapewnienie swobody wyboru dotyczy całej naszej oferty produktów i usług, w tym SUSE Linux Enterprise (SLE), SUSE Manager, NeuVector, Rancher i innych. Na przykład SUSE Manager umożliwia zarządzanie ponad 16 dystrybucjami Linuksa, a nie tylko naszymi produktami – wszystko z poziomu jednej konsoli. Szeroka gama naszych narzędzi i usług w połączeniu z bogatą wiedzą i doświadczeniem pozwala nam uprościć złożoność działań operacyjnych związanych z obsługą heterogenicznych środowisk.

Jakie działania warto podjąć w obliczu zmian w otoczeniu?

CIO i wszyscy inni menedżerowie odpowiedzialni za IT zdają sobie sprawę z konieczności zagwarantowania swojej firmie, że wybrani przez nich dostawcy będą dostarczać swoje technologie w sposób jasny i klarowny. Nadszedł więc odpowiedni czas na ponowną ocenę sytuacji i optymalizację działań w celu zapewnienia elastyczności i swobody wyboru w przyszłości. To czas na:

  • Wybór prawdziwie otwartych narzędzi open source i usług, które są wspierane przez dostawcę zaangażowanego w opracowywanie w pełni otwartego oprogramowania.
  • Współpracę z zaufanymi partnerami i społecznościami open source, które kierują się takimi wartościami jak współpraca i wspólny sukces. Należy upewnić się, że partnerzy ci dysponują odpowiednią kadrą i zakresem usług, by pomóc w realizacji strategii klienta.
  • Nadanie najwyższego priorytetu dla zapewnienia możliwości wyboru, elastyczności, niezawodności i elastyczności, tak aby odzyskać kontrolę nad środowiskami Linux i całą infrastrukturą IT.

Realia środowisk złożonych z różnych technologii i pomoc SUSE w ich obsłudze

To fakt, że większość działów IT w przedsiębiorstwach stawia na środowiska mieszane (heterogeniczne). Ma to po prostu sens biznesowy – a open source jest jednym z kluczowych elementów umożliwiających takie podejście. Środowiska mieszane z założenia promują swobodę wyboru i zapewniają elastyczność organizacji – dwa absolutne wymogi w dzisiejszych dynamicznych środowiskach biznesowych. Poniżej znajduje się podsumowanie kilku ważnych zalet środowisk mieszanych oraz przykłady wspierania ich przez rozwiązania SUSE.

1. Redundancja i niezawodność

Modele mieszane lub hybrydowe pozwalają organizacjom skutecznie rozłożyć ryzyko na wiele środowisk, zapewniając tym samym ciągłość działania w przypadku awarii jednego z systemów. Kontrastuje to z podejściem homogenicznym, które stwarza większe ryzyko, że pojedynczy punkt awarii spowoduje awarię wszystkich systemów.

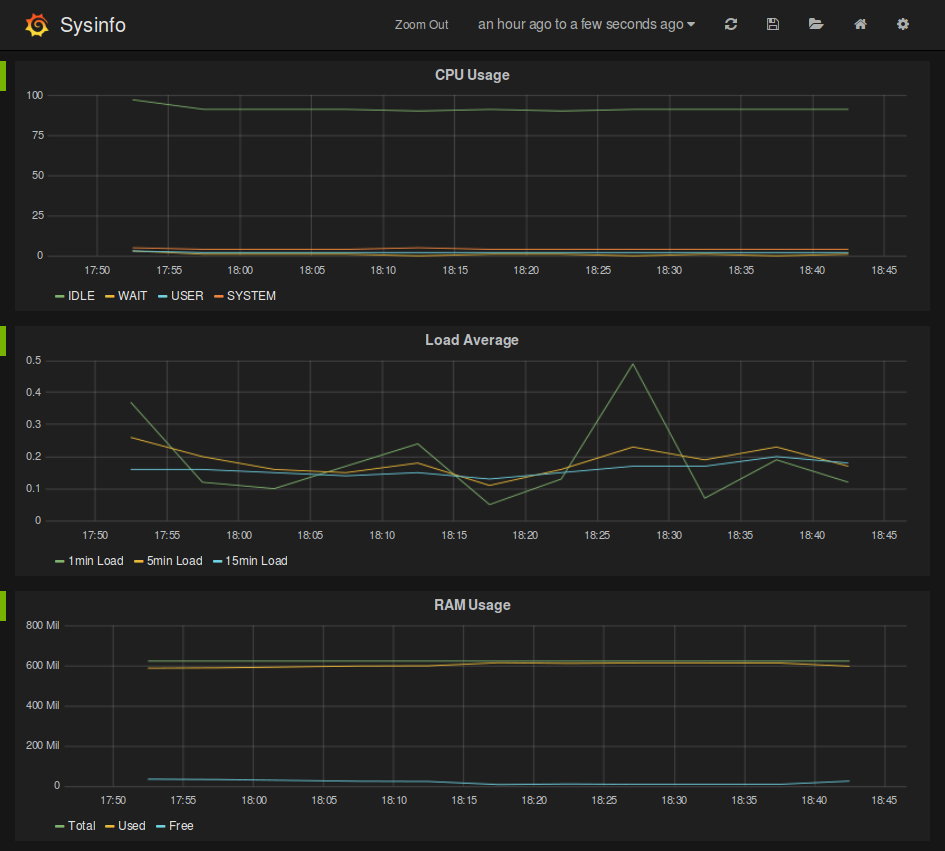
SUSE Manager jest tutaj doskonałym przykładem, ponieważ obsługuje szeroką gamę dystrybucji Linuksa, niezależnie od ich rozmieszczenia. I obsługuje wszystko z poziomu jednej konsoli, dzięki czemu użytkownik ma pełny wgląd w swoje środowisko.

2. Innowacyjność i elastyczność

Korzystanie z różnorodnych środowisk sprzyja zdrowej konkurencji pomiędzy firmami open source i innymi dostawcami, a także przyspiesza tempo opracowywania nowych rozwiązań i ulepszeń. Ma to kluczowe znaczenie dla osób opowiadających w firmie za IT i wybór technologii, ponieważ sami znajdują się pod coraz większą presją szybszego i częstszego dostarczania nowych produktów i usług dla swojej organizacji.

SUSE Linux Enterprise (SLE) jest dobrym przykładem rozwiązania stworzonego z myślą o środowiskach mieszanych. SLE oferuje sprawdzoną, bezpieczną, elastyczną i łatwą w zarządzaniu platformę serwerową i desktopową, która umożliwia zarówno programistom, jak i administratorom uruchamianie zadań w dowolnym miejscu – lokalnie, w chmurze lub na brzegu sieci – odzwierciedlając rzeczywistość, w której dzisiejsze środowiska technologiczne przedsiębiorstw muszą działać wszędzie. Umożliwia to ciągłe wprowadzanie innowacji przy jednoczesnym zachowaniu bezpieczeństwa, odporności i niezawodności.

3. Zapobieganie uzależnieniu od dostawcy

W środowiskach mieszanych liczy się przede wszystkim swoboda wyboru i kontrola. Użytkownik zachowuje krótko- i długoterminową swobodę, a jego zasoby nie są uzależnione od jednego dostawcy. Jeśli któryś dostawca wprowadzi zmiany, które nie są zgodne z wizją klienta, łatwiej i szybciej można się do nich dostosować, ponieważ dostępne są już inne opcje. Takie podejście prowadzi też do optymalizacji kosztów, co jest zaletą środowisk mieszanych.

SUSE Liberty Linux jest tutaj doskonałym przykładem. To solidne rozwiązanie technologiczne i powiązane z nim usługi wsparcia dla całego środowiska Linux, które eliminuje przywiązanie do jednego dostawcy. SUSE Liberty Linux zapewnia pełne wsparcie dla całego środowiska Linux – bez migracji. Co więcej, SUSE oferuje bardzo dobry, długoterminowy serwis i wsparcie w zakresie wszystkich technologii, a także usługi migracji i opcje wsparcia w trybie „białych rękawiczek”, zapewniając specjalistyczną wiedzę i pewny sukces projektów opartych na open source.

Uwaga użytkownicy CentOS: nadszedł czas na działanie

Dla wielu użytkowników systemów CentOS przejście na inną dystrybucję Linuksa nie jest realną opcją – oznacza potencjalne problemy z migracją, przerwy w działaniu, problemy z kompatybilnością oprogramowania i konieczność przeszkolenia personelu z zarządzania nowym środowiskiem. To jeden z głównych powodów, dla których podwajamy nasze długoterminowe zaangażowanie we wspieranie użytkowników systemu CentOS. Przejście na SUSE Liberty Linux nie wymaga migracji.

Zapewniamy narzędzia, usługi i wyszkolony personel, co gwarantuje płynne przejście już teraz. Mamy też zasoby do realizacji na dużą skalę najbardziej ambitnych celów w przyszłości. Rozwiązania SUSE to:

  • Bezpieczeństwo: Dalsze korzystanie z systemów CentOS 7 i 8.5 w obecnej postaci – po zakończeniu okresu eksploatacji (EOL) i bez zapewnionego wsparcia – stwarza poważne ryzyko dla bezpieczeństwa i wyzwania w zakresie zgodności z przepisami. Zobowiązujemy się do zapewnienia pełnego wsparcia dla tych systemów i ich aktualizacji do 2028 roku.
  • Autonomia i zabezpieczenie na przyszłość: Firma SUSE służy pomocą nie tylko teraz. Będziemy do dyspozycji niezależnie od tego, co przyniesie przyszłość. Nasi klienci zachowują kontrolę i elastyczność. Ich systemy Linux są bezpieczne, zaktualizowane i nowatorskie.
  • Kompleksowe wsparcie: Zapewnimy niezrównane usługi wsparcia i obsługę różnorodnych systemów Linux dla firm.
  • Zaangażowanie w open source: SUSE od ponad trzech dekad zajmuje się tworzeniem i wspieraniem rozwiązań open source. Nigdy nie stracimy z oczu naszych korzeni i pozostaniemy w 100% oddani ideom otwartego oprogramowania.

Podsumowanie

W przypadku stosowania systemów Linux do wspierania działalności swojej organizacji, warto polegać na firmie SUSE, która zapewnia doskonałą obsługę klienta i rozwiązuje najtrudniejsze problemy techniczne. Nasze zaangażowanie w oprogramowanie open source i sukces naszych klientów nigdy nie zmalało – i nigdy nie zmaleje! Więcej informacji można znaleźć na stronie o SUSE Liberty Linux:
https://www.suse.com/products/suse-liberty-linux

Premiera Rancher Prime 2.0 oraz społecznościowej edycji Rancher 2.8

Tuesday, 7 November, 2023

SUSE ogłosiła dzisiaj dostępność oprogramowania Rancher Prime 2.0 zwiększającego możliwości klientów w zakresie bezpiecznego i skalowalnego zarządzania heterogenicznymi, wielochmurowymi wdrożeniami Kubernetesa. Zaprezentowała również najnowsze aktualizacje w społecznościowej edycji Ranchera, system SLE Micro 5.5 oraz plany dotyczące przyszłości rozwiązania SUSE Edge.

Rancher Prime 2.0, czyli komercyjne wydanie SUSE dla przedsiębiorstw, jest z założenia interoperacyjne. Teraz zapewnia klientom jeszcze większą wartość i wsparcie. Rozszerzenia interfejsu użytkownika upraszczają operacje i zwiększają produktywność użytkowników poprzez wbudowanie funkcjonalności narzędzi SUSE i innych firm bezpośrednio w interfejs użytkownika Rancher Prime. Nowe UIE obejmują NeuVector – jest teraz ściśle zintegrowany z Rancher Prime, zapewniając klientom płynne zarządzanie kontenerami od operacji, zarządzania po bezpieczeństwo; a także interfejs Cluster API (CAPI), który usprawnia wdrażania klastrów Kubernetesa w środowiskach składających się z wielu chmur jak i w chmurach hybrydowych, zapewniając pojedynczą, znormalizowaną implementację poczynając od brzegu sieci po dowolne inne miejsca.

Wprowadzenie Rancher Prime Application Collection

Kolekcja aplikacji Rancher Prime, dostępna w wersji zapoznawczej, to wyselekcjonowana biblioteka aplikacji deweloperskich i infrastrukturalnych. Aplikacje są stworzone i spakowane za pomocą SUSE Linux Enterprise (SLE) Base Container Images. Dzięki temu klienci mogą szybko i łatwo uruchamiać te aplikacje, mając pewność, że są one wspierane przez zasady zerowego zaufania SUSE i objęte gwarancjami bezpieczeństwa dla całego łańcucha dostaw oprogramowania podczas tworzenia obciążeń i aplikacji.

Asystent klienta Rancher Prime oparty na sztucznej inteligencji

Asystent jest teraz ogólnie dostępny na kanale Slack dla klientów Rancher Prime i poprawia komfort użytkowania, zapewniając wgląd i wskazówki dotyczące niezliczonych tematów, w tym instalacji i konfiguracji, wydajności i rozwiązywania problemów.

Benchmarking i długoterminowe wsparcie serwisowe 

Rozwiązanie SUSE, dostępne wyłącznie dla klientów Rancher Prime, zapewnia teraz udokumentowane testy porównawcze wydajności w oparciu o testy warunków skrajnych w poziomie (liczba klastrów) i pionie (pody i nody), zapewniając klientom wgląd w to, jak zoptymalizować swoje wdrożenia. Aby lepiej dostosować się do cyklu życia aplikacji, klienci mogą teraz korzystać z długoterminowego wsparcia serwisowego (LTSS) dla RKE2 (Rancher Kubernetes Engine v2), które wydłuża cykl życia w środowisku produkcyjnym do dwóch lat.

Dostępność na platformach AWS i Azure Marketplace

Nawiązując do niedawno ogłoszonej dostępności NeuVector na AWS, SUSE ogłosiło, że NeuVector będzie dostępny również na Azure Marketplace, a Rancher będzie dostępny na AWS Marketplace i Azure Marketplace przed końcem roku. Dostępność w Marketplace zapewnia klientom prosty sposób na wdrożenie Ranchera i NeuVectora w środowiskach hiperskalerów, jednocześnie zmniejszając ich zobowiązania dotyczące wydatków na chmurę.

Nowa wersja edycji społecznościowej Ranchera 

Rancher 2.8  jest już ogólnie dostępny z nowymi funkcjami. Rancher 2.8 obsługuje obecnie Kubernetes 1.27, umożliwiając użytkownikom wykorzystanie najnowszych ulepszeń w Kubernetesie, w tym lepsze skalowanie skonteneryzowanych obciążeń, większe bezpieczeństwo, ulepszenia interfejsu uruchomieniowego kontenera (CRI) i rozszerzoną obsługę sieci w klastrach Kubernetes. Z kolei nowy, w pełni udokumentowany publiczny interfejs API umożliwia użytkownikom dostosowanie wdrożenia za pomocą publicznych, niestandardowych definicji zasobów (CRD) w celu dostosowania obciążeń, wydajnego skalowania i usprawnienia procesów automatyzacji w celu spełnienia ich konkretnych potrzeb. Dodana natywna funkcjonalność GitOps Ranchera obsługiwana przez Fleet oferuje teraz wykrywanie driftu i uzgadnianie driftu w ramach procesów ciągłego wdrażania.

Większe bezpieczeństwo kontenerów na brzegu sieci 

SLE Micro 5.5, to ultra-niezawodny, lekki system operacyjny stworzony specjalnie dla skonteneryzowanych i zwirtualizowanych obciążeń. Umożliwia teraz użytkownikom pobieranie obrazów kontenerów i obciążeń z zaufanych rejestrów. Pozwala im również na integrację obrazów i przesyłanie do wykorzystania w środowiskach air-gapped. Dzięki temu można tworzyć procesy, w których bezpośredni dostęp do rejestrów jest niepożądany lub niemożliwy. Integracja kontroli zgodności podczas przesyłania obrazów do środowisk z ochroną air-gapped jest niezbędna do utrzymania bezpieczeństwa i integralności środowisk brzegowych.

SUSE Edge będzie obsługiwać przemysłowe IoT 

W tym tygodniu firma SUSE po raz pierwszy zaprezentowała wstępną wersję platformy SUSE Edge zintegrowaną z rozwiązaniami IoT wykorzystywanymi w przemyśle. Wersja finalna będzie dostępna w 2024 roku. Korzystając z Edge IIoT organizacje mogą płynnie przejść od starszych technologii do korzystania z nowoczesnych obciążeń brzegowych opartych na kontenerach, Kubernetesie i otwartych standardach.

Na początku 2024 r. SUSE rozszerzy swoje partnerstwa w zakresie rozwiązań brzegowych z Buoyant i Synadia.

  • SUSE będzie kontynuować współpracę z Buoyant, twórcami opartej na Rust usługi service mash o nazwie Linkerd, aby wprowadzić do niej możliwości rozbudowy. Pozwoli to użytkownikom na wprowadzanie węzłów i obciążeń innych niż Kubernetes do ich środowiska Kubernetes w sposób bezpieczny i niezawodny, nawet w otwartym Internecie, i ostatecznie pomoże przenieść starsze systemy klientów do nowoczesnego świata.
  • SUSE będzie kontynuować współpracę z Synadia w celu rozszerzenia interoperacyjności NATS.io o stos SUSE Edge, zapewniając skalowalny i wysokowydajny system przesyłania komunikatów w ramach infrastruktury z rozwiązaniami natywnymi dla chmury i środowisk brzegowych (cloud-edge). Współpraca obejmuje zarówno „konfigurację High-Availability z dwoma węzłami” zaprojektowaną dla wdrożeń brzegowych o ograniczonych zasobach, jak i połączenie NATS jako opcji zaplecza dla K3S za pośrednictwem interfejsu KINE.

Więcej informacji o nowościach w Rancher Prime można znaleźć na stronie www.rancher.com