How to Use Terraform to Deploy Secure Infrastructure as Code
How to Ensure that the Infrastructure Remains Secure and Applications Are Secured Before Deployment
In part 1 of this Infrastructure as Code (IaC) topic we introduced the concepts and benefits of IaC. We also discussed the importance of deploying Secure IaC, including a security layer such as NeuVector to protect production container workloads. In this post we’ll go into the details of deploying a Secure Infrastructure and ensuring that security is in place before deploying any application workloads.
Secure Infrastructure As Code
As mentioned in part 1, secure infrastructure as code refers to the ability to deploy new infrastructure that is ‘secure by default.’ This requires that appropriate security configurations in the hosts, orchestration platforms, and other supporting infrastructure be applied during the creation of the infrastructure.
There are two major considerations to review when attempting to deploy Secure Infrastructure as Code;
- What are the security configurations required for the infrastructure being deployed?
- How do we continuously audit these configurations to ensure that they have not been inadvertently changed after initial deployment?
Examples of security configurations and settings to audit include:
- RBAC’s.
- User Privileges, including any root access.
- Network access and restrictions
- Secrets used or embedded
- Services definitions
- Allowed external connections either ingress or egress from the cluster
- Other misconfigurations which could enable man-in-the-middle attacks.
In order to ensure that both considerations are addressed when automating deployments, we’ll use Terraform to deploy secure infrastructure, the NeuVector security layer, and secured application workloads.
Using Terraform to Deploy Secure Infrastructure as Code
First, let’s look at how deploying Infrastructure as Code can play a role in security. In our examples in part 1 we deployed a generic Kubernetes cluster without a lot of customizations. However, there are configurations that can be declared to improve security. These include access controls (RBACs), and network policies.
In the GKE Private Cluster example, we take a few steps toward improving security by not exposing the cluster publicly, deploying a bastion host for access, and configuring a private network. This requires configuring of an SSH tunnel to access the cluster, which can further be secured by a VPN.
By reviewing the example, we can see a few key added steps to secure access to the cluster.
Configure access to the Bastion host:

Create the Proxy in the Bastion host:

Configure the SSH tunnel and proxy in your host:
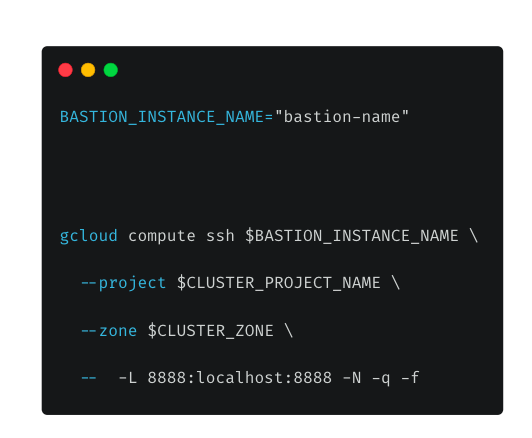
And finally, checking the deployment:
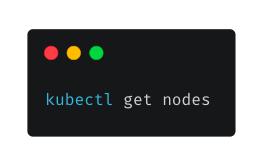
The full step by step instructions can be followed at here.
These are by no means all the only things that should be done to secure a cluster, but a few initial steps as examples of what is possible.
Deploying the NeuVector Container Security Platform As Code Using Terraform
Once the Kubernetes infrastructure is deployed securely, the next challenge is to enforce those security configurations and protect application workloads which run on it. In order to continuously audit security configurations or the hosts, orchestrator, images and containers we’ll deploy a security layer on top of the Kubernetes cluster. This security layer is provided by NeuVector, which also provides run-time security through Security as Code, which we’ll demonstrate later.
There are many tools to automate this deployment and configuration, including Helm Charts, Operators, and Configmaps. These can ensure that a NeuVector security platform is deployed properly and configured to automatically begin auditing and securing the infrastructure. These are compatible with Terraform, and we’ll start with a simple deployment example which is based on the NeuVector Helm chart.
In this simple NeuVector deployment example, the Terraform file uses the Helm chart and exposes certain configuration variables through Terraform. All configuration options supported through the Helm chart can be exposed, although only a few are shown in this example.
Key inputs exposed, to be configured in the terraform.tfvars.tpl file are:
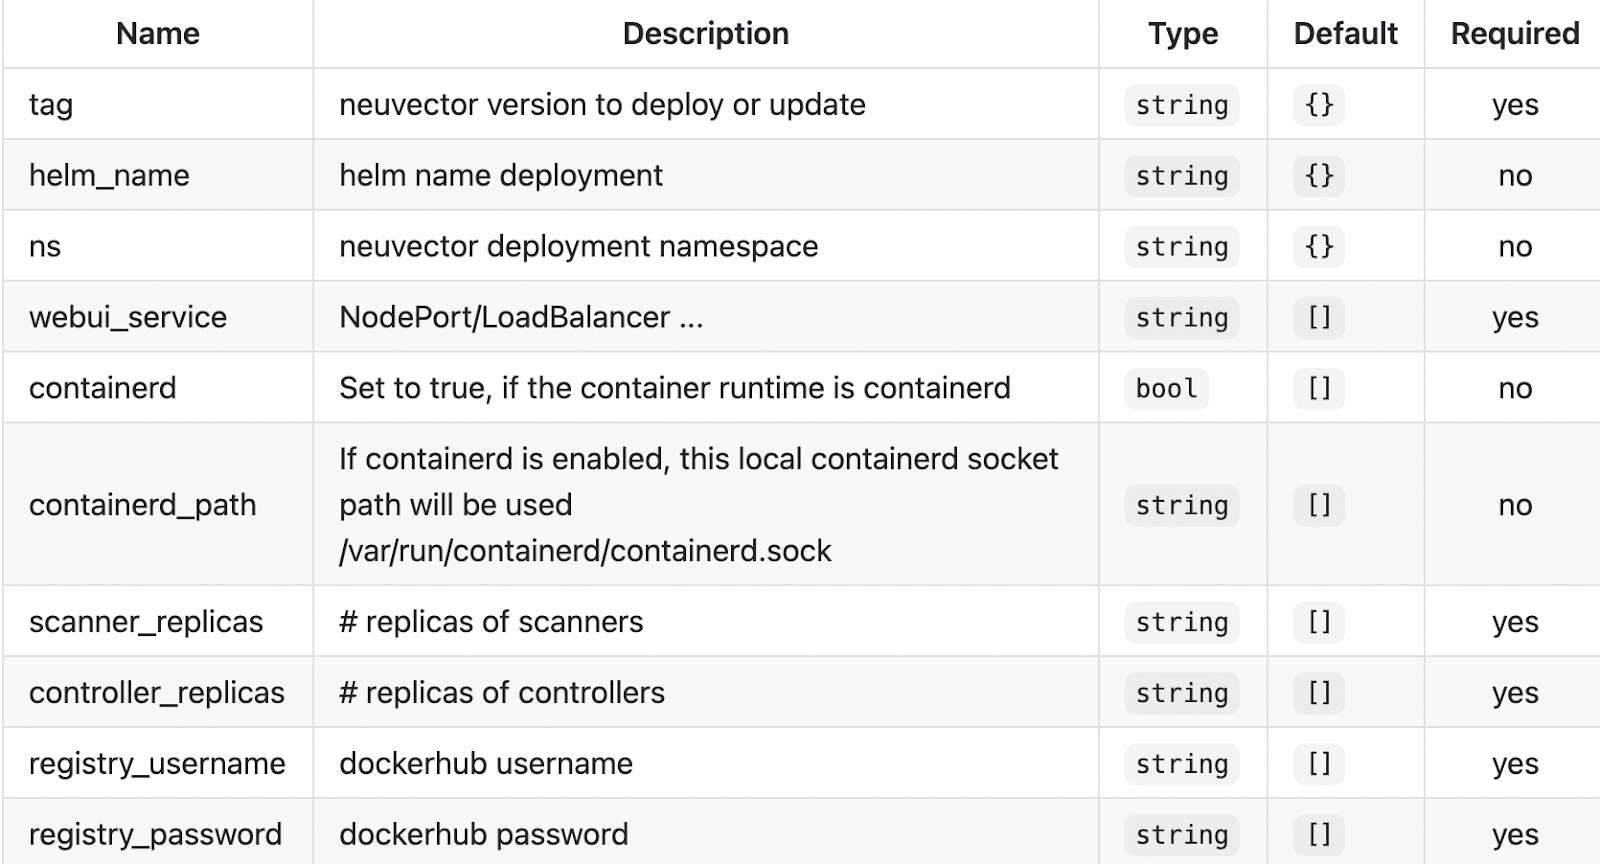
Deployment using modules can be done by creating a module file with the following example settings:
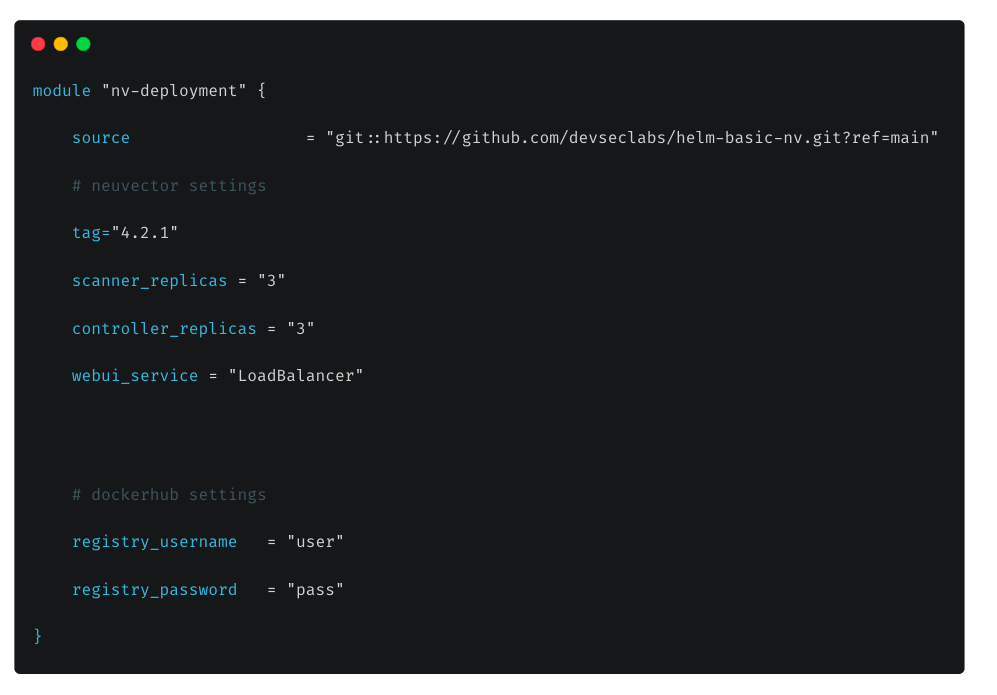
After the ‘terraform init’ and ‘terraform apply’ commands are successfully run and the kube.config context is configured, you can examine the deployment:
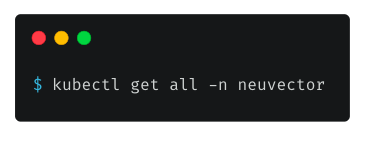
This example successfully deployed the NeuVector containers, required services, and exposed the console through a load balancer. Now the user needs to login, apply a license, and begin configuring NeuVector to protect the cluster. The Kubernetes and Docker CIS benchmarks start to run automatically, auditing the host and orchestrator settings.
But what if more extensive automation is desired, including initial configuration and deployment of applications? Ideally, when automating new cluster deployments, all configuration of software including NeuVector and any applications being deployed should also be automated.
Complete Automation of Security Layer and Secured Application Stack
To show a more complete automation example using Terraform, we’ll use the ‘nv-deployment’ example. In this example we’ll:
- Deploy the NeuVector security platform
- Perform initial configuration of the license and users using a ConfigMap. Note: the default admin password will be changed from admin to ‘nvlabs1’.
- Deploy the sample application security rules using a Custom Resource Definition (CRD) as Security as Code.
- Deploy the sample application stack, and show how the application is protected before deployment.
See the sections below for more detailed descriptions of Security as Code and CRDs.
- First, if you are deploying to the same cluster as in the previous example, be sure to remove that NeuVector deployment for a ‘terraform destroy’ command.
- Clone the project
- Edit the input variables for this deployment in the terraform.tfvars.tpl file:
a. Configure your dockerhub or NeuVector registry credentials to be able to pull the images
b. Configure your k8s context to deploy (default path: ~/.kube/config)
c. Define the NeuVector basic configuration values
i. manager service type (e.g. LoadBalancer)
ii. scanner and controller replicas (usually 2 scanners and 3 controllers)
iii. NeuVector version (e.g. 4.2.2)
d. Add your license key (trial or production license obtained from NeuVector) - Rename the file to terraform.tfvars
- Create your deployment with ‘terraform init’ and ‘terraform apply’
That’s it! In a few minutes NeuVector and the sample application stack will be deployed and configured. You can check your deployment with:
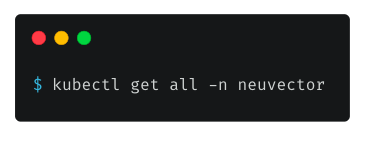
And log into the public IP exposed by the NeuVector webui service in order to view the console (e.g. https://<public IP>:8443). Note: the default admin login password has been changed to ‘nvlabs1’. There is also a read only user created as part of the deployment.
Next, check on the application stack deployment;
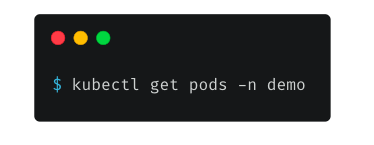
And you can also see these containers running the NeuVector console in the Network Activity or Assets views. To see how these applications were already secured as part of the deployment, go to Policy -> Groups and review the nginx, node, and redis groups to see the CRD network and process rules deployed. This is an example of Security as Code, which we’ll describe next.
What is Security As Code?
Security as Code refers to the ability to define security policies in a cloud-native way to ensure that all application workloads deployed on a Secure Infrastructure have workload security protections in place before they are deployed into production.
The importance of integrating Security As Code into your pipeline is:
- It enables pipeline automation for rapid application deployment and reduces or eliminates manual security configurations for new or updated applications.
- It enables DevOps and security teams to ‘declare’ security policy in the form of allowed behaviors (or allow lists) for all containers to be deployed in production, BEFORE they are deployed. This way, applications are already protected when they are deployed.
- It supports the creation and enforcement of global security policies to be applied across clusters.
Securing Container Workloads – Run-Time Security
There are two primary mechanisms which can be used to automatically secure container workloads to protect applications and the infrastructure on which they run. These are Admission Controls and Custom Resource Definitions (CRDs).
Using Admission Controls to Enforce Secure Image Deployments
The use of admission controls, combined with automated image scanning, can make sure that only images without compliance and security violations can be deployed into a production environment. This ensures that the infrastructure is secure for container exploits which could break out and affect the host or orchestration platform.
For example, in NeuVector, admission control rules can use multiple criteria to allow or block deployments.
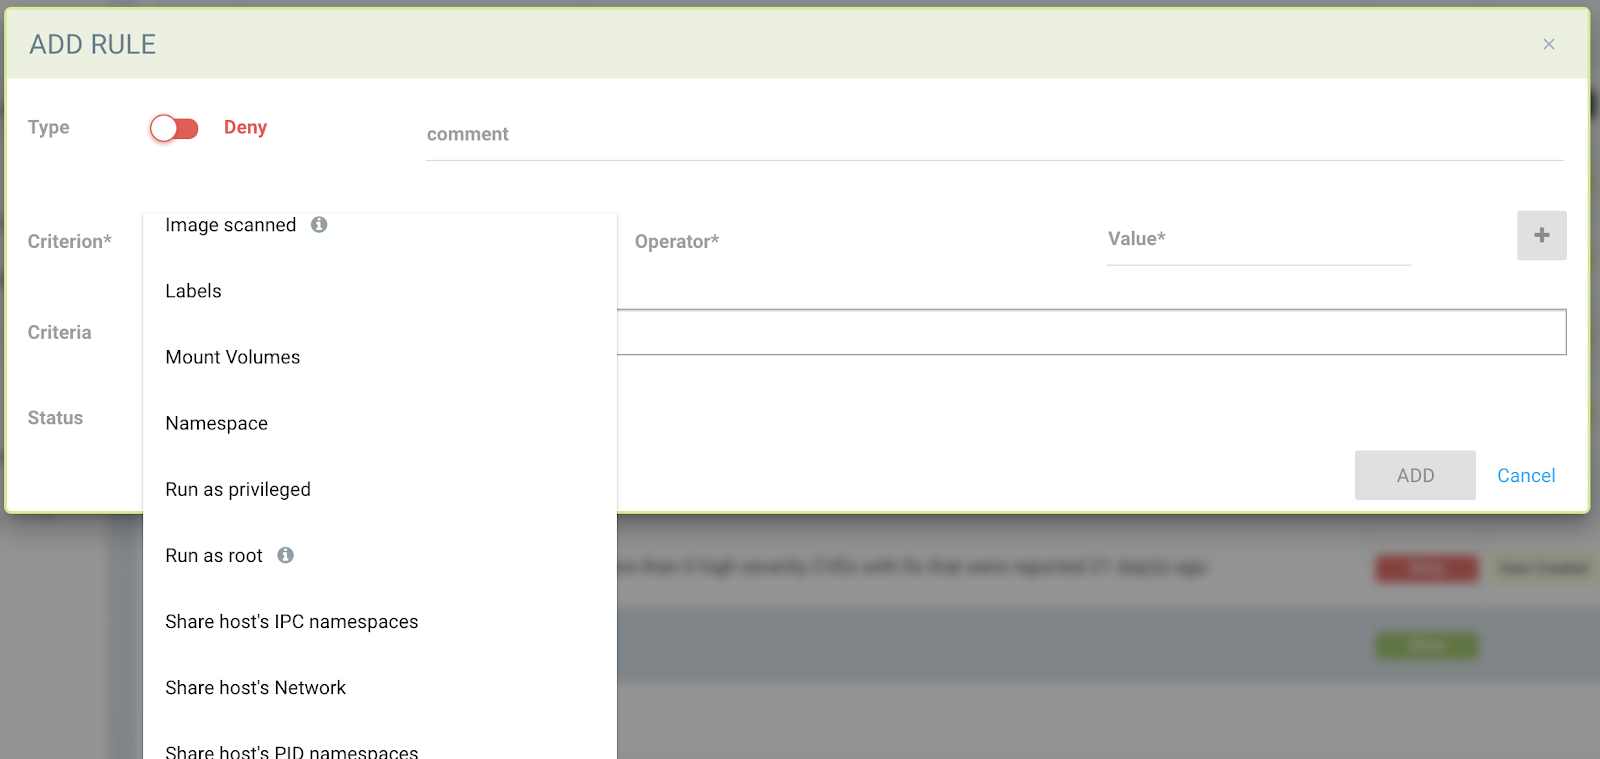
In addition to using vulnerability and compliance scan results, rules can include restricting containers from using the host resources such as network, IPC/PID namespaces or certain volumes, as shown above.
Using CRDs to Protect Application Workloads During Run-Time
The NeuVector CRD will enable creation of NeuVector security rules with Kubernetes-native yaml files. These rules can capture and enforce allowed application behavior, such as:
- Network connections. These include any connections in or out of the container and can be Layer 7 rules based on application protocols or layer 3/4 based on IP address and/or port. These rules can enforce east-west application segmentation as well as ingress and egress rules.
- Container processes. Processes which are expected to be started by the application container are whitelisted so unauthorized processes can be detected.
- Container file activity. Allowed file and/or directories can be defined together with specific applications which are whitelisted to access or modify those file/directories.
In the example snippet below, the nginx-pod containers in the demo namespace are allowed to connect to the node-pod containers also in the demo space, using only the protocol HTTP. The complete CRD yaml used in the ‘nv-deployment’ example above can be found here.
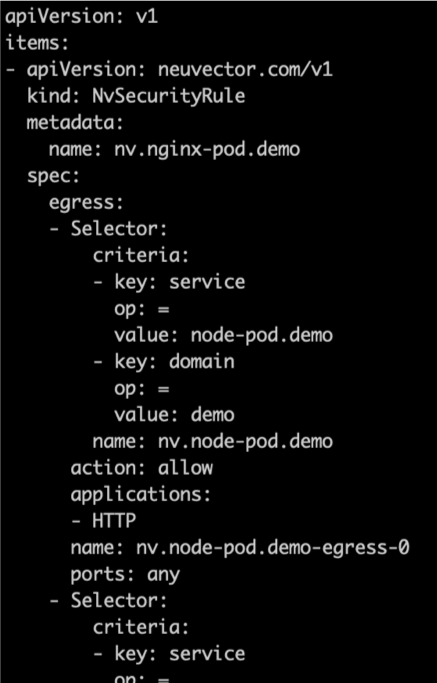
While the above rules declared in the yaml file could have been manually created through the console in NeuVector, it is more efficient and secure to manage these as security as code.
However, to alleviate developers from having to learn a new security code format and develop these from scratch, NeuVector provides a behavioral learning tool to automatically create these rules by observing the network, process, and file activity of an application in a test environment. The CRD can then be exported for review and edits by the developers and DevOps teams, then check-in, tested, and pushed into the production environment.
CRDs can be used for more than application workload security. They can be used to apply global security policies across clusters. For example, the security as code CRD file could block scp and ssh processes from running in any container, or containers in a protected namespace. It could also be used to allow egress connections, requiring an SSL connection to an api service, only for workloads that have been labeled as ‘external=api-access’ during deployment.
How to Manage All This Security Code?
As this guide has documented, there are many aspects of code which relate to security, from Terraform files to configmaps and CRDs. All of this code should be managed using the same tools and procedures for developing, checking in, testing and deploying applications that enterprises use today, following a gitops philosophy and workflow.
Modern cloud infrastructures and applications enable the desired state of the infrastructure and applications to be declared by code, and any changes should be properly documented, tested, and versioned.
If we look at the NeuVector CRDs which are used to declare run-time security rules to protect workloads and infrastrastructure in production, we can see that issues of priority, precedence, and access controls must be considered. Although rules can and should be allowed to be managed through various methods such as a browser console, REST API, CLI, and CRD, once a method such as CRD is used, it needs to become the single source of security policy ‘truth’ for that application or cluster. This is to avoid the chance that an admin logs into the console and changes the declared security state, thus causing the CRD code to become out-of-sync with the current deployed state. Likewise, CRD deployed rules should take precedence over local admin created rules to avoid situations where, for example, a network rule added by the admin could take precedence over a CRD rule, thus nullifying the desired firewall behavior.
Looking Forward – Open Policy Agent (OPA) for Managing Security Policies
OPA is a general-purpose policy engine which can be used to inspect, query, manage and enforce security policies. Policies are written in a declarative language called Rego that offers rich constructs to translate human-readable rules into unambiguous programs. The typical workflow is,
- The application sends the policy request to the OPA engine;
- The OPA engine then evaluates whether the request conforms to the defined policy;
- The application enforces the policy decision after the evaluation result is received.
Because of its declarative nature, OPA is a powerful tool that helps automate policy decision-making and enforcement of workflows in modern applications. As a general-purpose engine, OPA can be integrated into many applications. The most prominent examples include the gatekeeper project, which integrates with the Kubernetes Admission Control function; and Styra’s DAS project that provides authorization policy for microservices.
OPA can be used to manage code in the form of CRDs and Terraform files to enable enterprise wide visibility and enforcement of security policies. For more information, see this post on OPA by NeuVector co-founder Gary Duan.
Related Articles
Oct 28th, 2022
Replace PSP with Kubewarden policy
Feb 01st, 2023
Container Security: Network Visibility
Feb 01st, 2023